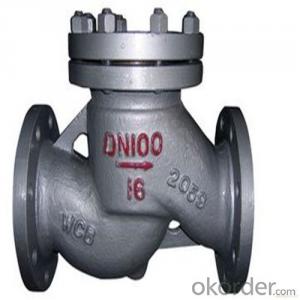
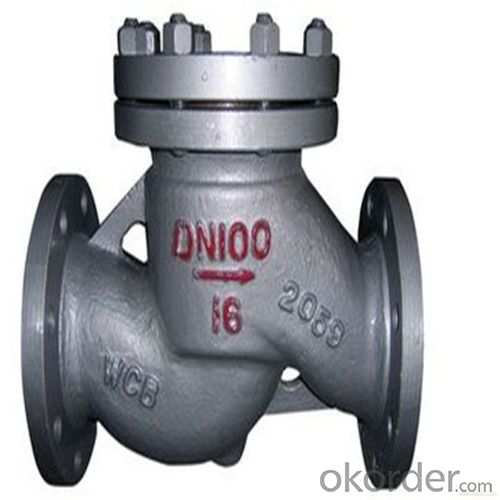
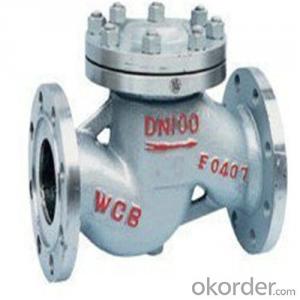
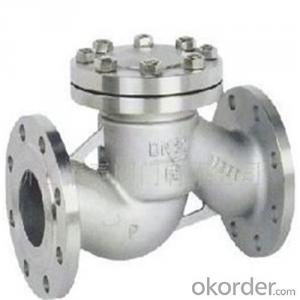
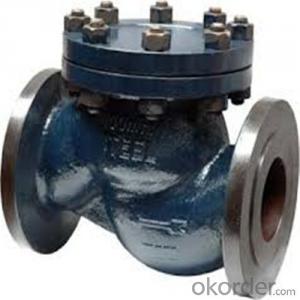
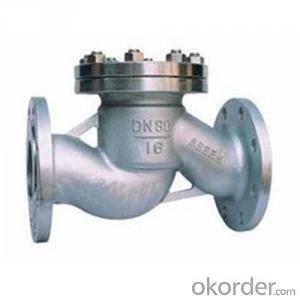
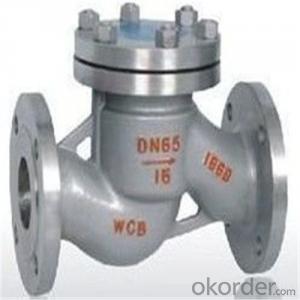
API Cast Steel Lift Check Valve Size 200 mm
- Ref Price:
-

- Loading Port:
- Shanghai
- Payment Terms:
- TT OR LC
- Min Order Qty:
- 10 pc
- Supply Capability:
- 100 pc/month
OKorder Service Pledge
OKorder Financial Service
You Might Also Like
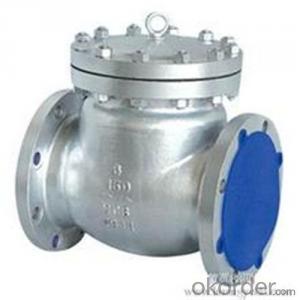
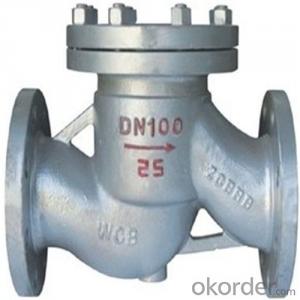


API Cast Steel Lift Check Valve 150 Class
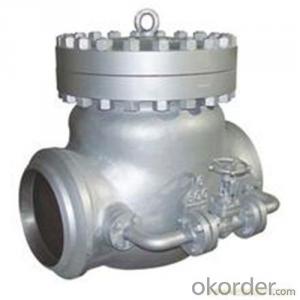
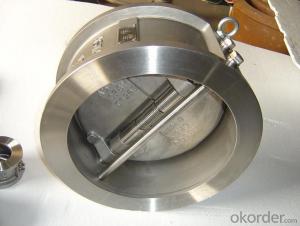
The features of Cast Steel Lift Check Valve
Bolted Bonnet;Swing and lift disc;Metallic seating surfaces.
Body and Bonnet Connection of Cast Steel Lift Check Valve:
The body and bonnet of Class150~Class900 check valves are usually with studs and nuts.And the body and bonnet of Class1500~Class2500 check valves are usually of pressurized seal design.
Body-To-Bonnet Joint of Cast Steel Lift Check Valve:
Stainless steel + flesible graphite wounded gasket is used for Class 150 and Class 300 check valve;Stainless steel + flexible graphite wounded gasket is used for Class 600 check valve,and joint gasket is also optional for Class 600 check valve;Ring joint gasket is used for Class900 check valve;Pressurized seal design is used for Class 1500~Class 2500 check valves.
Seat of Cast Steel Lift Check Valve:
For carbon steel check valve,the seat is usually forged steel.The sealing surface of the seat is spray welded with hard alloy specified by the customer.Renewable threaded seat is used for NPS<10 check="" valves="" and="" welded="" on="" seat="" can="" be="" also="" optional="" if="" being="" requested="" by="" the="" customer.welded="" is="" used="" for="" nps="">12 crbon steel gate valves .Forstainless steel check valve,integral seat is usually adopted ,or to weld hard alloy directly integrally.Threaded or welded on seat is also optional for stainless steel check valve if being requested by the customer.
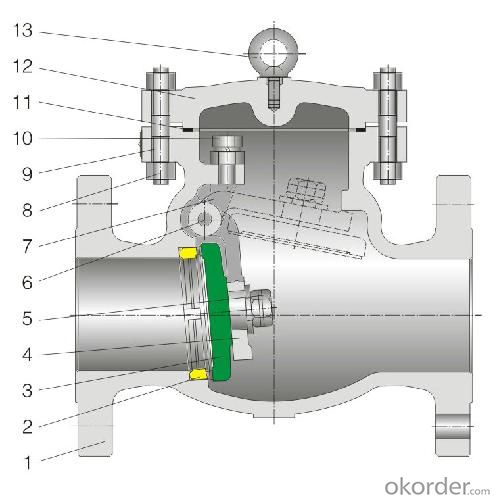
Parameter of Cast Steel Check Valve:
Standard Criteria | ASME/ANSI/API customize |
Pressure Rating | 150 Class 300 Class 600 Class 900 Class 1500 Class 2500 Class customize |
Valve Size | 50 mm 65 mm 80 mm 100 mm 125 mm 150 mm 200 mm 250 mm 300 mm 350 mm 400 mm 450 mm 500 mm 600 mm 650 mm 700 mm 750 mm |
2 inch 2.5 inch 3 inch 4 inch 5 inch 6 inch 8 inch 10 inch 12 inch 14 inch 16 inch 18 inch 20 inch 24 inch 26 inch 28 inch 30 inch customize | |
Actuator | Automatic customize |
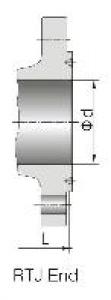
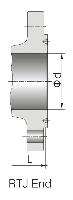
Connection | Butt Welding Flange RF Flange RTJ customize |
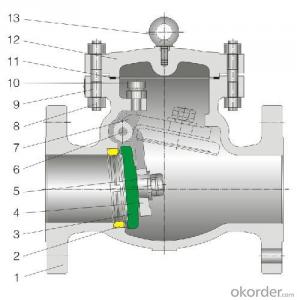
1-Body Material | A216 WCB A351-CF8 A351-CF8M customize |
2-Seat ring | A351-CF8 A351-CF8M A105+13Cr Tool Steel+A105 customize |
3-Disc | Tool Steel+A216 WCB A351-CF8M A351-CF8 A216 WCB+13Cr customize |
4-Arm | A351-CF8 A216 WCB A351-CF8M customize |
5-Nut | A194 8M A194-8 A194 2H customize |
6-Arm pin | A182-F6a A182-F316 A182-F304 customize |
7-Yoke | A351-CF8 A351-CF8M A216 WCB customize |
8-Bonnet nut | A194 8M A194-8 A194 2H customize |
9-Bonnet bolt | A193-B8 A193-B8M A193-B7 customize |
10-Bolt | A193-B7 A193-B8 A193-B8M customize |
11-Gasket | graphite+304 graphite+316 customize |
12-Bonnet | A216 WCB A351-CF8M A351-CF8 customize |
13-Eye bolt | A181 customize |
Design Standard | API 6D BS 1868 customize |
Connection Standard | API 605 ASME B 16.25-2007 ASME B 16.47A ASME B 16.47B ASME B 16.5 MSS SP-44 customize |
Test Standard | API 598 API 6D customize |
Face to Face | ASME B 16.10 customize |
Pressure-temperature ratings | ASME B 16.34-2004 customize |
Wall thickness dimension | API 600 BS 1868 |
FAQ of Cast Steel Check Valve:
Q1:I can’t find the type of steel check valve which I need. what can I do?
The chart above only lists out some common composition of steel check valve parts.We may provide other different parts material composition according to the customer's request or the actual valve working condition.
Q2:Which certification do your products pass?
Our products are in accordance with ISO 9001、ISO 14001、API 6A、API 6D、TS CE、API607/6FA/BS6755.
- Q: I got an engine knock and backifiring and no power not even to move the car just a few feet. I figured its the vales that are eather broken or burned out. I just started to take my top end apart to check and change borken or damaged valves so i can drive the car once again. My question is, when i take the valve cover off i can see what looks like the valves and the springs and something in the middle of the springs, now what iam i gona be looking at for a broken/damaged valve since i dont see any obvious damages but i could be wrong.
- you need to pull the head(s) off to see the valve. all you are seeing is the valve stem wich is not going to help you determine much. remove the intake manifold and then the head(s) the underside of the head (combustion chamber) is where you will be able to visualy inspect the valves. more likely you have weak or broken springs, lifters arent pumping up or your cam is going flat. as for the knock sound, that is a whole other thing to diagnose.
- Q: I have a stainless valve I want to install in a copper domestic water line. My concern is: are the two metals compatible? Are stainless steel and galvanized steel compatible?
- How would you plan on connecting them? SS will reject solder and a welding torch will likely melt the copper. Maybe via a PVC piece as an intermediary? If the valve is threaded can you solder a threaded adapter on the copper pipe and use Teflon tape on the threads?
- Q: IT USUALLY TAKES 2 SECONDS TO START THE MOTOR. NOW, IT TAKES OVER 40 SECONDS AT 7 AM. IT ALMOST KILL THE BATTERY. IF YOU PARK FOR 1 HOUR, 2ND START TAKES 10 SECONDS. IS THIS HAPPENING BECAUSE THE VALVES NEEDS ADJUSTING? HOW AND WHAT IS THE EASY WAY OF VALVES TUNE-UP?
- Good call, it most likely is the valve clearance. As the valves wear, they get tighter until they actually stay open a bit (when cold). As the engine warms up, the aluminum head pushes the cam away from the valve stems a bit, and some clearance comes back. Check 'em, adjust 'em, and you should be good to go. For most chinese 150's, you'll need to remove the plastic around the engine, then pull off the valve cover - you'll see the rocker arms inside, with locking nuts and adjustment screws. Set the crank at TDC on the compression stroke (about 1/2 turn after the intake valve closes) and then adjust the clearance - get specs from your manual, or just make sure that there's at least 0.1 mm gap if you don't have the specs.
- Q: ok im buying a kx 125 from 96 and he said the only problem with the bike is that it has a small oil leak around the power valve too me it sounds like a gasket. but i want someone elses opinion on what else it could be.
- The kx125 actually has 3 valves in the exhaust, a main, a left-hand one and a right-hand one. Each is fitted with o-rings which require disassembly in order to be reached. This would also be a good time to clean the power valves since they tend to become encrusted with carbon deposits which interfere with their normal operation.
- Q: How do I adjust valves on a CAT C15 On-highway diesel engine?specifics:435-550 hp 2100 rpm1550-1850 lb-ft 1200 rpm Peak Torqu
- You have to remove VVA. Its a general tune-up #1cyl at TDC adjust: Intake valve: 1, 2, 4 Exhaust valve: 1, 3, 5 Injectors: 6, 3, 5 #6cyl at TDC adjust: Intake valve: 6, 3, 5 Exhaust valve: 6, 2, 4 Injectors: 1, 2, 4 You gotta use a feeler gauge for the valves and a pin tool (looks like an alen wrench)...(I don't remember the specs, so you'll have to fine those yourself) For injectors your need a special tool (timing pin) to adjust the height (there is also a spec for that) You'll need a pin tool for the valves and injectors plus wrenches to tighten the nut after the adjustment. Valves: loosen up the nut, put the feeler gauge between the rocker arm and the valve, turn the alen wrench till the rocker arm reaches the feeler gauge...make sure the feeler gauge is kinda loose between them but tight...then tighten the nut (there is a torque spec) Injectors: loosen up the nut, set the timing pin on top of the injector, turn the ajustment screw w/ alen wrench till timing pin reaches a lil notch, then tighten the nut till it's tight (also need a torque spec) Afterwards you'll need to adjust VVA... I'm giving you somewhat of a general idea. If you are attempting to do this, you should get a manual.
- Q: Would it be cheaper to get a toyota Valve body U140/240 repaired or would it be easier to swap it out... by the way the transmission valve body would cost $780
- LOL okorder DETROIT MICHIGAN! $780, my SORE LEFT FOOT!
- Q: here are pix's i want to no, if there is a easy fix or does it have 2 b machined thanksi think it use to have a bent valve in it
- Your pics are too small and not clear enough for me to give you a 100% sure answer. My thought on this though is try to power lap the valves and see if that takes pitting out.. If not then you need a valve job. Lapping the valves won't put you out much. The lapping compond is pretty cheap. $5 or less for a tube of it, sold aty all parts stores. The common lapping is done with a lapping stick turning it by hand.. I recommed power lapping.. Get a lenght of 11/32 rubber hose, Put lapping compound on valve seat and valve face, put valve in head.. Put rubber hose on the valve stem, then chuck the other end of rubber hose into a hand held drill. I use a 1/2 chuck high torque drill for this. Now lightly push agaist the bottom of valve, will you trigger the drill and turn the valve around and around.. For yours do about 1-1.5 min, stop, push valve out some and look at seat, add more lapping compund if needed, then do it again This will machine the seat some.. It may be enough to clen up the pitting
- Q: Help! I've got this leaky CPVC valve in a new plumbing setup for a water heater. It only drips when open. :( It's going to be a real pain to replace it. Is there any way to tighten this thing up? It looks like there is a plastic pop off panel on the knob for the valve but I'm not sure. Thanks for any help!
- Turn off the main water to your house. Turn that valve to open. Then tighen the nut on it (slightly), see if the valve will close , if yes; then tighten it a little more, then see if the valve will close. If yes - that should do it. If the nut is so tight that the valve will not close, then loosen the nut just a tad. That should do it, ......... now, turn the valve off. Turn back on the main water to your house -- and see if that works.
- Q: I'm taking a pipe fitting class and I can not find witch valve had the most restriction.
- A globe valve has a lot of resistance (restriction) even when it is open A metering valve has adjustable restriction but i am thinking that that is not what you are asking.... A gate valve or ball valve has less resistance (a ball valve has almost none).
- Q: My check engine light is on in my 1999 Toyota Camry XLE...I went to autozone and they told me it was my egr valve BUT they did not tell me if it need to be cleaned or replaced. How can I tell if it needs to be cleaned or replaced
- Flag is right. You should of got the code from AutoZone and posted it here. A trouble code can have several meanings and the salesperson just gave you his best interpretation with his limited knowledge. You either had a P0420, P1410, P1411, P1661 or P1662 code. More than likely it's EGR Valve Position sensor or EGR Vacuum Solenoid depending on the code. It also can be the wires or connectors that plug into them or one of the vacuum hoses to them. About a $40-$70 fix if you do it yourself. You can pull the EGR valve off to inspect it but you need to replace the $1 gasket under it when you are done. On old poorly maintained engines they can clog up with carbon deposits or the vacuum diaphragm can rupture. You can apply vacuum to the valve manually and see if it opens while you have it off. If you have good lungs you can do it with a piece of hose. :) If it works then it's not getting vacuum and most likely it's the EGR Vacuum Solenoid that opens and supplies vacuum to it. The EGR Valve Position Sensor tells the Vacuum Solenoid to open via the ECM. See if you can't get the code and post it.
Send your message to us
API Cast Steel Lift Check Valve Size 200 mm
- Ref Price:
-
- Loading Port:
- Shanghai
- Payment Terms:
- TT OR LC
- Min Order Qty:
- 10 pc
- Supply Capability:
- 100 pc/month
OKorder Service Pledge
OKorder Financial Service
Similar products
Hot products
Hot Searches
Related keywords

