

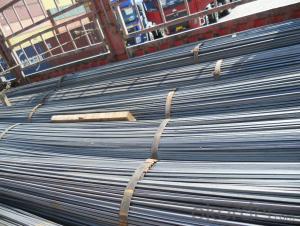
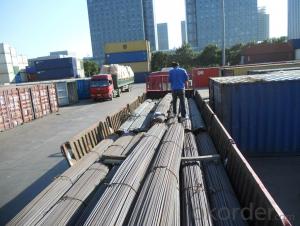
Hot rolled steel bar
- Ref Price:
-

- Loading Port:
- China Main Port
- Payment Terms:
- TT OR LC
- Min Order Qty:
- -
- Supply Capability:
- -
OKorder Service Pledge
Quality Product, Order Online Tracking, Timely Delivery
OKorder Financial Service
Credit Rating, Credit Services, Credit Purchasing
You Might Also Like


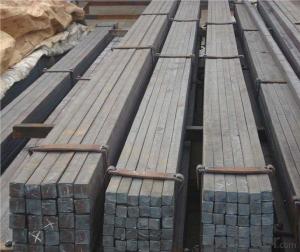


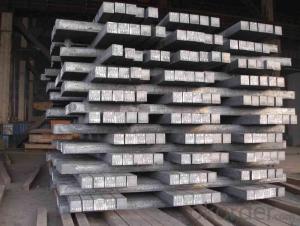
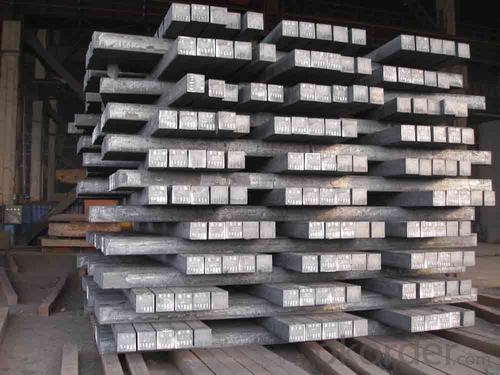
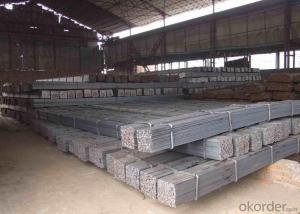
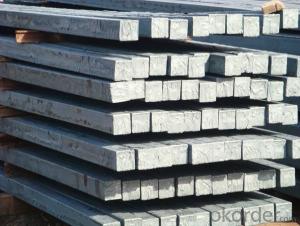
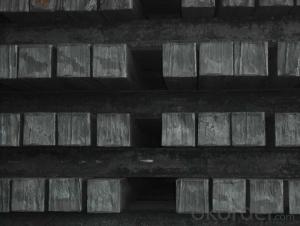
Product Description
The Detail of Product
| Name: | steel billets |
| LENGTH: | 6 meter to 12 meter (+ 50mm) |
| Size: | 100*100, 120*120, 150*150, 200*200 |
| Grade: | 3SP,5SP,Q235,20MnSi. |
| Shape: | Square, Round |
| Technique: | Hot-Rolled |
| Standard: | ASTM/GB |
| BENDING | No more than 5mm in 1 meter No more than 30mm in 6 meter No more than 60mm in 12 meter |
| ANGULAR TWIST | No more than 1 degree per meter and not more than 6 degree over 12 meter length. |
| Chemical composition | C, Si, Mn, P, S, N, etc |
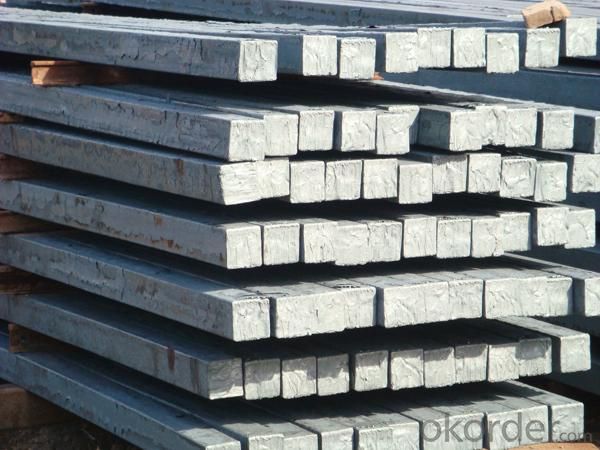
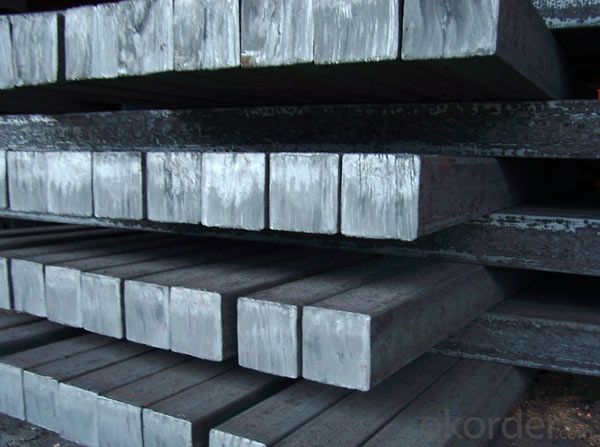
Chemical Properties
| Size | 60*60/90*90/100*100/120*120/150*150 |
| Length | 6000mm-12000mm |
| Standard | GB |
| Applicaton | To produce bars or other applications |
| Grade | Q195/Q235/Q275/3SP/5SP/20MnSi |
| Packing terms | TT/LC |
| Package | Mill's standard packing or as client's requirment |
| Delivery time | Within 10-30 days after receiving the deposit or LC |
Chemical Comosition
| Standard | C(%) | Mn(%) | S(%) | P(%) | Si(%) |
| Q195 | ≤0.12 | ≤0.50 | ≤0.040 | ≤0.035 | ≤0.30 |
| Q235 | ≤0.20 | ≤1.40 | ≤0.045 | ≤0.045 | ≤0.35 |
| Q275 | ≤0.22 | ≤1.50 | ≤0.045 | ≤0.045 | ≤0.35 |
| 20MnSi | 0.17-0.25 | 1.2-1.6 | ≤ 0.050 | ≤ 0.050 | 0.40-0.80 |
| 3SP | 0.14-0.22 | 0.40-0.85 | ≤ 0.050 | ≤ 0.040 | 0.05-0.15 |
| 5SP | 0.28-0.37 | 0.50-1.00 | ≤ 0.050 | ≤ 0.040 | 0.15-0.30 |
- Q: How do you use a steel square to determine angles for baseboards?
- To use a steel square to determine angles for baseboards, first, place the square against the corner where the baseboard will be installed. Then, adjust the square until one of its edges aligns with the wall and the other edge touches the baseboard. Next, read the angle measurement indicated on the square where the baseboard edge meets the square's markings. This measurement can be used as a guide to cut the baseboard accurately at the desired angle.
- Q: How do you check the accuracy of a steel square?
- In order to verify the accuracy of a steel square, the following steps can be taken: 1. Begin by visually inspecting the square for any noticeable defects or signs of damage. Look for visible bends, warps, or dents that could impact its accuracy. 2. Identify the reference edge of the square, which is the long edge used as a reference for measuring and marking right angles. Make sure this edge is straight and free from any irregularities. 3. To test squareness, place the square against a flat surface like a table or wall. Align the reference edge along the surface, ensuring it is flush. Then, use a spirit level or try square to check if the other edge of the square is perpendicular to the reference edge. If it is not perfectly square, the square may be inaccurate. 4. Verify the measuring accuracy of the square by using a tape measure or ruler to measure the length of both arms. Ensure that both arms are of equal length and match the stated dimensions of the square. Any significant discrepancies indicate inaccuracy. 5. Another method to check accuracy is by using the square against a known straight edge. Place the square against the edge, aligning the reference edge with the straight edge. Then, mark a line with the square and flip it over, aligning the same reference edge with the straight edge once again. If the marked lines do not align perfectly, the square may not be accurate. 6. If there are any suspicions of inaccuracies after the initial tests, repeat the above steps multiple times to ensure consistent results. It is also advisable to test the square at various points along its length to identify any irregularities. 7. If any inaccuracies are discovered, it may be possible to adjust and calibrate the square depending on its design and adjustability features. Consult the manufacturer's instructions or seek professional assistance if needed. By following these steps, the accuracy of a steel square can be effectively checked, ensuring reliable measurements and right angles for woodworking or metalworking projects.
- Q: How do you use a steel square to measure and mark beveled angles?
- To use a steel square to measure and mark beveled angles, you need to follow a few simple steps. First, make sure your steel square is clean and free of any debris or rust. This will ensure accurate measurements and markings. Next, identify the angle you want to measure and mark. Let's say you want to mark a 45-degree beveled angle. Place the long edge of the steel square against the edge of the material you want to mark. In this case, it would be the edge where you want the beveled angle to start. Now, rotate the steel square until the 45-degree line aligns with the edge of the material. You can find the 45-degree line on the inside of the square, usually marked with a number or a symbol. Once the 45-degree line is aligned, hold the steel square firmly against the material and use a pencil or a scribe to mark the line along the other edge of the square. You have now successfully measured and marked a 45-degree beveled angle using a steel square. Remember, the process may vary depending on the angle you want to measure and mark. Some steel squares may have additional lines or markings to help you with specific angles. It's always a good idea to refer to the manufacturer's instructions or guides if you're unsure about a particular angle.
- Q: What are the common uses of a steel square in welding?
- A steel square, also known as a framing square or carpenter's square, is a versatile tool commonly used in welding for various purposes. Here are a few common uses of a steel square in welding: 1. Measuring and Marking: A steel square is often used to measure and mark straight lines, angles, and dimensions on metal surfaces. It helps in ensuring accurate measurements and precise cuts, ensuring the welding process is executed correctly. 2. Checking for Squareness: Welding involves joining multiple metal pieces together at right angles. A steel square is used to check the squareness and ensure that the joints are properly aligned before welding. This helps in achieving strong and structurally sound welds. 3. Setting Up Right Angles: Welding often requires creating right angles between metal pieces. A steel square is used to accurately set up right angles during the fabrication process. It acts as a guide to ensure the proper alignment of the metal pieces before welding. 4. Aligning and Clamping: A steel square can be used as a guide to align and clamp metal pieces together during the welding process. It helps to hold the workpieces in the desired position, ensuring they stay in place while the welds are being made. This ensures accuracy and prevents distortion or misalignment during the welding process. 5. Checking for Flatness: Before welding, it is essential to ensure that the metal surfaces are flat and even. A steel square can be used to check for flatness by placing it against the metal surface and observing if any gaps or unevenness are present. This helps in identifying any imperfections that need to be addressed before welding. Overall, a steel square is a handy tool in welding that provides accuracy, precision, and alignment. It assists in measuring, marking, aligning, and checking for squareness and flatness, contributing to the successful execution of welding projects.
- Q: How do you use a steel square to measure and mark 168.75-degree angles?
- To measure and mark a 168.75-degree angle using a steel square, the following steps should be followed: 1. Begin by placing the steel square on a flat surface or workbench, making sure it is aligned and parallel to the edge being worked with. 2. Locate the 90-degree angle on the steel square, typically found at the corner where the long and short sides meet. 3. Utilize a pencil or scribe to create a small mark near the 90-degree angle on the long side of the steel square. This mark will serve as a reference point. 4. Proceed to measure 168.75 degrees on the long side of the steel square, starting from the reference mark made in the previous step. The angle can be accurately measured using the graduations or markings on the steel square. 5. Once the correct measurement is identified, make another mark on the long side of the steel square at the measured angle. This mark will represent the desired 168.75-degree angle. 6. Now, position the steel square on the surface or material where the angle needs to be marked. Align the long side of the square with the edge being worked with, ensuring that the reference mark and the mark representing the angle are in line with the edge. 7. With the steel square securely in place, use a pencil or scribe to trace along the edge of the steel square, transferring the angle onto the surface or material. By adhering to these instructions, a 168.75-degree angle can be accurately measured and marked using a steel square. Remember to maintain measurement accuracy and a steady hand when making the marks to achieve precise results.
- Q: What are some common mistakes to avoid when using a steel square for layout work?
- Some common mistakes to avoid when using a steel square for layout work include not ensuring the square is square before beginning the layout, not properly aligning the square with the workpiece, not double-checking measurements and angles, not securely holding the square in place, and not using a scribe or pencil to mark the layout lines accurately.
- Q: What are the common applications of a steel square in masonry work?
- A versatile tool commonly used in masonry work is the steel square, also known as a framing square or carpenter's square. It has various functions, such as measuring, marking, and cutting materials. When it comes to masonry work, one of the primary uses for a steel square is laying out and verifying right angles. Masons rely on the square to ensure that corners are perfectly square, which is crucial for achieving proper alignment and stability in masonry structures. By placing the square against the corner of a wall or foundation, they can determine if it forms a 90-degree angle. If adjustments are necessary, they can be made to ensure the accuracy of the construction. Another common application of the steel square in masonry work is precise measurements. The tool has markings along its blade and tongue, allowing masons to accurately measure various dimensions. They can use it to measure the length and width of bricks or blocks, ensuring that they meet the desired size and shape requirements. Moreover, marking lines on masonry materials is another important task for which a steel square is utilized. Before cutting or installing bricks, blocks, or other materials, masons often need to mark cut lines or reference lines. By aligning the square's straight edge with the desired line, they can accurately mark the material using a pencil or scribe. Additionally, a steel square serves as a cutting guide in masonry work. Masons occasionally need to make straight cuts on bricks or blocks to fit them into specific spaces. Using the square as a guide for a masonry saw or chisel ensures that the cuts are straight and precise. Overall, the steel square is an essential tool for masons due to its versatility and accuracy. It enables them to check right angles, make precise measurements, mark lines, and serve as a cutting guide. By utilizing the steel square, masons can achieve precise and high-quality masonry construction.
- Q: How do you use a steel square to measure the width of a picture frame?
- To use a steel square to measure the width of a picture frame, you will need to follow a few simple steps. First, ensure that your steel square is clean and free from any dirt or debris that could affect your measurements. Next, place the steel square against one side of the picture frame, aligning it with the edge of the frame. Make sure that the square is flush against the frame and not tilted or slanted in any way. Once the steel square is properly positioned, use the measuring scale on the square to determine the width of the frame. Read the measurement value where the other side of the frame intersects with the scale on the square. It is important to note that steel squares typically have both metric and imperial measurements, so ensure you are using the appropriate scale for your needs. Repeat this process on the opposite side of the frame to validate your measurement. If the frame is not perfectly square, take multiple measurements at different points and use the average to get a more accurate width. Overall, using a steel square to measure the width of a picture frame is a straightforward process that provides accurate results, making it a reliable tool for this purpose.
- Q: Can a steel square be used for checking the squareness of a table saw sled?
- A table saw sled's squareness can be assessed by employing a steel square. This tool is extensively utilized for angle measurements and inspections, guaranteeing reliable accuracy. To examine the squareness of the sled, position the steel square flush against the fence of the sled. Then, align the sled with the table saw blade and verify if the square is perpendicular to the blade. If the square perfectly aligns with the blade, the sled is square. However, if any gaps or misalignments are detected, the sled can be adjusted to ensure proper squareness.
- Q: How do you use a steel square to mark out 45-degree angles?
- To use a steel square to mark out 45-degree angles, you need to align the shorter leg (the tongue) of the square along the edge of the material you want to mark. Then, rotate the square until the longer leg (the blade) aligns with the opposite edge of the material. Finally, make a mark at the intersection of the blade and the material's edge to create a 45-degree angle.
Send your message to us
Hot rolled steel bar
- Ref Price:
-
- Loading Port:
- China Main Port
- Payment Terms:
- TT OR LC
- Min Order Qty:
- -
- Supply Capability:
- -
OKorder Service Pledge
Quality Product, Order Online Tracking, Timely Delivery
OKorder Financial Service
Credit Rating, Credit Services, Credit Purchasing
Similar products


Hot products


Hot Searches
Related keywords

