


Polished Porcelain tile Offer SB7006
- Ref Price:
-

- Loading Port:
- China Main Port
- Payment Terms:
- TT OR LC
- Min Order Qty:
- -
- Supply Capability:
- -
OKorder Service Pledge
OKorder Financial Service
You Might Also Like


Product Description:
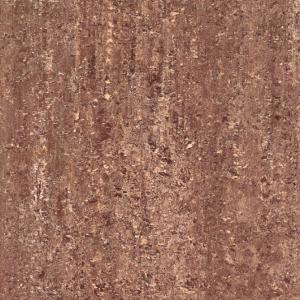
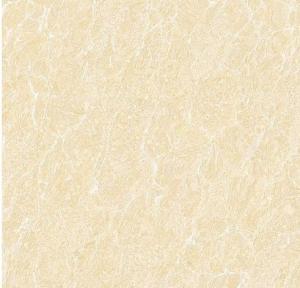
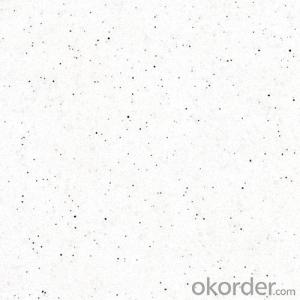
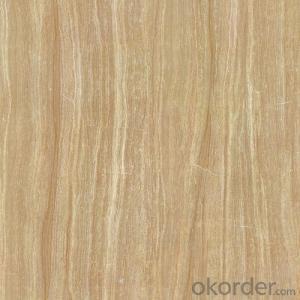
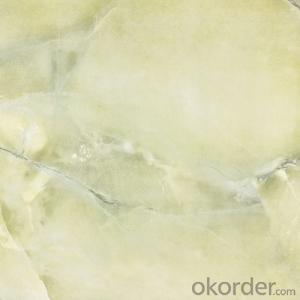
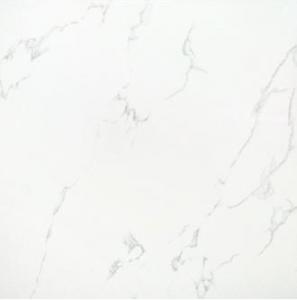
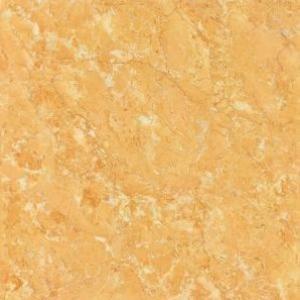
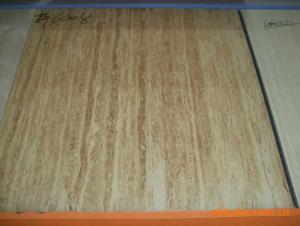
Key SpecificationsPolished Porcelain Tile SB7006:
Product information:
Material: soluble salt porcelain
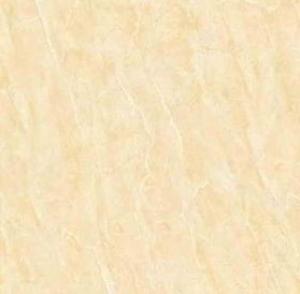
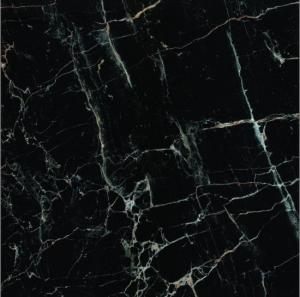
Various colors are available
Size: 600 x 600mm
Thickness: 10mm
Features: non-slip, wear- and water-resistant
Packing: 4 pieces/carton, 29.5kg/carton
20-foot container: 880 cartons
20-foot FCL container: 1267sqm
Carton with pallets or customized
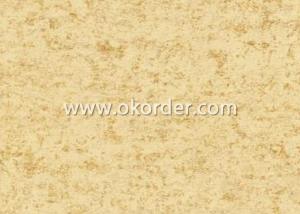
Primary Competitive Advantages Polished Porcelain Tile ST36046 :
First choice,top grade.
Water absorption:<0.1%.
Delivery Time:15~25 days after deposit.
Certicate: CE,ISO9001,Soncap,etc.
Competitive price and good quality
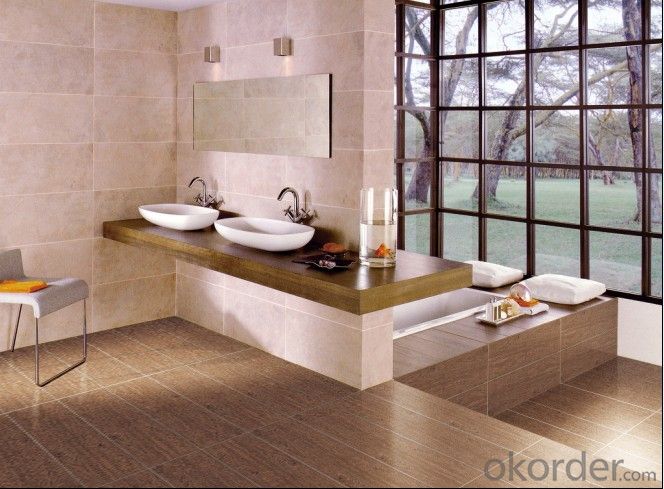
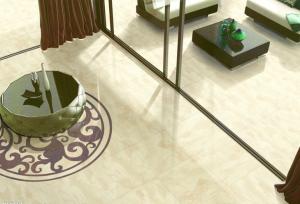
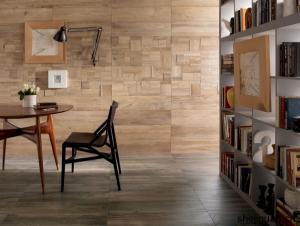
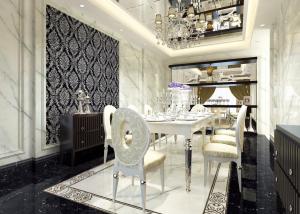
Usage— Suitable for home, high grade office buildings, high-grade hotel, airport, shopping mall,
deluxe clubs floor and wall tiles etc.
This series of products in addition to good wear resistance with ultrafine tiles, flexural strength,
and low water absorption, the appearance of the product, due to be fired into a crystal frit, so
three-dimensional effectprominent, white the texture clear, natural, delicate harmony and balance without duplication, with impeccable decorative effect, close to natural stone.
Technical characteristics:
Adopt international advanced ceramic cloth exquisite processing technology, selected high
quality pure raw materials, on the product body, with moist and gorgeous color, microcomputer
total precision control, multiple temperature control forming technology create gorgeous texture
hd grain boundary, bottom dense embryo thicker, pure texture, deduces the natural stone material through the external environment and the geological characteristics and the dynamic form of change,
also make products with high hardness, high gloss, low water absorption, strong dirt resistance, easy
to clean, etc excellent characteristic
Main Export Markets:
Mid East/Africa
Central/South America
Asia
Australasia
Southeast Asia, Mideast Asia
Product Picture :


Production Line :

Product Certificates :

Packing Details :

- Q: 1. Why floor tiles can pop up?2. What we can do to avoid that?
- Bad prep when putting the tiles down - Cheap tiles (or Cheap adhesive) - Excessive water (either standing water or water continuing to leak in the same area) - Clean the area before placing the tiles - Buy the right tiles adheasive for the area your doing. - Keep water from pooling-up on tiles
- Q: We want to put up kitchen tile for our back splash. I would like to put the squares on diagonally but my husband is concerned about the difficulty of all of the cuts. I need some DYI help. Please only serious replies, no jokesters
- Not totally sure what you are asking. I have applied square tiles in a diamond pattern. Be sure to get a wet tile saw to cut the tiles diagonally in half, as this will do a much neater job and make things easy for you. It really wasn't that difficult, lay out your pattern on the floor to get an idea how many cuts you need to make. Use those plastic spacers to ensure uniform spacings between tiles and then just have fun with it. It was a project that I enjoyed and it brought instant enhancements to the kitchen.
- Q: MyMy bathroom. which is about 75 square feet has a carpet and I want to change it to tile. The only utility is a toilet.How do I handle the toilet? If I use ceramic tile, does the toilet sit on the ceramic tile and does that cause a problem with breaking the tile?What do you recommend that is practical, easy to install, and still functional?
- First remove the toilet. There is two screws holding it down, remove them. Then remove the toilet and the rug. What is underneath the carpet? If you have cement, you can tile over cement if its not damaged. If your have wood, you can install cement board using the cement screws that id made for this type of installation. Never use sheet rock screws. Use thin-set modified mortar to install floor tiles, do not use adhesive glue. I would recommend 8 x 8 tile but no bigger than 13 x 13 tile. Spread the thin-set onto the floor evenly using a spreader with 3/8 space. Spread an area enough to cover two or three tiles. Install two or three at a time and level them off, then continue the process. Let dry overnight and reinstall toilet, I would change the johnny ring and new screws.
- Q: I am going to lay bathroom floor tiles in my bathroom but I have some questions before I start. 1. Can I lay the new tiles over the existing floor, which is vinyl flooring? Or do I have to remove that first? 2. If I have to remove the vinyl flooring do I have to add cement backer board? Or can I lay the tile right over whatever is under the vinyl flooring? 3. I have trim along that floor that I will be re-attaching, do I lay the tile right up to the wall or do I put a space in between the wall and the edge tile? Do I then grout into that space between the wall and the edge tile?
- you actually *can* install ceramic tile over vinyl flooring, if the vinyl is in good shape and not coming up or bubbling. you would need to use a mutliflex thinset instead of a standard thinset for the ceramic tiles to stick. now this only works if the vinyl is over concrete. if it's over wood, then an underlayment is needed. if the vinyl is in poor shape, pull it up. if in doubt as to it's quality, pull it up. 1/4 or 1/2 hardibacker or durarock are your options for your underlayment. use a multiflex thinset to adhere to the vinyl or wood subfloor and screw the board down every 6 inches. if your floor is a concrete slab don't bother with the underlayment; just tile directly over the concrete. leave a slight gap from your tile to your wall, then install your base and/or shoe molding. grouting the space between the tile and wall would be a waste of time and grout. don't bother; the base will cover it. i agree with the 1/8 grout joint. a much better look to it than a larger joint. keep in mind the thinset rules: a tile up to 12 requires a 3/8 notch of thinset, a tile 16 to 18 needs a 1/2 notch, and anything over 18 requires a 3/4 notch. this guarantees that there will be no thinset adhesian failures. good luck!
- Q: Why the tile is not clean clean
- Should be a chemical reaction, different reactions different methods, the most important reason for the quality of the tile, the surface is not well handled.
- Q: How would one grout mosaic tiles on standing mirror?
- Grout application on a mirror is exactly the same process as grouting a tile floor, back-splash, counter top, or table. Since the mirror is standing, I'd be sure that the mirror won't topple over when applying the grout because it has to be floated into the crevices between the tiles / tile pieces. If possible I'd suggest laying the mirror flat, either on the floor or on a sturdy worktable A grout float is basically a block shaped pushing tool used to force the grout between the tiles. Hold the float at an angle against the tiled surface and use a firm sweeping motion across the tile to push/force the grout into all the nooks, crannies, cracks and openings between the tiles. You'll have to work fairly quickly because grout becomes hard to work once it starts drying out. Work in a diagonal pattern and go back over any low or missed areas. Allow the grout to sit for 20-30 minutes. You'll know the grout is starting to cure when there is a light haze on the tile surface. Using a sponge and a bucket of clean water lightly buff the tile to remove the haze. This step may have to be repeated once or twice to be sure that all of the excess grout has been removed from the tile surface. If you want to seal the grout and tile, there are a number of sealant products available but you'll need to wait 3 or 4 days before applying in order to allow the grout to cure properly.
- Q: I want to know if it‘s necessary to use any special underlayment, or any additional steps required to successfully lay ceramic tile over a wood plank floor. Thanks!
- The right way to do it would be to remove the flooring and lay down some hardi backer or some cement board. However - if your wood floor is very very flat, and you consider the areas where that wood floor + the thickness of your tile meets up with other floor surfaces (e.g. carpeting or door door thresholds), it might be the easiest thing to do. Tile is a lot of fun. Don't skimp on making the right cuts and be sure to use spacers. Depending on what kind of tile you use - go with a smaller (1/4 or less) spacer so you have less cleanup with your grout. [Edit - I definitely agree with Crazy Man below. The waterproofing layer is a definite! Make sure you give it adequate time to dry, and then make sure you let the mud (adhesive) dry completely before grouting.] You might also consider something other than ceramic tiles, although there are some newer styles that are quite nice. A sealed porcelain tile or slate looks so nice.
- Q: I am tiling my kitchen and My house was a prefab. and OLD. The plywood used was 1/2 (I measured it). what thickness of backboard/cement board should I use for under the tile and on top of the plywood? I was thinking 1/2 backerboard/cement board so there is 1 of subfloor under the tile. Do you think this is enough? Also, I am tiling around my cabinets, what do I do about the dishwasher? Do I tile around it? If I tile under it, it won‘t fit in the spot then. I was going to tile around it... I do have room to tile under the fridge though. There is space above.
- I would use a minimum of 1/2 inch cement board. How large are your joists are you sure you will not have any weight issues (you should be OK). Next try to jump up and down once in the middle of your floor, this will give you an idea of the flex you have in your floor. Too much and your tile will end up cracking. If you have too much flex, consider installing a floating floor instead, they make some that look just like ceramic tile but are synthetic. They are lightweight and will last almost as long as the tile would have. As far as your dishwasher is concerned, see how much adjustment is on your legs (the legs screw up and down- they are used to level the dishwasher). It is not always necessary to tile under the dishwasher, but you want to make sure you can still get it out in the future, they don't last as long as your tile will. You can just tile under the front panel, it is adjustable.
- Q: I recently bought a home with old fashioned pink and blue tile, is there an inexpensive way to make it look better? Help.....
- i think if u paint it...it may look worse... just save up some cash and get new flooring
- Q: The bathroom tile in my recently purchased house isn‘t finished. The previous owner used floor tile to surround the tub; he/she left many pieces of tile unfinished, but luckily left us a stack of the tiles so we could finish it off. However, we don‘t have an unlimited supply of these tiles, so we‘d like to get it right with as few tries as possible!I‘m wondering: -I need to fit the tub faucet and knobs within two 12 square tiles. What‘s the best way to measure the placement of the fixtures? Is it possible to make some sort of template that I could transfer to the tiles? -Can I make the cuts for the fixtures using a hacksaw-type tile saw blade, or should I buy a tile drill bit? (I realize it rather depends on where the fixtures fall within the tile-- but if I don‘t need to buy both, I won‘t waste my money. )Thanks!
- I'll try to answer this in layman's terms as best i can.. Take one tile and hold it exactly square with the tile just above the faucet Knob. Take another tile and put the edge of it dead center in the middle of the faucet knob(this will take another person to lend a helping hand obviously).The other edge of the piece of tile you are holding on the center of the faucet knob will come to exactly where you want to put the center bit of the tile hole cutter so mark that with your pencil take the piece your holding square on the tile above the faucet knob down and cut your hole using a tile hole saw bit that is slightly larger in diameter than the faucet knob.. Sorry if this sounds complicating but i think once you start doing it you'll see how easy it is.. Good luck..
Send your message to us
Polished Porcelain tile Offer SB7006
- Ref Price:
-
- Loading Port:
- China Main Port
- Payment Terms:
- TT OR LC
- Min Order Qty:
- -
- Supply Capability:
- -
OKorder Service Pledge
OKorder Financial Service
Similar products

Hot products
Hot Searches

