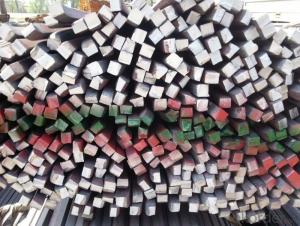


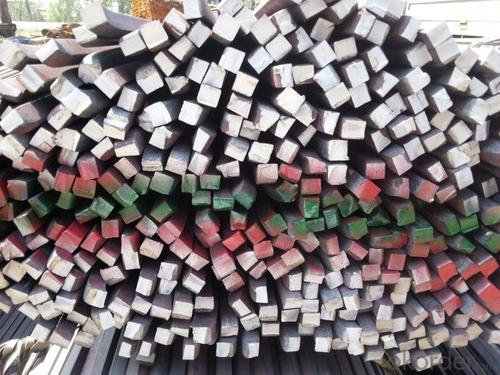


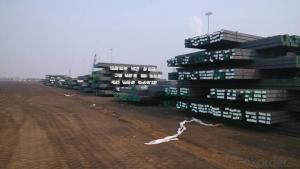
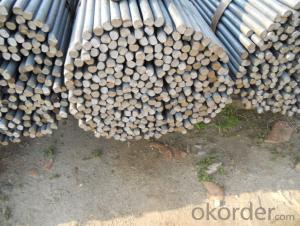
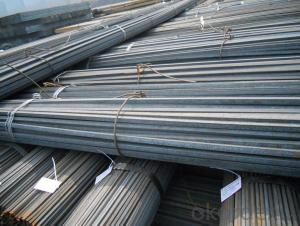
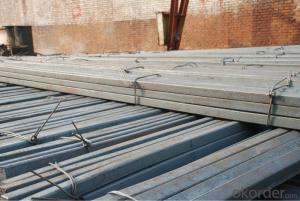
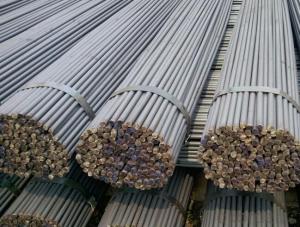
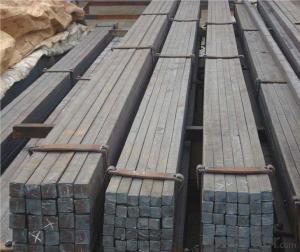
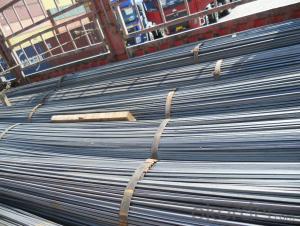
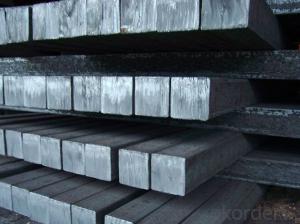
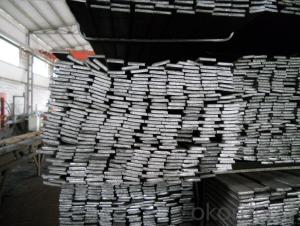
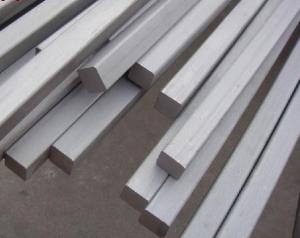
Low Carbon Hot Rolled Steel Square Bar in Bundle
- Ref Price:
-

- Loading Port:
- China main port
- Payment Terms:
- TT OR LC
- Min Order Qty:
- 100 m.t.
- Supply Capability:
- 5000 m.t./month
OKorder Service Pledge
OKorder Financial Service
You Might Also Like


Product Description:
OKorder is offering Low Carbon Hot Rolled Steel Square Bar in Bundle at great prices with worldwide shipping. Our supplier is a world-class manufacturer of steel, with our products utilized the world over. OKorder annually supplies products to African, South American and Asian markets. We provide quotations within 24 hours of receiving an inquiry and guarantee competitive prices.
Product Applications:
Low Carbon Hot Rolled Steel Square Bar in Bundle are ideal for structural applications and are widely used in the construction of buildings and bridges, and the manufacturing, petrochemical, and transportation industries.
Product Advantages:
OKorder's Low Carbon Hot Rolled Steel Square Bar in Bundle are durable, strong, and wide variety of sizes.
Main Product Features:
· Premium quality
· Prompt delivery & seaworthy packing (30 days after receiving deposit)
· Can be recycled and reused
· Mill test certification
· Professional Service
· Competitive pricing
Product Specifications:
Manufacture: Hot rolled
Grade: Q195 – 235
Certificates: ISO, SGS, BV, CIQ
Length: 6m – 12m, as per customer request
Packaging: Export packing, nude packing, bundled
| SQUARE BAR | |
| SIZE a(mm) | theoretical kg/m |
| 5.5 | 0.237 |
| 6 | 0.283 |
| 7 | 0.385 |
| 8 | 0.502 |
| 9 | 0.636 |
| 10 | 0.785 |
| 11 | 0.95 |
| 12 | 1.13 |
| 13 | 1.33 |
| 14 | 1.54 |
| 15 | 1.77 |
| 16 | 2.01 |
| 17 | 2.27 |
| 18 | 2.54 |
| 19 | 2.83 |
| 20 | 3.14 |
| 21 | 3.46 |
| 22 | 3.8 |
| 24 | 4.52 |
| 25 | 4.91 |
| 26 | 5.31 |
| 28 | 6.15 |
| 30 | 7.06 |
| 32 | 8.04 |
| 34 | 9.07 |
| 36 | 10.2 |
| 38 | 11.3 |
| 40 | 12.6 |
| 42 | 13.8 |
| 45 | 15.9 |
| 48 | 18.1 |
| 50 | 19.6 |
| 53 | 22 |
| 56 | 24.6 |
| 60 | 28.3 |
| 63 | 31.2 |
| 65 | 33.2 |
| 70 | 38.5 |
| 75 | 44.2 |
| 80 | 50.2 |
| 85 | 56.7 |
| 90 | 63.6 |
| 95 | 70.8 |
| 100 | 78.5 |
FAQ:
Q1: Why buy Materials & Equipment from OKorder.com?
A1: All products offered byOKorder.com are carefully selected from China's most reliable manufacturing enterprises. Through its ISO certifications, OKorder.com adheres to the highest standards and a commitment to supply chain safety and customer satisfaction.
Q2: How do we guarantee the quality of our products?
A2: We have established an advanced quality management system which conducts strict quality tests at every step, from raw materials to the final product. At the same time, we provide extensive follow-up service assurances as required.
Q3: How soon can we receive the product after purchase?
A3: Within three days of placing an order, we will arrange production. The normal sizes with the normal grade can be produced within one month. The specific shipping date is dependent upon international and government factors, the delivery to international main port about 45-60days.
Images:


- Q: Can a steel square be used for checking the levelness of shelves?
- No, a steel square cannot be used for checking the levelness of shelves. A steel square, also known as a framing square, is primarily used in carpentry and woodworking to measure and mark angles and to ensure the accuracy of right angles. It is not designed or suitable for checking the levelness of shelves. To check the levelness of shelves, a level tool such as a spirit level or a laser level should be used. These tools are specifically designed to determine if a surface is perfectly horizontal or level. They provide a much more accurate and reliable measurement for ensuring the levelness of shelves.
- Q: What are the different techniques for using a steel square in metalworking welding?
- Metalworking welding offers various techniques for utilizing a steel square. One prevalent method entails employing the steel square as a reliable guide to achieve precise right-angle cuts. By placing the square against the metal surface, it serves as a reference point to direct the cutting tool, ensuring meticulous and straight cuts. Another approach involves utilizing the steel square as a measuring device. Equipped with markings and measurements on its blade, the square can accurately gauge and mark dimensions on the metal surface. This proves particularly advantageous when constructing or fitting metal pieces together. The steel square can also serve as a guide for welding joints at right angles. Positioning the square on the metal surface enables it to act as a reference for aligning the welding torch or electrode, guaranteeing even and desired-angle welds. Furthermore, the steel square proves invaluable in verifying the squareness and flatness of welded joints. By placing the square against the welded joint, one can identify and rectify any deviations from a perfect right angle. Similarly, the square can assess the flatness of a metal surface, ensuring an even and flawless finish. Overall, the steel square emerges as a versatile tool in metalworking welding. It functions as a guide for precise cuts, measurements, alignment, and quality control. Its meticulous design and functionality render it an indispensable tool for welders striving for accuracy and precision in their craft.
- Q: How do you use a steel square to lay out a pentagon?
- In order to lay out a pentagon using a steel square, a specific set of steps must be followed. Below is a guide to assist you in this process: To begin, you must determine the desired size of the pentagon. It is necessary to know either the length of one side or the apothem (the distance from the center to any side). Next, place your steel square on a flat surface, ensuring proper alignment. Measure the desired length of one side of the pentagon on the blade of the steel square. Use a pencil or any suitable marking tool to mark this measurement. Position the blade of the square at the desired starting point for the construction of the pentagon. Make sure that the marked measurement aligns precisely with the starting point. Hold the steel square securely in place and pivot it around the starting point, creating an arc. Repeat the previous step by pivoting the square around the endpoint of the arc, creating another arc that intersects the first one. Continue this process, pivoting the square along the intersecting arcs, until you have five intersecting arcs. Connect the points where the arcs intersect to form the sides of the pentagon. Once the sides of the pentagon are marked, double-check the angles to ensure that they all measure 108 degrees. Make any necessary adjustments. Finally, use a ruler or straight edge to connect the marked points, thus forming the complete pentagon shape. The process of using a steel square to lay out a pentagon demands precision and meticulous measurements. By following these steps, you will be able to construct a pentagon accurately using this versatile tool.
- Q: Can a steel square be used for checking the alignment of wall tiles?
- Indeed, the alignment of wall tiles can be assessed using a steel square. In the realm of carpentry and construction, this tool is highly versatile and can serve various purposes, including measurements and alignments. Should you wish to examine the alignment of wall tiles, simply position the steel square adjacent to the tile's edge and compare it to its neighboring tiles. By utilizing the straight edge of the square, you can effectively determine whether the tiles are properly aligned or necessitate adjustments. Furthermore, the right angle of the steel square can be employed to ascertain that the corners of the tiles are flawlessly perpendicular. All in all, when it comes to installing wall tiles, a steel square is an utterly dependable instrument for evaluating alignment and precision.
- Q: Can a steel square be used for retaining wall layout and construction?
- Utilizing a steel square, commonly referred to as a framing square, is essential for the layout and construction of a retaining wall. This versatile tool serves various purposes in the field of carpentry and construction. It proves particularly valuable when it comes to measuring and marking right angles, a crucial aspect of accurately setting up a retaining wall. When undertaking the construction of a retaining wall, it becomes imperative to meticulously measure and mark all angles to guarantee the wall's levelness and structural stability. By utilizing a steel square, one can measure and mark right angles, which are indispensable for establishing the foundation and corners of the wall. Consequently, this ensures that the wall is constructed in a straight manner and adheres to the desired layout. Furthermore, the steel square serves as a means to assess the squareness of the wall throughout the construction process. By placing the square against the wall's corners and edges, one can verify their alignment with perfect right angles. Such an approach aids in upholding the integrity and stability of the retaining wall. To summarize, a steel square proves to be an invaluable tool for both layout and construction of a retaining wall. Its ability to facilitate accurate measurement and marking of right angles ensures that the wall is constructed in a straight, level, and structurally sound manner.
- Q: Can a steel square be used for trellis layout and construction?
- Yes, a steel square can be used for trellis layout and construction. The steel square, also known as a framing square, is a versatile tool commonly used in carpentry and construction. It can be used to measure and mark angles, lay out straight lines, and create precise right angles, which are all essential for designing and constructing a trellis. The sturdy and durable nature of steel makes it suitable for outdoor use, ensuring the longevity and stability of the trellis structure.
- Q: Can a steel square be used for measuring angles in plumbing pipe cuts?
- Indeed, when it comes to measuring angles in plumbing pipe cuts, a steel square comes in handy. This tool, which is alternatively referred to as a framing square or carpenter's square, proves to be quite versatile in accurately measuring and marking angles. Its design typically incorporates a 90-degree angle and a 45-degree angle, both of which are frequently employed in plumbing pipe cuts. Plumbers can achieve precise and accurate cuts by aligning the square with the pipe and marking the desired angle. It is worth noting, however, that specialized tools like a miter saw or angle finder may be necessary for more intricate angles or cuts.
- Q: Can a steel square be used for setting up a planer?
- Yes, a steel square can be used for setting up a planer. A steel square is a versatile tool commonly used in woodworking and carpentry to ensure accuracy and precision in various tasks, including the setup of machinery such as a planer. When setting up a planer, a steel square can be used to check the alignment of the tables, fences, and blades, ensuring that they are all perfectly square and parallel. This is important for achieving smooth and accurate planing results. Additionally, a steel square can also be used to check the squareness of the workpiece before planing, helping to ensure that it is properly aligned and will be planed evenly. Overall, a steel square is a valuable tool that can definitely be used for setting up a planer and ensuring its optimal performance.
- Q: How do you use a steel square to check for levelness?
- In order to check for levelness, one must begin by placing a steel square onto the desired surface. It is important to ensure that the square is firmly and evenly positioned on the surface. Following that, the bubble level on the square should be observed. Typically located at the center of the square, the bubble level is a small glass tube containing a liquid and an air bubble. If the bubble is situated between two marked lines or in the center of the tube (if it is a digital level), this indicates that the surface is level horizontally. On the other hand, if the bubble is not centered and leans towards one side, it signifies that the surface is not level and requires adjustment. To level the surface, shims can be utilized or the legs/supports beneath the surface can be adjusted until the bubble is centered. Additionally, the square can be employed as a guide to measure the variation in height or levelness across different points of the surface. It is important to note that a steel square is typically used for smaller and more precise leveling tasks. For larger surfaces or more accurate measurements, a longer level or laser level may be more suitable.
- Q: Can a steel square be used for measuring pipe sizes?
- Using a steel square is not suitable for measuring pipe sizes. While a steel square is ideal for measuring and marking right angles, it is not designed for determining the diameter or circumference of pipes. To obtain precise measurements for pipe sizes, it is recommended to employ a specialized tool such as a pipe gauge or a tape measure specifically designed for this purpose. These tools are crafted to deliver accurate measurements of pipe sizes and are better suited for this task.
Send your message to us
Low Carbon Hot Rolled Steel Square Bar in Bundle
- Ref Price:
-
- Loading Port:
- China main port
- Payment Terms:
- TT OR LC
- Min Order Qty:
- 100 m.t.
- Supply Capability:
- 5000 m.t./month
OKorder Service Pledge
OKorder Financial Service
Similar products
Hot products


Hot Searches
Related keywords

