


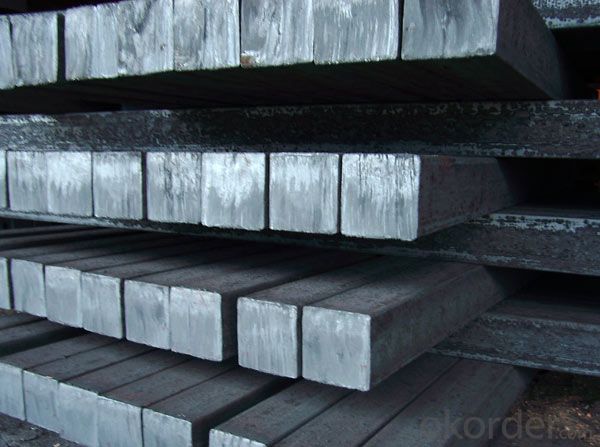

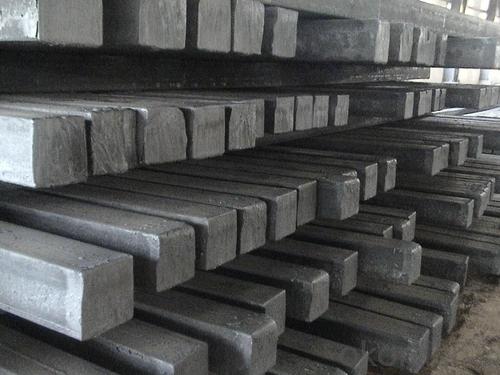
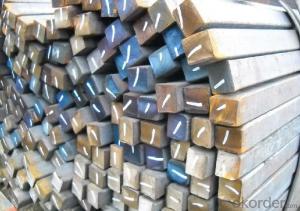
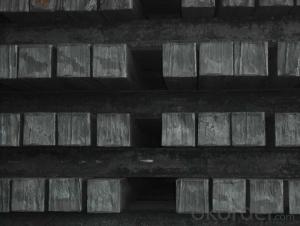
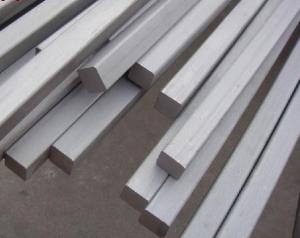
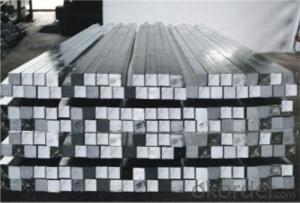
hot rolled square bar
- Ref Price:
-

- Loading Port:
- China Main Port
- Payment Terms:
- TT OR LC
- Min Order Qty:
- -
- Supply Capability:
- -
OKorder Service Pledge
OKorder Financial Service
You Might Also Like


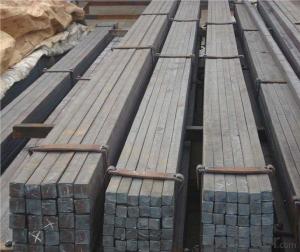


Square Bar Details:
| Minimum Order Quantity: | | Unit: | m.t. | Loading Port: | |
| Supply Ability: | | Payment Terms: | | Package: | loose |
Product Description:
1.Heat the EVA film
2.Cover the heated EVA film on the mould(can be made from wood or aluminum)
3.Spray a coating in a certain baume degree
4.Put on the empty blask
5.Sand-up the flask and vibrate to compaction
Packaging & Delivery
Packaging Details:containers
Delivery Detail:Complete one set of equipment needs for three months
-The length of a side and the theoretical weight of Square Steel.
Length of a side(a, mm) | Theoretical weight(kg/m) | Length of a side(a, mm) | Theoretical weight(kg/m) |
6 | 0.283 | 32 | 8.04 |
7 | 0.385 | *33 | 8.55 |
8 | 0.502 | 34 | 9.07 |
9 | 0.636 | *35 | 9.62 |
10 | 0.785 | 36 | 10.17 |
11 | 0.950 | 38 | 11.24 |
12 | 1.13 | 40 | 12.56 |
13 | 1.33 | 42 | 13.85 |
14 | 1.54 | 45 | 15.90 |
15 | 1.77 | 48 | 18.09 |
16 | 2.01 | 50 | 19.63 |
17 | 2.27 | 53 | 22.05 |
18 | 2.54 | *55 | 23.6 |
19 | 2.82 | 56 | 24.61 |
20 | 3.14 | *58 | 26.4 |
21 | 3.46 | 60 | 28.26 |
22 | 3.80 | 63 | 31.16 |
*23 | 4.15 | *65 | 33.17 |
24 | 4.52 | *68 | 36.3 |
25 | 4.91 | 79 | 38.49 |
26 | 5.30 | 75 | 44.16 |
*27 | 5.72 | 80 | 50.24 |
28 | 6.15 | 85 | 56.72 |
*29 | 6.60 | 90 | 63.59 |
30 | 7.06 | 95 | 70.85 |
*31 | 7.54 | 100 | 78.50 |
Notes:
1, The theoretical weights in the list, base on the density of 7.85 g/cm3.
2, The numbers with *mean that they are not regulars or we don’t offer them.
-The allowed tolerance of Square Steel:
Length of a side(mm) | Allowed Tolerance | ||
Group1 | Group2 | Group3 | |
5.5~7 | ±0.20 | ±0.30 | ±0.40 |
7~20 | ±0.25 | ±0.35 | ±0.40 |
20~30 | ±0.30 | ±0.40 | ±0.50 |
30~50 | ±0.40 | ±0.50 | ±0.60 |
60~80 | ±0.60 | ±0.70 | ±0.80 |
80~110 | ±0.90 | ±1.0 | ±1.1 |
110~150 | ±1.2 | ±1.3 | ±1.1 |
150~190 | ―― | ―― | ±2.0 |
190~250 | ―― | ―― | ±2.5 |
Usage/Applications of Steel Square Bar:
-The Square Steel is normally used as structure steel.
-Row material for other structure steel like steel angles, channels, I-beams, H-beams, etc…
Packaging & Delivery of Steel Square Bar:
-Packing Detail: The products can be packed in bundles by steel wires.
-Marks:
1, Tag marks: the tag marks will be tied up to each bundle of the products. The information is usually including supplier’s logo and name, product name, made in China, products’ specifications, the painted color and other information requested by customers.
2, Color marks: we will paint both ends of the bundles of these products to make sure that they are more evident. It’s will be more convenient for the customers to distinguish them at the destination port.
-Delivery Detail: 30~45 working days after receive buyer’s T.T. or L/C.
Transportation:
-The products can be delivered by bulk vessel or by container. As for container, products with the length of 6m will be loaded in 20’ container, with 9m or 12m, in 40’ container.
-The maximum quantity of loading of container is 25 tons.
-The products usually are transported to the nearest port from the production place.
Payment:
-Invoicing on theoretical weight or actual weight a s customer’s request.
-FOB, CFR or CIF.
-Regular terms of payment:
1, 30% payment in advance, the remaining balance (70% payment) against the copy of B/L.
2, 30% payment in advance, the remaining balance (70% L/C) against the copy of B/L.
3, Negotiable.
- Q: Can a steel square be used for checking the plumbness of a wall stud?
- No, a steel square cannot be used for checking the plumbness of a wall stud. A level or plumb bob is typically used for this purpose as they provide more accurate measurements.
- Q: How do you use a steel square for creating accurate half-lap joints?
- To use a steel square for creating accurate half-lap joints, follow these steps: 1. Measure and mark the desired size of the half-lap joint on the pieces of wood you will be joining together. Make sure the marks are accurate and aligned properly. 2. Position the steel square on the edge of one of the wood pieces, aligning one of its edges with the edge of the wood. Ensure that the square is held firmly in place. 3. Use a pencil or a marking knife to trace along the inside edge of the square onto the wood. This will transfer the square's 90-degree angle onto the wood, which will be crucial for creating a precise half-lap joint. 4. Repeat the process of tracing the square's edge onto the other piece of wood that will be part of the half-lap joint. Make sure the marks are aligned with the first piece of wood. 5. Now, using a saw, carefully cut along the marked lines on both pieces of wood. It is important to stay as close to the marked lines as possible to ensure a tight and accurate fit for the half-lap joint. 6. Once the cuts are made, test-fit the two pieces of wood together. They should fit snugly and create a seamless joint. If necessary, make slight adjustments with a chisel or sandpaper to achieve a perfect fit. By using a steel square, you can ensure that the half-lap joints are accurately marked and cut, resulting in strong and precise connections between the pieces of wood.
- Q: What are some common uses for a steel square in deck construction?
- Deck construction relies heavily on the use of a steel square, also known as a framing square, due to its versatility and importance. This tool is primarily utilized for precise angle measurements, markings, and cuts. Several common applications of a steel square in deck construction include: 1. Ensuring square corners: The steel square's 90-degree angle is ideal for guaranteeing that corners are square and properly aligned. Builders can utilize it to assess and adjust the deck's frame corners, ensuring accurate and precise construction. 2. Establishing the deck's layout: A steel square is useful in laying out the deck's perimeter and marking the precise positions for the placement of posts, beams, and joists. It aids in creating straight and parallel lines, resulting in a symmetrical and well-balanced deck structure. 3. Marking and cutting angles: Deck construction often involves cutting angles, especially for stair stringers, joist hangers, and other components. The steel square's accuracy in measuring and marking various angles enables builders to ensure precise cuts that fit together seamlessly. 4. Checking for level and plumb: Builders can employ a steel square to verify if posts and beams are plumb (vertical) and if joists and deck boards are level (horizontal). By aligning the square against the components and utilizing a level, builders can ensure the deck's structure is straight and properly aligned. 5. Measuring and marking dimensions: The long blade and tongue of a steel square allow for accurate measurements and markings. Whether it involves determining the length and width of deck boards, marking out notches, or measuring distances between joists, the steel square provides precise measurements for all deck components. Overall, the steel square is an indispensable tool in deck construction. Its versatility and accuracy in measuring, marking, and checking angles make it an essential asset for guaranteeing a well-built and structurally sound deck.
- Q: Can a steel square be used for checking the alignment of brickwork?
- Yes, a steel square can be used for checking the alignment of brickwork. A steel square is a versatile tool that is commonly used by carpenters and masons for measuring and checking angles and alignments. It has a right angle shape, with one long side and one shorter side. To check the alignment of brickwork, the steel square can be used to ensure that the corners of the bricks are at perfect right angles. By placing the long side of the steel square against the corner of the bricks, one can visually inspect if the edges align properly. If the corners are not at right angles, adjustments can be made to ensure an accurate alignment. Additionally, the shorter side of the steel square can be used to measure the evenness of the brick courses. By placing the shorter side across the face of the bricks, one can check if the courses are level and even. This is particularly useful for ensuring that the mortar joints are consistent and the bricks are laid in a straight line. Overall, a steel square is a valuable tool for checking the alignment of brickwork and can help ensure that the construction is accurate and visually appealing.
- Q: How do you use a steel square to determine the angle of a profile cut?
- To use a steel square to determine the angle of a profile cut, you will need to follow a few steps. First, ensure that your steel square is clean and free from any debris or rust. Next, place the steel square against the side of the material you wish to cut at a right angle, making sure that it is flush and snugly fits against the surface. Once the steel square is properly positioned, observe the markings on the square. Most steel squares have markings that indicate angles, typically ranging from 0 to 90 degrees. These markings can be found on both the blade and the tongue of the square. To determine the angle of the profile cut, locate the marking on the blade that aligns with the edge of the material. This marking will indicate the angle at which the cut needs to be made. If the marking on the blade does not align exactly, you can estimate the angle by looking at the nearest marking and measuring the difference. Once you have determined the angle, you can transfer it to your cutting tool or machine to make the profile cut accurately. It is important to note that the accuracy of the angle measurement depends on the precision and calibration of your steel square, so ensure that it is in good condition before using it for such measurements. Using a steel square to determine the angle of a profile cut is a simple and effective method, especially when working with materials that require precise and accurate cuts.
- Q: The anti-theft lock in the steel compression spring is what?
- Spiral spring requires surface decarburization less than 0.5% of the diameter, polished surface, long fatigue life, dimensional tolerances more stringent requirements, there should be no defect transmission. The hot working process is often difficult to meet the requirement of the user, therefore, hot forming of cold forming of automotive suspension coil spring gradually replaced by drawing, heat treatment (quenching and tempering of martensite GET) spiral spring made after.
- Q: What are some common uses for a steel square in woodworking joinery?
- A steel square, also known as a framing square or carpenter's square, is a versatile tool used in woodworking joinery for a variety of purposes. Some common uses for a steel square include: 1. Measuring and marking right angles: The most basic use of a steel square is to ensure that corners and joints are perfectly square. Woodworking projects often require precise angles, and a steel square helps achieve accurate measurements and markings. 2. Checking for squareness: Before joining two pieces of wood together, it is crucial to check if they are square. A steel square is used to verify if the edges are at a perfect 90-degree angle, ensuring a tight and secure joint. 3. Laying out perpendicular lines: When marking cuts or making layouts, a steel square is invaluable in creating perpendicular lines. It helps ensure that cuts and joints are made at precise right angles, resulting in accurate and well-fitting pieces. 4. Determining and transferring angles: Steel squares often have additional markings that allow woodworkers to measure and transfer different angles. This feature makes them useful for creating miters, bevels, and other angled cuts or joints. 5. Checking for flatness: A steel square can also be used to determine if a surface is flat or level. By placing the square against the surface, woodworkers can identify any unevenness or deviations, allowing them to make necessary adjustments. 6. Acting as a saw guide: A steel square can be clamped or held firmly against the edge of a board, serving as a guide for a saw. This helps in making straight and accurate cuts, especially when working with handheld tools like circular saws or jigsaws. 7. Assisting in layout and design: Steel squares often have various measurements and markings etched onto them, making them helpful tools for layout and design work. Woodworkers can use the square to create proportional designs, take precise measurements, and establish consistent spacing. Overall, a steel square is an essential tool in woodworking joinery, enabling woodworkers to achieve accuracy, ensure squareness, and create well-fitting joints. Its versatility and reliability make it a staple in any woodshop, aiding in a wide range of tasks and contributing to the overall quality of woodworking projects.
- Q: How do you make precise measurements with a steel square?
- In order to achieve accurate measurements using a steel square, it is necessary to follow a few important steps. Firstly, it is crucial to guarantee that the steel square is clean and devoid of any debris or rust that may impact its precision. Subsequently, position the square flatly and in the appropriate alignment on the surface or object that requires measuring. To measure angles, utilize the 90-degree corner of the square as a point of reference. Align one side of the square with the desired edge to be measured and examine the angle measurement on the scale or protractor found on the opposite side of the square. Ensure that the square is flawlessly aligned without any gaps or overlaps between the square and the edges. For measuring lengths, the longer side of the square can be employed as a ruler. Align one end of the square with the starting point of the length to be measured and read the measurement on the scale or ruler located on the longer side. Once again, guarantee that the square is correctly aligned without any gaps or overlaps. To attain more precise measurements, employ a marking tool such as a pencil or scribe to directly mark the desired measurement on the object. This will aid in maintaining accuracy when transferring the measurement to other surfaces or during cutting or shaping processes. In conclusion, the key to achieving precise measurements with a steel square is to ensure proper alignment, eliminate any gaps or overlaps, and thoroughly verify all measurements prior to proceeding with any subsequent steps.
- Q: What is the history of steel squares?
- Steel squares have a long and rich history, dating back to ancient times. The concept of a square tool for measuring right angles can be traced back to the ancient Egyptians and Mesopotamians. However, it was during the 18th and 19th centuries that steel squares as we know them today began to emerge. These squares were initially made from cast iron and gradually evolved into being made from steel, which provided increased durability and accuracy. They became an essential tool for carpenters, masons, and other craftsmen, enabling them to measure and mark right angles with precision. Over the years, steel squares have undergone technological advancements, such as incorporating additional measurements and features like protractors and scales. They continue to be widely used in various industries for layout work, framing, and woodworking. In summary, the history of steel squares is one of evolution and refinement, starting from ancient origins to becoming an indispensable tool for professionals across different trades.
- Q: How do you use a steel square to lay out stairs?
- To use a steel square in laying out stairs, first, gather the necessary tools including a steel square, a tape measure, a pencil, and a saw. To start, determine the desired height of each stair riser. This height should be consistent throughout the stairs for safety reasons. Measure the total height from the top to the bottom of the stairs and divide it by the desired height of each riser to determine the number of steps needed. Next, use the steel square to mark the rise and run dimensions on a stringer board, which is the angled support board for the stairs. The rise refers to the vertical height of the step, and the run refers to the horizontal depth of the step. The steel square has markings that allow you to easily determine these dimensions. To mark the rise, place the steel square against the stringer board, aligning the corner of the square with the bottom edge of the board. Find the mark that corresponds to the desired rise height and draw a line across the board. For the run, place the steel square against the stringer board again, this time aligning the corner of the square with the rise line you just drew. Find the mark that corresponds to the desired run depth and draw a line across the board perpendicular to the rise line. Repeat these steps for each step, using the same measurements for both the rise and run to maintain consistency. Make sure to double-check your measurements and markings for accuracy. Once all the steps are marked on the stringer board, cut along the lines you drew using a saw. Be careful to stay within the lines to ensure the steps fit properly. Finally, assemble the stairs by attaching the stringer board to the structural support and attaching the treads (the horizontal portion of each step) to the stringer board. Use screws or nails to secure them in place, ensuring they are evenly spaced and level. By following these steps and using a steel square to lay out the stairs, you can create a safe and well-structured staircase.
Send your message to us
hot rolled square bar
- Ref Price:
-
- Loading Port:
- China Main Port
- Payment Terms:
- TT OR LC
- Min Order Qty:
- -
- Supply Capability:
- -
OKorder Service Pledge
OKorder Financial Service
Similar products


Hot products


Hot Searches
Related keywords

