

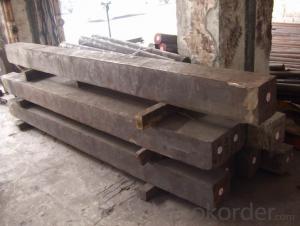
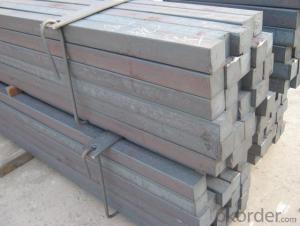
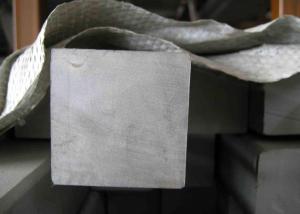
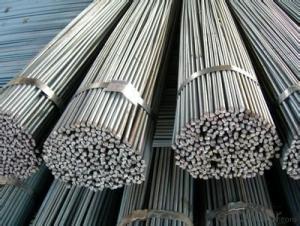
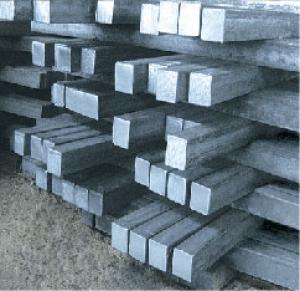
Squre Bar
- Ref Price:
-

- Loading Port:
- China Main Port
- Payment Terms:
- TT OR LC
- Min Order Qty:
- -
- Supply Capability:
- -
OKorder Service Pledge
OKorder Financial Service
You Might Also Like


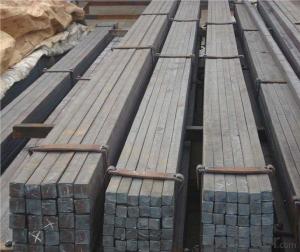

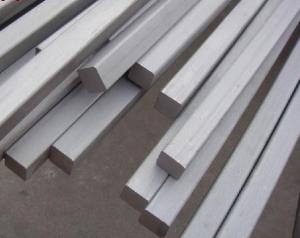
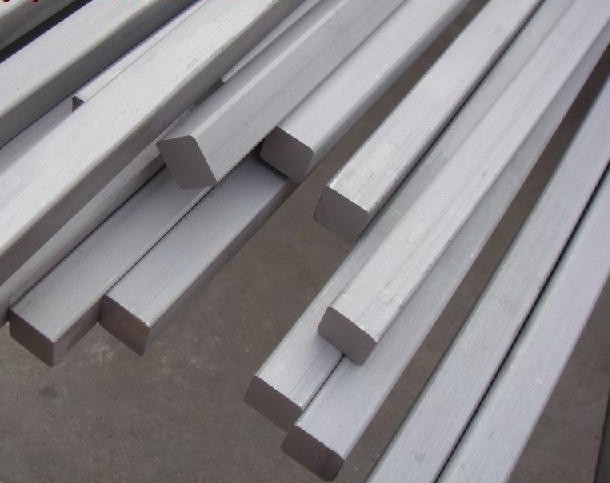
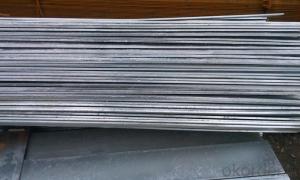
Product Description:
We offer Square Steel Bar with grade Q195 / Q235
Specifications of Square Steel Bar:
-Standard: GB,
-Grade: Q195/Q235 or equivalent.
Chemical Composition:
-Chemical Composition. Q195
Standard | Grade | Element (%) | ||||
GB | Q195 | C | Mn | S | P | Si |
0.06~0.12 | 0.25~0.50 | ≤0.050 | ≤0.045 | ≤0.30 | ||
-Chemical Composition. Q235
Standard | Grade | Element (%) | ||||
GB | Q235B | C | Mn | S | P | Si |
0.12~0.20 | 0.30~0.70 | ≤0.045 | ≤0.045 | ≤0.30 | ||
Measures and Tolerances of Square Steel Bar:

(The section of Square Steel Bar)
-The length of a side and the theoretical weight of Square Steel.
Length of a side(a, mm) | Theoretical weight(kg/m) | Length of a side(a, mm) | Theoretical weight(kg/m) |
6 | 0.283 | 32 | 8.04 |
7 | 0.385 | *33 | 8.55 |
8 | 0.502 | 34 | 9.07 |
9 | 0.636 | *35 | 9.62 |
10 | 0.785 | 36 | 10.17 |
11 | 0.950 | 38 | 11.24 |
12 | 1.13 | 40 | 12.56 |
13 | 1.33 | 42 | 13.85 |
14 | 1.54 | 45 | 15.90 |
15 | 1.77 | 48 | 18.09 |
16 | 2.01 | 50 | 19.63 |
17 | 2.27 | 53 | 22.05 |
18 | 2.54 | *55 | 23.6 |
19 | 2.82 | 56 | 24.61 |
20 | 3.14 | *58 | 26.4 |
21 | 3.46 | 60 | 28.26 |
22 | 3.80 | 63 | 31.16 |
*23 | 4.15 | *65 | 33.17 |
24 | 4.52 | *68 | 36.3 |
25 | 4.91 | 79 | 38.49 |
26 | 5.30 | 75 | 44.16 |
*27 | 5.72 | 80 | 50.24 |
28 | 6.15 | 85 | 56.72 |
*29 | 6.60 | 90 | 63.59 |
30 | 7.06 | 95 | 70.85 |
*31 | 7.54 | 100 | 78.50 |
Notes:
1, The theoretical weights in the list, base on the density of 7.85 g/cm3.
2, The numbers with *mean that they are not regulars or we don’t offer them.
-The allowed tolerance of Square Steel:
Length of a side(mm) | Allowed Tolerance | ||
Group1 | Group2 | Group3 | |
5.5~7 | ±0.20 | ±0.30 | ±0.40 |
7~20 | ±0.25 | ±0.35 | ±0.40 |
20~30 | ±0.30 | ±0.40 | ±0.50 |
30~50 | ±0.40 | ±0.50 | ±0.60 |
60~80 | ±0.60 | ±0.70 | ±0.80 |
80~110 | ±0.90 | ±1.0 | ±1.1 |
110~150 | ±1.2 | ±1.3 | ±1.1 |
150~190 | ―― | ―― | ±2.0 |
190~250 | ―― | ―― | ±2.5 |
Usage/Applications of Steel Square Bar:
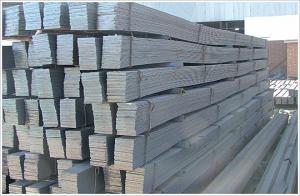
-The Square Steel is normally used as structure steel.
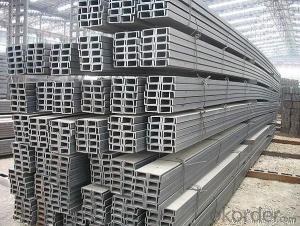
-Row material for other structure steel like steel angles, channels, I-beams, H-beams, etc…
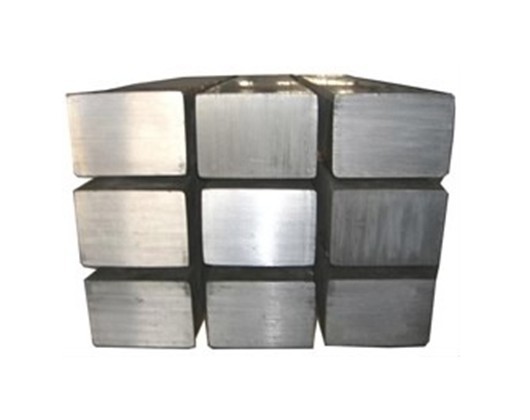
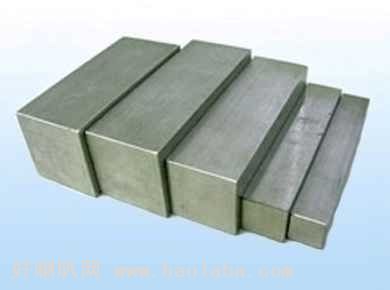
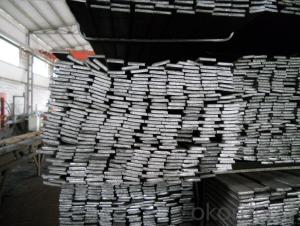
Packaging & Delivery of Steel Square Bar:
-Packing Detail: The products can be packed in bundles by steel wires.
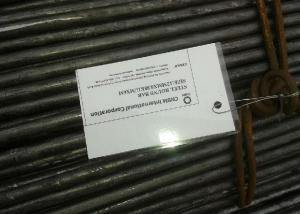
-Marks:
1, Tag marks: the tag marks will be tied up to each bundle of the products. The information is usually including supplier’s logo and name, product name, made in China, products’ specifications, the painted color and other information requested by customers.
2, Color marks: we will paint both ends of the bundles of these products to make sure that they are more evident. It’s will be more convenient for the customers to distinguish them at the destination port.
-Delivery Detail: 30~45 working days after receive buyer’s T.T. or L/C.
Transportation:
-The products can be delivered by bulk vessel or by container. As for container, products with the length of 6m will be loaded in 20’ container, with 9m or 12m, in 40’ container.
-The maximum quantity of loading of container is 25 tons.
-The products usually are transported to the nearest port from the production place.
Payment:
-Invoicing on theoretical weight or actual weight a s customer’s request.
-FOB, CFR or CIF.
-Regular terms of payment:
1, 30% payment in advance, the remaining balance (70% payment) against the copy of B/L.
2, 30% payment in advance, the remaining balance (70% L/C) against the copy of B/L.
3, Negotiable.
- Q: Can a steel square be used for marking out cuts on materials?
- Marking out cuts on materials can be done using a steel square. A steel square, also referred to as a framing square or carpenter's square, is a versatile tool widely utilized in carpentry and woodworking. It comprises a long arm and a shorter arm positioned at a right angle, creating an L shape. The long arm is typically employed for marking straight lines, while the shorter arm is used to create 90-degree angles. When marking cuts on materials like wood, metal, or plastic, a steel square ensures accuracy and precision. By aligning the long arm with the material's edge, a straight line can be formed, and the shorter arm guarantees a perfect 90-degree angle. By firmly holding the steel square against the material and using a pencil or scribe, desired cuts can be easily marked. Using a steel square for marking cuts not only ensures precise measurements and angles but also guarantees consistent and uniform results. Carpenters, woodworkers, metalworkers, and other craftsmen who require accurate and clean cuts frequently employ this tool. To summarize, a steel square is an excellent tool for marking cuts on materials, providing accuracy, precision, and consistency throughout the cutting process.
- Q: Can a steel square be used for checking the squareness of furniture joints?
- Checking the squareness of furniture joints can be done using a steel square. This versatile tool, also known as a carpenter's square or framing square, is commonly used in woodworking and construction. It has a shape with one long side and one short side, forming a 90-degree angle. To assess the squareness of furniture joints, simply position the steel square against the joint and observe if it fits snugly into the corner. A perfect fit indicates that the joint is at a precise right angle. Conversely, any gap or misalignment between the square and the joint suggests that the joint is not perfectly square. The utilization of a steel square for checking furniture joints is a straightforward and efficient technique, particularly for projects that necessitate accurate angles and precise measurements. This method ensures that the furniture possesses properly aligned joints, enhancing stability, durability, and overall quality.
- Q: How do you use a steel square to determine the angle of a rip cut?
- In order to determine the angle of a rip cut using a steel square, you must follow these steps: 1. First, position the steel square against the edge of the board you wish to cut, ensuring it is flush and square. 2. Then, locate the degrees or angles scale on the outer edge of the steel square. 3. Align the scale with the edge of the board, ensuring that the square blade is perpendicular to the board's edge. 4. Once the square is properly aligned, identify the numerical mark on the scale that represents the desired cutting angle (e.g., 45 degrees). 5. After identifying the correct angle, mark the board along the blade of the steel square, indicating where the cut should be made. 6. Finally, utilize a saw or another cutting tool to follow the marked line and execute the rip cut at the desired angle. Always double-check your measurements and ensure proper alignment of the steel square before making any cuts. By employing a steel square, you can achieve precise and accurate rip cuts by relying on a dependable angle reference.
- Q: Can a steel square be used for cabinet hardware installation?
- Yes, a steel square can be used for cabinet hardware installation. A steel square, also known as a framing square or a carpenter's square, is a versatile tool that can be used for a variety of tasks in woodworking, including cabinet installation. It can be used to ensure accurate and square cuts, measure and mark lines, and check for level and plumb. When installing cabinet hardware, a steel square can be used to ensure that the hardware is properly aligned and spaced. Additionally, it can be used to measure and mark the location of holes for drilling. Overall, a steel square is a valuable tool that can assist in achieving precise and professional results in cabinet hardware installation.
- Q: Can a steel square be used for checking the squareness of a bandsaw blade?
- No, a steel square cannot be used for checking the squareness of a bandsaw blade. While a steel square is commonly used for checking the squareness of other tools, such as table saw blades or miter saw fences, it is not suitable for checking the squareness of a bandsaw blade. Bandsaw blades have a unique shape and configuration, with teeth and a curved blade, which makes it difficult to accurately measure their squareness using a steel square. Additionally, the steel square is designed to check the squareness of flat surfaces, whereas bandsaw blades have a curved shape. To check the squareness of a bandsaw blade, it is best to use a specialized tool designed for this purpose, such as a bandsaw blade square or a dial indicator. These tools are specifically designed to measure the squareness of bandsaw blades accurately. They provide a more precise and reliable measurement, ensuring that the blade is properly aligned for accurate cutting.
- Q: Can a steel square be used for checking the squareness of a shelf bracket?
- Yes, a steel square can be used for checking the squareness of a shelf bracket.
- Q: How do you use a steel square to measure and mark 348.75-degree angles?
- To measure and mark 348.75-degree angles using a steel square, you would first align one edge of the square with the desired reference line. Then, rotate the square until the desired angle (348.75 degrees) is reached, making sure that the reference edge remains fixed. Finally, use a pencil or marking tool to mark the angle on the workpiece using the square as a guide.
- Q: What are some common mistakes to avoid when using a steel square?
- Some common mistakes to avoid when using a steel square include not properly aligning the square with the workpiece, applying excessive force while using the square, not ensuring that the square is square to the workpiece, and not securely holding the square in place while making measurements or marking lines.
- Q: Can a steel square be used for metal fabrication?
- Yes, a steel square can be used for metal fabrication. A steel square, also known as a framing square or a carpenter's square, is a versatile tool commonly used in woodworking and construction. However, it can also be used in metal fabrication tasks. Its design, consisting of a flat blade and a perpendicular handle, allows for precise measurements and accurate layout work. The steel square is particularly useful in marking and measuring angles, ensuring the proper alignment and layout of metal pieces during fabrication. It can also be used for checking the squareness and straightness of metal components, making it an essential tool in metalworking.
- Q: Can a steel square be used for drywall patching?
- Yes, a steel square can be used for drywall patching. It can be used to measure and mark the dimensions of the patch accurately, ensuring a precise fit. Additionally, the straight edge of a steel square can be used as a guide for cutting the drywall patch.
Send your message to us
Squre Bar
- Ref Price:
-
- Loading Port:
- China Main Port
- Payment Terms:
- TT OR LC
- Min Order Qty:
- -
- Supply Capability:
- -
OKorder Service Pledge
OKorder Financial Service
Similar products
Hot products


Hot Searches
Related keywords

