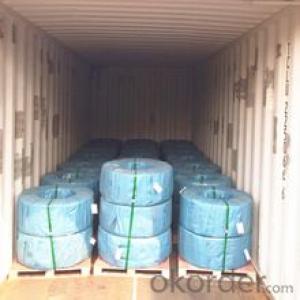

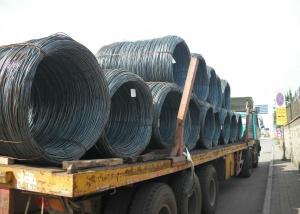
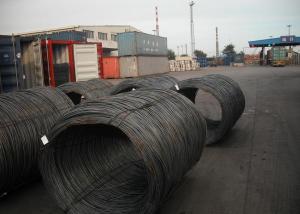
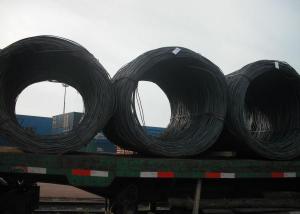
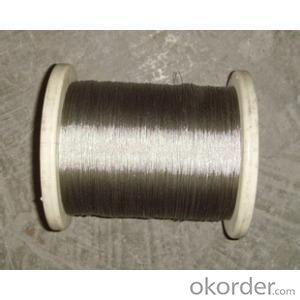
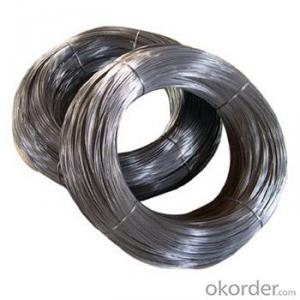
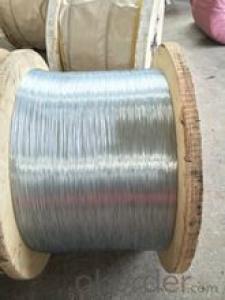
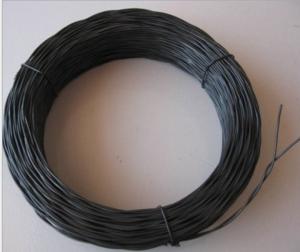
ACSR 3.05mm ASTM B498 galvanized high carbon steel wire
- Ref Price:
-

- Loading Port:
- China Main Port
- Payment Terms:
- TT OR LC
- Min Order Qty:
- -
- Supply Capability:
- 20000 m.t./month
OKorder Service Pledge
OKorder Financial Service
You Might Also Like

Quick Details
Steel Grade:carbon constructional quality steel
Standard:AISI, ASTM, BS, DIN, GB, JIS
Wire Gauge:3.05mm
Place of Origin:Zhejiang, China (Mainland)
Type:Galvanized
Application:Manufacturing
Alloy Or Not:Non-alloy
Special Use:Free Cutting Steel
Model Number:3.05mm
Tensile strength:≥1380Mpa
1% elongation:≥1170Mpa
Zinc coating:≥275
Tolearance:-0.08 +0.1
Elongation L=250MM:≥4.0%
Joint:No Joint
C%:0.50-0.85%
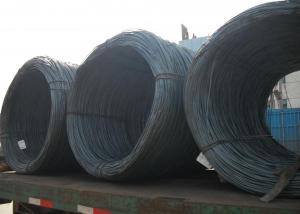
Packaging & Delivery
| Packaging Details: | Z2 , Coil . Plastic Roll, or wooden reel as the dimension of the reel is according to your requirement |
|---|---|
| Delivery Detail: | Within 15 days after confirmation |
Specifications
3.05mm ASTM B498 galvanized high carbon steel wire
1.Good quality
2..Professional manufacturer
3.Prompt delivery
3.05mm ASTM B498 galvanized high carbon steel wire
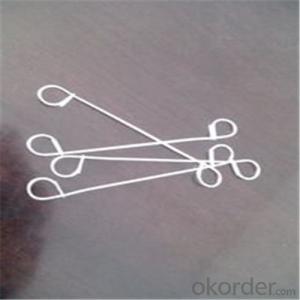
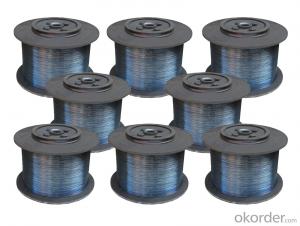
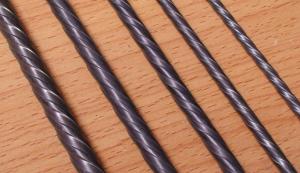
1.Diameter range:0.8-5mm
2.Main application:making spring,mattress,for ACSR,for fence.for optical fibre,for hose
3.Standard: ASTM B498 ASTM B500
4.Type:low carbon,middle carbon,high carbon
5.Z2 packing ,ply-wood reel, Roll packing etc.,or as your requirements
- Q: Ok, i want to make a flash gun. I made one before with my cousin, but it broke. I remember what i used to make it, and how to make it, i just need the names of the wires and parts i need. How I made it: I had a battery connected to a wire that connected to a tube that had a special wire in there that heated up when i pressed a button. I would put flash paper in there, and a flame would shoot out. I need to know the name of that wire, I also need to know where to put the button on the wire connected to the battery. A link to a picture, or a detailed explanation would be really cool!Thanks!Nick
- That okorder The circuit is simple. The parts are the battery, some regular wire, a push-button switch, and the nichrome wire. Connect one end of the short piece of nechrome wire to one end of a wire. Connect that end to one of the battery terminals. Connect a second piece of wire between the other battery terminal and one side of the switch. Connect a third piece of wire from the switch to the other end of the nechrome wire. When the button is pushed, the wire should heat up.
- Q: Okay I have a question I have an 8 gauge wire kit and it says 350 watts peak. What the difference when there is the same 8 gauge wire that says 800 watts peak does this really matter? Thanks guys
- properly, there are transformations in conductivity in wires of a similar gauge, based upon the fabric of which the twine is made and no count if or no longer it quite is multi-strand or good middle. That sounds like an quite huge hollow even even with the shown fact that. To account for that lots variance i could almost ought to think of the decrease one is aluminum or some very decrease priced copper alloy. 8 gauge is distinctly thick twine, after all.
- Q: What is wire Harnesses?
- A wire harnes is a set of wires that has all the conductors needed and can just be installed into something. There's a wiring harness in your car. They don't install the wires one-by-one. A harness is built for the product and is installed like any other part. There can be many branches on a wiring harnes to go to different places in the product. There may be more than one harness. There could be one for power, one for communications, etc. This is more efficient than installing separate wires.
- Q: i need to know which wire is which in a 1999 dodge stratus for the cars stereo
- Here okorder /
- Q: i hav a 2000 explorer and just got a new head unit and bought a wiring harness to hook it up. on the wiring harness that's supposed to be plugged in to the truck there are 2 illumination wires, 1 of them is the illumination ground .Out of my new stereo there is only the illumination wire not an illumination ground wire. where do I put the illumination ground ? also i have 2 ground wires coming from my new deck 1 is 12v ground and the other is a chassis ground can i just hook them together?
- workin for best answer 2000 Ford Explorer Car Stereo Radio Wiring Diagram. Car Radio Constant 12V+ Wire: Light Green goes to your yellow deck wire Car Radio Switched 12V+ Wire: Yellow/Black goes to your red deck wire Car Radio Ground Wire: Black goes to your black ground wire Car Radio Illumination Wire: Light Blue/Red goes to your illumination wire Car Radio Dimmer Wire: N/A Car Radio Antenna Trigger Wire: Blue Car Radio Amp Trigger Wire: N/A if u have a amp this goes to your blue remote wire Front Speakers Size: 5″ x 7″ Front Speakers Location: Doors Left Front Speaker Wire (+): Orange/Light Green Left Front Speaker Wire (-): Light Blue/White Right Front Speaker Wire (+): Dark Green/Orange Right Front Speaker Wire (-): White/Light Green Rear Speakers Size: 5″ x 7″ Rear Speakers Location: Rear Door Left Rear Speaker Wire (+): Gray/Light Blue Left Rear Speaker Wire (-): Tan/Yellow Right Rear Speaker Wire (+): Orange/Red Right Rear Speaker Wire (-): Brown/Pink hope this helps
- Q: I just bought an exhaust tip with leds which needs to be wired up to the brake lights on my mazda 626. Can somebody tell me which colour wire it is (positive) on the wiring to the brake light? There are a few wires and I dont know which one it is! Thanx
- Its either red or green,sometimes white if there is a black ground wire.
- Q: The switches for the ventilation have 6 wires coming out of the ceiling. My ventilation unit has 5 wires. The ceiling has 2 black, 2 red, and 2 white wires. The ventilation unit has yellow, black, white, red, and blue. how do i make the connections?
- Go back to store get the instructions (if they have to, they can rob it from another package or make photocopies of it). Since the colors have that much of a difference, it probably be your best bet to hire an electrician for it. Check with several for rough estimates and for how soon.
- Q: Wires in the dash*Radio constant*Radio Switched*Radio illumination**please match these up with the options below**Wires on the stereo itself*Dashboard Light Dimmer Switch*Amplifier Remote or Power Antenna (Positive +)*(fuze) yellow memory (negative -)*(fuze) red 12v (positive +)if someone could please help that would be great-since the wires were replaced i cant go by color
- Car radio wire constant to stereo yellow memory. Car radio wire switched to stereo red 12v positive. Car radio wire illumination to stereo Dashboard Light Dimmer Switch. Don't forget to ground the black wire on the unit to the ground wire from the car harness. An extra ground strap to the chassis is a good idea also. If you don't have an amp or a power antenna, cap off the blue Remote/Antenna wire.
- Q: I have a 1983glastron cvx-16 and need to wire the lights, tach horn fuel guage there are 2 wires coming off the fuel guage one pink from the center and the other looks to be comming off of a bracket not conacted to the tanks fuel guage
- Wiring your gauges is pretty easy to do as there are only 3 wires per gauge.You have a positive,negative and sender wire.Your positive wire goes to the I which is the ignition terminal,the negative goes to the negative terminal and the sender wire to the S terminal.That's it,done.To make it a little easier I'll give you the usual colour's of the sender wires. OIL pressure = light blue Fuel =pink or yellow usually pink Tach=gray Temp=light brown or brown Trim sender=brown with a white stripe. Light wire for gauges=blue Your positive wire for your gauges is purple and this wire starts from your key switch,from the I terminal.I hope this helps.
- Q: One wire has part of the plastic coating on the end, the other wire does not.
- the lead is the wires showing. lead wire can also mean attaching a wire and feed it through a wall attach other end to the wire and pull it through. Now if you need both ends to have wire showing take a utility knife firmly place wire on block of wood and lightly cut through the caseing. thats the thick wire that en cases the other wires and peal back and then cut it off. then carefully hold blade of utility knife and wire aganst your thumb on a 45 degrees away from you and pull that will strip the plastic off the wires hope that answers your question dave
Send your message to us
ACSR 3.05mm ASTM B498 galvanized high carbon steel wire
- Ref Price:
-
- Loading Port:
- China Main Port
- Payment Terms:
- TT OR LC
- Min Order Qty:
- -
- Supply Capability:
- 20000 m.t./month
OKorder Service Pledge
OKorder Financial Service
Similar products
Hot products


Hot Searches

