

Steel Square Billet Chinese Standard Q195, Q235 and Q275
- Ref Price:
-

- Loading Port:
- Tianjin
- Payment Terms:
- TT or LC
- Min Order Qty:
- 25 m.t.
- Supply Capability:
- 10000 m.t./month
OKorder Service Pledge
OKorder Financial Service
You Might Also Like


1. Structure of Steel Square Billet Description:
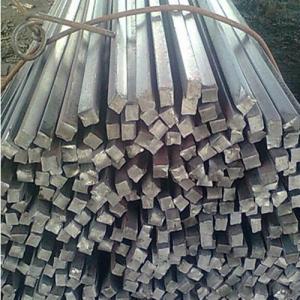
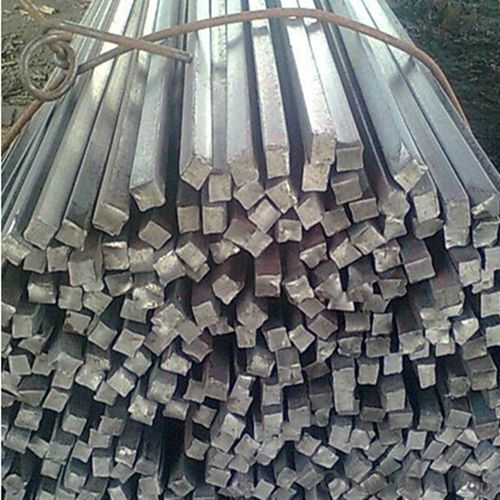
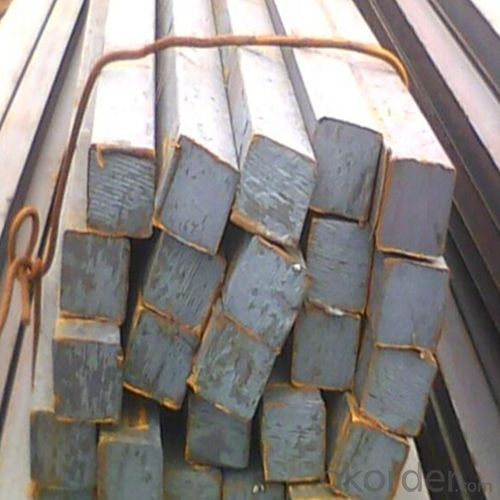
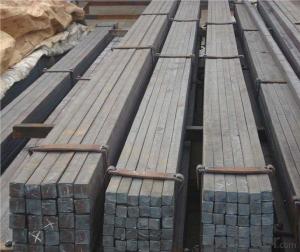
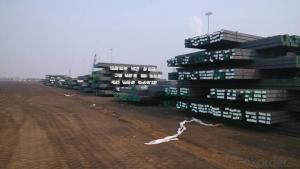
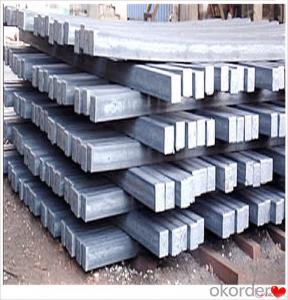
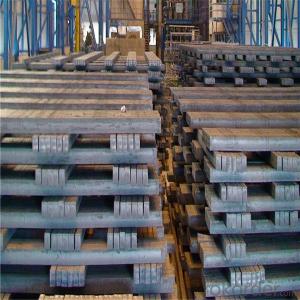
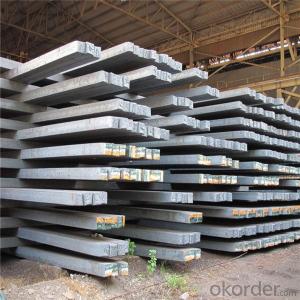
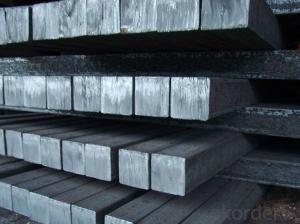
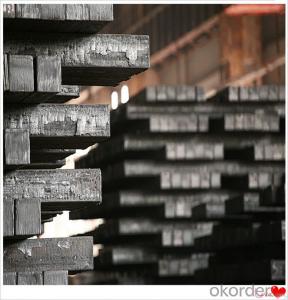
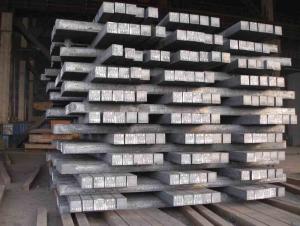
Square bars with firm sides is a bar with square shaped cross-section. It is special case of equal sides. Before steel products are sold on the market, the steel must first be processed into more functional pieces. Raw steel cannot be of use while in its pure form, thus it has to be cast into shape. The freshly made steel, square bars with firm sides is still in the form of a metal bar or rectangle. Small sizes of square bars with firm sides are used in ship building.
2. Main Features of Steel Square Billet:
• Grade: Q235
• Type: Mild carbon steel
• A quadrilateral with four equal sides and four right angles.
• Vibration: The stiffness and mass are chosen to prevent unacceptable vibrations, particularly in settings sensitive to vibrations, such as offices and libraries.
• Local yield: Caused by concentrated loads, such as at the beam's point of support.
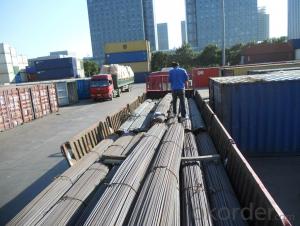
3. Steel Square Billet Images:


4. Steel Square Billet Specification:
Mechanical Properties | Grade | Steel diameter(mm) | |||
≤16 | 16~40 | 40~60 | 60~100 | ||
Yield Point Δs/MPa | Q195 | ≥195 | ≥185 | - | - |
Q235 | 235 | 225 | 215 | 205 | |
Tensile Strength | Q195 | 315~390 | |||
Q235 | 375~500 | ||||
Elongation δ5% | Q195 | ≥33 | ≥32 | - | - |
Q235 | 26 | 25 | 24 | 23 | |
5. FAQ
We have organized several common questions for our clients,may help you sincerely:
①What is the main material?
There are two types of Square Bar, one is hot rolled square bar and other one is cold drawn square bar. Our principal products is hot rolled square bar. We dedicate to products with material Q195 and Q235. We offer products with high quality and low price.
②How to inspect the quality?
We have a professional inspection group which belongs to our company. We resolutely put an end to unqualified products flowing into the market. At the same time, we will provide necessary follow-up service assurance.
③Is there any advantage about this kind of product?
Steel I beam bar IPE has a reduced capacity in the transverse direction, and is also inefficient in carrying torsion, for which hollow structural sections are often preferred.
- Q: Is there a specific method for using a steel square correctly?
- Yes, there is a specific method for using a steel square correctly. It involves ensuring that the square is properly aligned and perpendicular to the workpiece, using the square to mark or measure angles, and making accurate cuts or markings using the square's edges and measurements.
- Q: How do you use a steel square to create parallel lines?
- In order to generate parallel lines, one must adhere to a few straightforward measures when utilizing a steel square. Firstly, position the steel square on the designated surface or material where the parallel lines are desired. It is essential to ensure that the longer side of the square aligns parallel to the material's edge. Subsequently, employ a pencil or scribe to mark a straight line along the steel square's edge. It is crucial that the line is of sufficient length for the intended parallel lines. Once the initial line has been created, proceed to slide the steel square along the edge, guaranteeing alignment with the previously marked line. Continuously verify that the longer side of the square remains parallel to the material's edge. Using the same pencil or scribe, proceed to mark another line along the steel square's edge. This line should run parallel to the first one that was made. Repeat this procedure as many times as necessary to achieve the desired quantity of parallel lines. On each occasion, shift the steel square along the edge and delineate a fresh line that is parallel to the preceding one. By employing a steel square in this fashion, one can effortlessly produce precise and parallel lines on a diverse range of materials, such as wood, metal, or paper. The steel square acts as a guide, ensuring the maintenance of parallel alignment and accuracy in measurements.
- Q: Can a steel square be used for checking the alignment of a table router fence?
- Indeed, one can utilize a steel square to verify the alignment of a table router fence. The steel square boasts exceptional precision and reliability, rendering it suitable for assessing the perpendicularity of two surfaces. By positioning the steel square adjacent to both the fence and table of the router, it becomes feasible to ascertain whether the fence is flawlessly perpendicular to the table or necessitates adjustment. This aspect holds utmost significance in guaranteeing precise and uniform cuts when employing a table router.
- Q: How do you use a steel square to find angles for coping cuts?
- To use a steel square for finding angles for coping cuts, you can follow these steps: 1. Measure the width of the material you need to cope. 2. Place the steel square against the edge of the material, aligning one side of the square with the width measurement. 3. Mark the desired angle on the material using the desired angle measurement on the square (e.g., 45 degrees). 4. Repeat the process on the other side of the material. 5. Connect the marked points to create the cutting line. 6. Cut along the marked line to achieve the coping cut with the desired angle.
- Q: The anti-theft lock in the steel compression spring is what?
- The development trend of suspension spring steel is to reduce carbon content, reduce decarburization tendency, and increase the flexibility and anti attenuation performance of plastic forming.
- Q: How do you use a steel square to mark out parallel lines on irregular surfaces?
- To use a steel square to mark out parallel lines on irregular surfaces, you would start by placing the square against the straight edge of the surface and aligning it with the desired angle or parallel line. Then, using a pencil or marker, trace along the edge of the square to mark the parallel line. Repeat this process at different points along the surface to ensure accuracy and consistency in marking out parallel lines.
- Q: How do you use a steel square to determine angles for wainscoting?
- To determine angles for wainscoting, one can follow a few steps: 1. Take measurements of the height and width of the installation area to determine the size and dimensions of the wainscoting panels. 2. Position the steel square against the wall, ensuring it is flush and level. Place the long edge of the square against the wall and the shorter edge facing outward. 3. Align one leg of the square with the bottom edge of the wall or baseboard, while keeping the other leg perpendicular to the wall. 4. Use a pencil or marker to trace a line along the longer edge of the square. This line will serve as a reference for cutting or installing the wainscoting panels. 5. Then, use a tape measure to mark the height of the wainscoting panels on the wall. This will help determine the placement of the top edge of the wainscoting. 6. Align the square with the mark indicating the top edge of the wainscoting and trace another line along the longer edge of the square. 7. By connecting the two traced lines, a reference angle for the wainscoting will be established. This angle will guide the cutting and fitting of the top and bottom edges of the wainscoting panels to ensure a proper fit on the wall. 8. Repeat this process for each wall section where wainscoting will be installed, ensuring that the square is aligned and level each time. By utilizing a steel square in this manner, precise and accurate angles can be achieved for wainscoting installation, resulting in a professional and visually appealing outcome.
- Q: How do you use a steel square to determine the angle of a cut?
- Achieving the desired angle for a cut using a steel square involves a straightforward process. Begin by ensuring that your steel square is free from any debris or dirt, as cleanliness is crucial. Next, firmly position the square's base against the material's edge that you intend to cut, ensuring proper alignment. Then, utilize the markings on the square to determine the desired angle. While the most common angle measurements are 45 degrees and 90 degrees, some squares may include additional markings for other angles. Once you have identified the angle, employ a pencil or marker to draw a guiding line along the square's edge. This line will serve as a reference for your cut. Finally, exercise caution and precision as you follow the marked line with either a saw or another appropriate cutting tool. Maintaining steady control and ensuring the saw is properly aligned with the marked line are vital for achieving an accurate cut.
- Q: Can a steel square be used for checking the plumbness of a corner post?
- Using a steel square to determine the plumbness of a corner post is not recommended. The primary function of a steel square, or framing square, is to measure angles and make precise cuts in carpentry and construction. It is not designed for assessing the verticality or plumbness of structures. For checking the plumbness of a corner post, it is more appropriate to use a plumb bob or a level. A plumb bob consists of a weight attached to a string, which, when suspended next to a corner post, indicates whether the post is perfectly vertical or not. On the other hand, a level is equipped with a bubble vial that helps determine if a surface is level or plumb. To ensure accurate measurements and proper construction, it is essential to use the appropriate tools for specific tasks.
- Q: What are the different techniques for using a steel square in woodworking joinery?
- There are several techniques for using a steel square in woodworking joinery. One common technique is using it as a measurement tool to ensure accurate and precise cuts and angles. The square can be used to mark and measure straight lines, check for squareness, and mark angles for various joints such as mitered or dovetailed joints. Additionally, the steel square can be used as a guide for making straight cuts by aligning the square's edge with the material being cut. Overall, the steel square is a versatile and essential tool in woodworking joinery for achieving precise and well-fitted joints.
Send your message to us
Steel Square Billet Chinese Standard Q195, Q235 and Q275
- Ref Price:
-
- Loading Port:
- Tianjin
- Payment Terms:
- TT or LC
- Min Order Qty:
- 25 m.t.
- Supply Capability:
- 10000 m.t./month
OKorder Service Pledge
OKorder Financial Service
Similar products

Hot products


Hot Searches
Related keywords

