
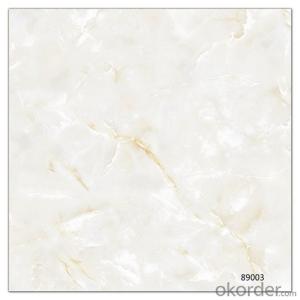
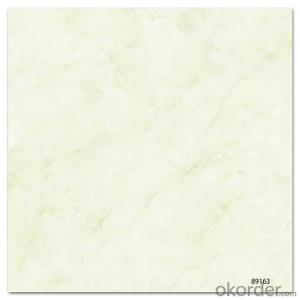
Polished Porcelain Tile The White Color CMAXSB4640
- Ref Price:
-

- Loading Port:
- China main port
- Payment Terms:
- TT OR LC
- Min Order Qty:
- 1382.4
- Supply Capability:
- 10000 m²/month
OKorder Service Pledge
OKorder Financial Service
You Might Also Like
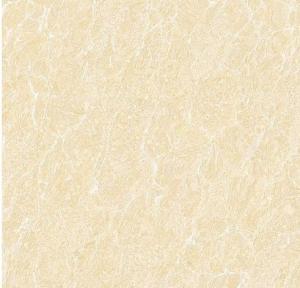

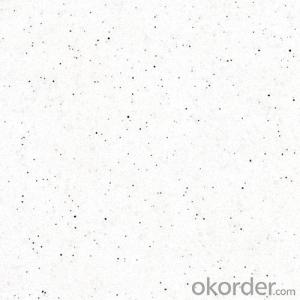
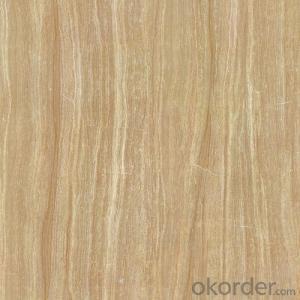

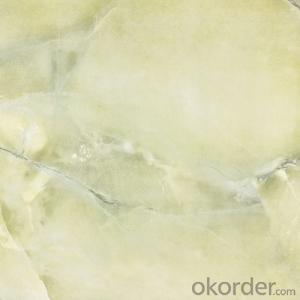

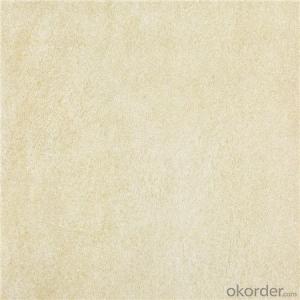
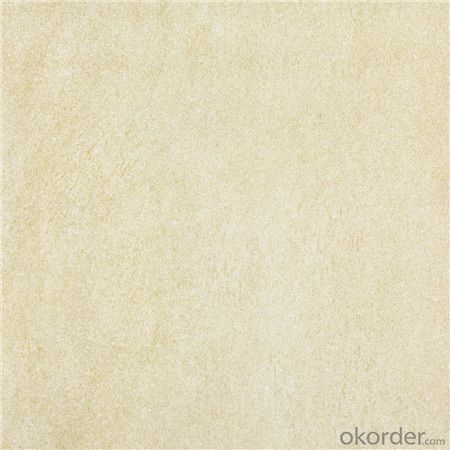
Key Specifications Polished Porcelain Tile The White Color CMAXSB4640:
Product information:
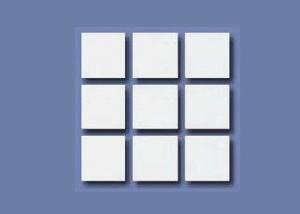
Material: soluble salt porcelain
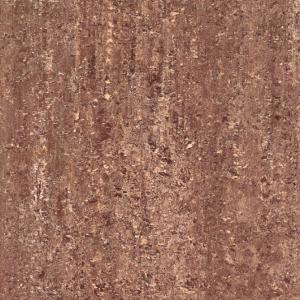
Various colors are available
Size: 600 x 600mm
Thickness: 10mm
Features: non-slip, wear- and water-resistant
Packing: 4 pieces/carton, 29.5kg/carton
20-foot container: 880 cartons
20-foot FCL container: 1267sqm
Carton with pallets or customized
First choice,top grade.
Water absorption:<0.1%.< p="">
Delivery Time:15~25 days after deposit.
Certicate: CE,ISO9001,Soncap,etc.
Competitive price and good quality
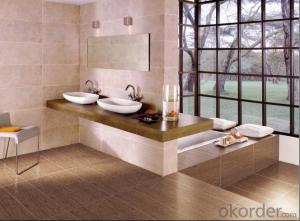
Usage— Suitable for home, high grade office buildings, high-grade hotel, airport, shopping mall,
deluxe clubs floor and wall tiles etc.
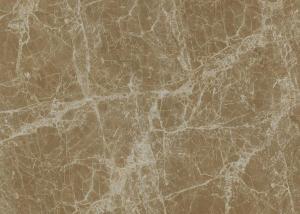
This series of products in addition to good wear resistance with ultrafine tiles, flexural strength,
and low water absorption, the appearance of the product, due to be fired into a crystal frit, so
three-dimensional effectprominent, white the texture clear, natural, delicate harmony and balance without duplication, with impeccable decorative effect, close to natural stone.
If you ask me,what do you live for?
Maybe there is only one reason:I love life.
In the place where I live,I would like to put my life taste into the space decoration. I try to find what will help me?Until one day,my family travel to one seaside,I was shocked by what I saw,high mountain and clear water and green trees in front of me,what a wonderful scene! Can I take the beautiful things to my home?At that instant,suddenly I feel that life and porcelain should be the best partner.
Nature,space,design,which of porcelain is what I am happy to share with you.
Life and Porcelain,Love and Passion,the story is going on
This series of products in addition to good wear resistance with ultrafine tiles, flexural strength,
and low water absorption, the appearance of the product, due to be fired into a crystal frit, so
three-dimensional effectprominent, white the texture clear, natural, delicate harmony and balance without duplication, with impeccable decorative effect, close to natural stone.
Technical characteristics:
Adopt international advanced ceramic cloth exquisite processing technology, selected high
quality pure raw materials, on the product body, with moist and gorgeous color, microcomputer
total precision control, multiple temperature control forming technology create gorgeous texture
hd grain boundary, bottom dense embryo thicker, pure texture, deduces the natural stone material through the external environment and the geological characteristics and the dynamic form of change,
also make products with high hardness, high gloss, low water absorption, strong dirt resistance, easy
to clean, etc excellent characteristic
Main Export Markets:
Mid East/Africa
Central/South America
Asia
Australasia
Southeast Asia, Mideast Asia
Product Picture :


Production Line :

Product Certificates :

Packing Details :

FAQ
1. For Polished Porcelain Tile, is the 30*60 available?
—— Yes, 30*60 is available. Due to the basic size is 60*60, we need to cut 60*60 tile into 30*60. 6 pcs are packed into one carton.
2. What is the MOQ for this tile?
—— Normally the MOQ is 1382.4 m2 for one 20’ container. To support our clients, we could go with 3 models to fill one container at most.
3. Can we use the carton with our own design and brand name?
—— Yes. Normally we go with Neutral Carton or our Carton with our CMAX brand name. But for carton of client’s own design, the MOQ for one size is 5 containers, due to the carton factory can’t arrange production if quantity is below 5000 pcs.
- Q: I need some guidance on hanging new wall tiles in my bathroom.1) can I tile over the existing tiles2) what are the pro‘s/con‘s of ready mixed adhesive against mix your own3) is all grout standard waterproof or do i need specialist stuff4) do you tile all the walls then replace the suite or put the new suit in first then tile? bearing in mind i hope to tile over existing tiles.5) is it true you shoudl first replace your bath, fill it with water and leave it overnight to level?Any guidance would be much appreciated......
- [1] Yes you can tile over the existing tiles, What you need to do first? Is to rough up with rough sandpaper on the existing tiles to give a bite for the new tiles to hold on. [2] It is better to have ready mix, because it will have every things in it [3] Most grout are waterproof and also you can get differ colour grouts to match your bathroom. [4] Put in your new suit first, then tiles on top of your existing tiles, and grouts it as well. [5] fill your bath first, then seal it, so it will have the weight of the bath and water in it and it wont break the seal and lest chance of a leak.
- Q: I am installing 13x13 porcelain tile on a wall. Should I leave a 1/4‘‘ gap for grout or can I butt them up tight for a smaller grout line?
- You have to leave some gap for grout. Butting them together would not work.
- Q: I am redoing my bathroom floor and I am going to use stick on tiles how do I put them on? Do you just stick them on the
- Make sure the floor is clean and all the old glue from previous installations has been removed. Pop a chalk mark from opposing walls so they cross in the center of the room. Start at the center and work towards the walls so that everything looks even all the way around when you're finished. If the tiles have lines or a pattern running in one direction then turn every other tile 90 degrees or it will look wavery. To help the tiles stick, stack them up and let an electric heater blow on them for 30 minutes prior to starting installation. Warm tiles are a lot easier to lay and get butted up without cracks between them.
- Q: I have a large number of tiles on the walls of the laboratory nowadays, and the whole piece of fall, years ago is normal, do not know how the matter, please answer expert!
- Well, upstairs positive solution: upstairs friends said the first kind of hollowing the general two kinds of situations: 1, the workers in the construction did not have a responsible inspection of the back of the tile is fully integrated with the cement or cement label is not in accordance with the standard procurement , Resulting in cement after the tile off. 2, manufacturers in the tiles factory accidentally anti-fouling wax hit the back of the tile to reduce the combination of ceramic tile and cement performance. Specific identification method, hand tapping the drums around the other tiles there is no like knocking into the empty box of the sound, if there is basically that the process of paving caused by the phenomenon of hollowing. Upstairs friends said the second case is also easier after the tile paving the situation, the cement in the contraction of the time or the temperature changes so that the heat up and down, paving the process if there is no stay or stay Too small will make the tiles from the cement, there is a situation that the house is a long time due to the foundation will moderate subsidence problems, will lead to wall tiles appear drums, fall or crack occurs. Personal advice solution: 1, if the drop of the tile is not much landlord do not want trouble, you can use glass glue or marble glue from the new paste on the wall, but the useful time will not be very long. I hope I can help you
- Q: In order to be able to tile the windows (instead of the white moulding) like in the second kitchen, what steps would I have to take? Just remove the moulding on the inside then tile?
- You are exactly right just remove the old moldings and you will have to make sure you fill any cracks for water to get in but you just install the tile instead of new molding.
- Q: My landlord recently had new bath/shower faucets installed, but didn‘t have matching tiles put in place of the ones that had to be removed in a small section. Do I have a legitimate case against my landlord? It‘s such an eyesore. Everytime I shower, I see the unmatching tiles and get so angry. Aren‘t I deserving of matching tiles?
- Actually, probably not. As long as the shower is covered with tile and not bare, it wouldn't be against any health issue. You could ask nicely, but I think since he didn't do it when the faucets were replaced, it isn't going to be done now. Some landlords are so stupid.....You are going to want to take better care of his property if he strives to keep in top condition. You have a bad attitude now I am sure not too eager to keep that shower clean. Am I right? Those kind of repairs are what makes a landlord into a slum landlord. EDIT: YES, you are deserving of matching tiles. Send him a note with your next rent check.
- Q: I want to remove all the white tiles in my kitchen as some are broken, others don‘t match up and basicially who ever tiled it initially may have been intoxicated, some have come off easy, but others are stuck on tight, tried using a chisel hammer to smash them, but they would splinter and smash like glass, does anyone know a easier less messier way i can do this?
- If you have a broken tile you obviously don’t need to worry about saving it. You may be able to pry it off the wall by sliding the putty knife under the tile at a very low angle (almost parallel to the surrounding tiles), then moving the knife around to break the tile away from the glue or mastic holding it on. Depending on how loose the tile is you may be able to remove it by simply sliding your putty knife under the tile and prying up gently. If the tile won't come off you'll need to get rid of the surrounding grout
- Q: I‘ve seen on many different DIY shows that you can get used tiles that are still in good condition (from a certain place, I just can‘t seem to remember the word) to use in your projects.
- Most tile stores throw out tiles every week. They throw out sample boards and broken tiles and generally you can go dumpster diving and pick up quite a few. Some stores will give them to you if you ask. I used to work at a tile store and we threw out tons of tiles all the time. The large stores like Home Depot sometimes have rules that they won't give anything broken away or even sell it but it's worth asking because they're all different. You may be able to find a Habitat Re-Store that has some as well. When they tear out old houses they often recycle rather than toss the items.
- Q: We want to pull out our carpeting and use self stick linoleum tiles. What do we need to know?
- They work best when You apply a thin coat of vinyl floor glue to the floor as you go. This works much better than relying on the self stick glue. Otherwise some tiles may come loose or move. And like others said, the wood floor must be clean and smooth.
- Q: I am in the process of installing a slate floor in my mudroom. The durock has been laid, and the tiles cut and sealed, and I‘m ready to start using the medium set to secure the tiles in place, but as I‘ve never laid slate (or any tile) before, I have some questions. 1. The tiles are in place now how I want them, do I have to take up the tiles row by row before I start mortaring them in place, or can I do 1 or 2 tiles at a time?2. I laid the tiles out starting from the center and working outwards. When I lay the tiles in place do I again start at the center, or do I start from the edges, or doesn‘t it matter?3. What is the best way to prevent lippage? As this is slate there is a good amount of variation. Do I just back butter each tile so that it is as high as the highest tile in the room? How do I manage to do that properly?
- Others might disagree, but here's what I suggest: 1. I take up at least a few rows of tile at a time, carefully stacking them in order. 2. Layout should always be done using a center line. There are options for the installation: - If you carefully snap or draw lines for each row on the Durorock and do not use spacers you can start wherever you want, for example against a far wall so that you don't work your way into a corner. - If you only use a center line and rely upon spacers, then you need to start at the center. Tiles tend to drift from each other slightly when you install using spacers, so if you start in the center and work in both directions the net drift toward the edge will be half as much as it would if you work from one edge all the way to the other. - I always draw lines for each row when I do a diagonal installation. I install the longest row first and the work away from it toward the opposite corners. 3. Once I mix a batch of thinset, I don't want to fuss much with tile thickness. So before I even lay the slate tiles out on the floor I sort them from thickest to thinnest. Individual tiles often vary in thickness from one corner to the other; others might have consistent thickness but be dished (not flat). These tiles are candidates to be cut for edge pieces, or they might not be worth using at all. Anyway, I layout the tiles from thickest on one side of the room to thinnest on the other and only need to butter a thin corner of that occasional irregular tile that is pretty enough to be worth the hassle. 4. See my answer to 2.
Send your message to us
Polished Porcelain Tile The White Color CMAXSB4640
- Ref Price:
-
- Loading Port:
- China main port
- Payment Terms:
- TT OR LC
- Min Order Qty:
- 1382.4
- Supply Capability:
- 10000 m²/month
OKorder Service Pledge
OKorder Financial Service
Similar products

Hot products
Hot Searches
Related keywords

