


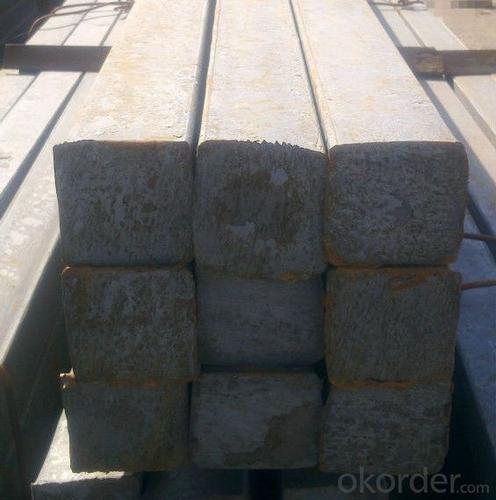


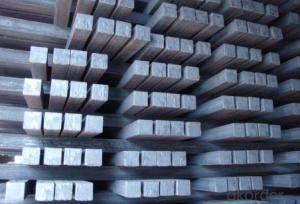
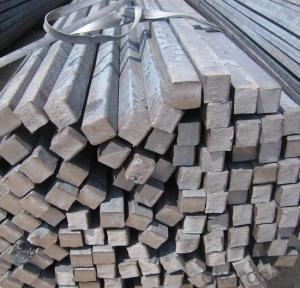
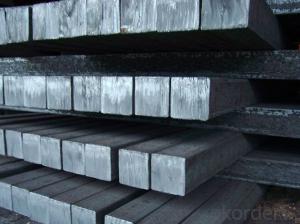
High Quality GB Standard Steel Square Bar
- Ref Price:
-

- Loading Port:
- Tianjin
- Payment Terms:
- TT OR LC
- Min Order Qty:
- 25 m.t
- Supply Capability:
- 10000 m.t/month
OKorder Service Pledge
OKorder Financial Service
You Might Also Like


Product Description:
-Standard: GB,
-Grade: Q195 or equivalent.
-Chemical Composition:
Standard | Grade | Element (%) | ||||
GB | Q195 | C | Mn | S | P | Si |
0.06~0.12 | 0.25~0.50 | ≤0.050 | ≤0.045 | ≤0.30 | ||
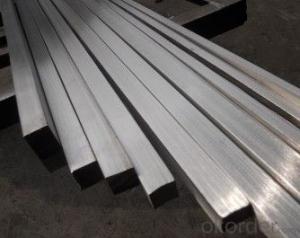
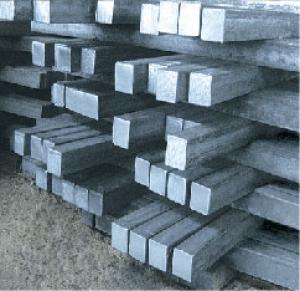
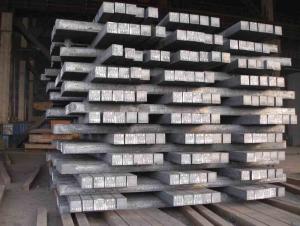
Measures of HR Square Bar (small measures):

(Section of HR Square Bar)
-Length of a side and Theoretical weight of Square Bar.
Length of a side(mm) | Theoretical weight(kg/m) | Length of a side(mm) | Theoretical weight(kg/m) |
7 | 0.385 | 22 | 3.80 |
8 | 0.502 | 24 | 4.52 |
9 | 0.636 | 25 | 4.91 |
10 | 0.785 | 26 | 5.30 |
11 | 0.950 | 28 | 6.15 |
12 | 1.13 | 30 | 7.06 |
13 | 1.33 | 32 | 8.04 |
14 | 1.54 | 34 | 9.07 |
15 | 1.77 | 36 | 10.17 |
16 | 2.01 | 38 | 11.24 |
17 | 2.27 | 40 | 12.56 |
18 | 2.54 | 42 | 13.85 |
19 | 2.82 | 45 | 15.90 |
20 | 3.14 | 48 | 18.09 |
21 | 3.46 | 50 | 19.63 |
Notes:
1, The theoretical weights in the list, base on the density of 7.85 g/cm3.
2, Formula for theoretical weight of Square bar: (length of a side)2 * 0.00785
3, The numbers with *mean that they are not regular or we don’t offer them.
-Regular length of Square Bar:
Steel | Length of a side (mm) | Length of steel (m) |
Normal steel | < 25 | 4~10 |
> 25 | 3~9 | |
Steel of high quality | All measure | 2~6 |
Tool steel >75 | 1~6 |
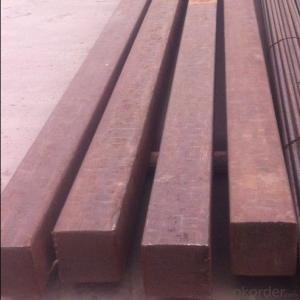
Usage/Applications of HR Square Bar:
-The Square Bar is normally used as structure steel.
-Row material for other structure steel like steel angles, channels, I-beams, H-beams, etc…
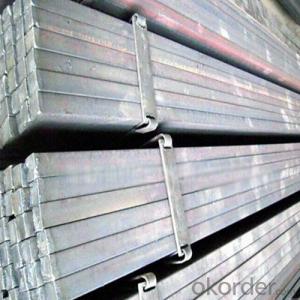
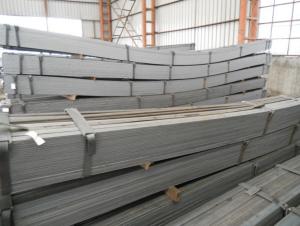
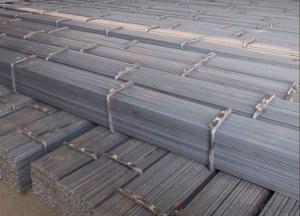
Packaging & Delivery of HR Square Bar:
-Packing Detail: The products can be packed in bundles by steel wires.
-Marks: We make tag marks and color marks. The tag marks with white background and red company logo will be tied up to each bundle of the products. The information is usually including basic information of products and company and other information requested by customers. As for color marks, we will paint both ends of bundles to make sure that it will be more convenient for customers to distinguish them from other products.
-Delivery Detail: 30~45 working days after receive buyer’s T.T. or L/C.
Transportation:
-The products can be delivered by bulk vessel or by container. As for container, products with the length of 6m will be loaded in 20’ container, with 9m or 12m, in 40’ container.
-The maximum quantity of loading of container is 25 tons.
-The products are usually transported to the nearest port from the production place.
- Q: Can a steel square be used for checking the plumbness of a wall stud?
- No, a steel square cannot be used for checking the plumbness of a wall stud. A steel square, also known as a carpenter's square, is mainly used for measuring and marking right angles in woodworking projects. It is not designed or calibrated for checking plumbness. To check the plumbness of a wall stud, a level or plumb bob is typically used. These tools are specifically designed to ensure vertical alignment and are more accurate for this particular task.
- Q: What is the cold drawn steel material? Why did it break?
- Should be low carbon steel, easy to break, because the carbon content of steel or impurities too much, but also later that its ductility is not good, in addition, low temperature is also easy to break
- Q: Can a steel square be used for tile shower layout?
- Indeed, a tile shower layout can benefit from the utilization of a steel square. Known as a framing square or carpenter's square, a steel square is a versatile tool commonly employed in construction and woodworking. Comprising a long arm and a shorter arm that intersect at a 90-degree angle, it is particularly suitable for ascertaining right angles and guaranteeing precision in measurements and layout. In terms of tile shower layout, incorporating a steel square can prove advantageous in guaranteeing the proper alignment and squareness of the walls, floors, and corners. It can facilitate the creation of straight lines, the assessment of squareness, and the assurance of even and symmetrical tile placement. To employ a steel square for tile shower layout, one can commence by measuring and marking the starting point on the wall or floor before aligning the square with these marks to verify squareness. This process assists in determining whether the walls are perpendicular and if the angles measure 90 degrees, which is crucial for achieving a properly aligned shower. Moreover, a steel square can also serve to measure and mark the tiles themselves. By aligning the square with the edges of the tiles, one can ensure accurate cuts, leading to a more precise and professionally finished tile installation. All in all, while alternative tools exist for tile shower layout, a steel square can undoubtedly be employed with efficacy. Its robust construction and precise measurements render it a reliable option for ensuring accuracy and attaining a well-aligned and aesthetically pleasing tile shower.
- Q: Can a steel square be used for checking the squareness of a workbench leg?
- Yes, a steel square can be used for checking the squareness of a workbench leg. A steel square is a versatile tool that is commonly used in woodworking and construction to ensure accurate right angles and squareness. To check the squareness of a workbench leg, you can place the steel square against the leg and the surface it is supposed to be perpendicular to. By aligning the square with the leg and checking if the edges are perfectly perpendicular, you can determine if the leg is square or if it needs adjustments. The steel square provides a reliable and precise measurement for checking squareness in various applications, including workbench legs.
- Q: How do you use a steel square to determine the angle of a drum sanding cut?
- To use a steel square to determine the angle of a drum sanding cut, you will need to follow these steps: 1. Start by setting up the steel square on a flat surface, ensuring that it is perpendicular to the edge of the table or workbench. 2. Place the drum sander on the table, aligning it with the edge of the steel square. 3. Adjust the angle of the drum sander by rotating it until it is parallel to one of the edges of the steel square. 4. Once the drum sander is aligned parallel to the edge of the steel square, measure the angle between the steel square and the drum sander using a protractor or an angle measuring tool. 5. Take note of the angle measurement, as this will be the angle at which you need to set your drum sander for the desired cut. 6. Use the angle measurement to adjust the drum sander accordingly, either by adjusting the table tilt or by using any angle adjustment features available on your specific drum sander model. 7. Double-check the angle by placing the steel square back on the table and aligning it with the drum sander. Ensure that the drum sander is parallel to the edge of the steel square. 8. Once you are confident that the drum sander is set at the desired angle, you can proceed with making your drum sanding cut. It is important to note that using a steel square to determine the angle of a drum sanding cut provides a rough estimate and may not be as accurate as using specialized angle measuring tools. However, it can still be a useful technique for achieving reasonably accurate results in many woodworking tasks.
- Q: Can a steel square be used for plumbing pipe layout?
- Certainly! The steel square is capable of assisting in plumbing pipe layout. Known as a framing square or carpenter's square, this versatile tool can be utilized for various construction and layout tasks. In terms of plumbing pipe layout, the steel square proves beneficial in determining angles, measuring and designating straight lines, and guaranteeing precise cuts and connections. Its functionality extends to measuring and marking the necessary angles for pipe bends, as well as inspecting the overall plumbing layout for squareness and alignment. Moreover, the steel square's robust and enduring nature renders it suitable for use in plumbing applications that demand utmost precision and accuracy.
- Q: How do you use a steel square to determine the center of a circle?
- In order to determine the center of a circle using a steel square, you will require a compass, a pencil, and the steel square itself. Follow these steps: 1. Ensure that the steel square is stable and level by placing it on a flat surface or workbench. 2. Adjust the width of the compass to match the diameter of the circle you wish to find the center of. Secure the width by tightening the compass. 3. Position the compass on the steel square, with one leg resting against the inside edge of the square and the other leg extending beyond the edge. 4. Firmly hold the compass and rotate it along the inside edge of the steel square, drawing an arc on the surface below. 5. Repeat this process by rotating the compass along the outside edge of the steel square, drawing another arc that intersects the first one you drew. 6. The point where the two arcs intersect is an approximate center of the circle. 7. To verify the accuracy of the center point, slightly adjust the compass width and repeat the process. The new arcs should intersect at the same point as before, indicating that you have found the true center of the circle. Remember to exercise precision and caution when using a steel square to determine the center of a circle. Utilizing multiple measurements and varying compass widths can contribute to maintaining accuracy in your calculations.
- Q: Can a steel square be used for deck construction?
- Yes, a steel square can be used for deck construction. Steel squares, also known as framing squares or rafter squares, are versatile tools commonly used by carpenters in construction projects, including deck building. They are typically made of steel and have markings and measurements that help with layout and angle calculations. Steel squares can be used to measure and mark cuts, check for squareness, and lay out the framing components of a deck, such as joists, beams, and posts. They are durable and provide accurate measurements, making them a suitable choice for deck construction.
- Q: Can a steel square be used for framing?
- Yes, a steel square can be used for framing. Steel squares are commonly used in construction and carpentry for measuring, marking, and aligning angles and lengths, making them a versatile tool for framing projects.
- Q: How do you use a steel square to check for level and plumb?
- To use a steel square to check for level, you can place one side of the square against a surface and observe if the bubble in a level is centered within the vial. If it is, the surface is level. For checking plumb, you can hold the square against a vertical surface and ensure that the edge of the square is parallel to the surface. If it is, the surface is plumb.
Send your message to us
High Quality GB Standard Steel Square Bar
- Ref Price:
-
- Loading Port:
- Tianjin
- Payment Terms:
- TT OR LC
- Min Order Qty:
- 25 m.t
- Supply Capability:
- 10000 m.t/month
OKorder Service Pledge
OKorder Financial Service
Similar products


Hot products


Hot Searches
Related keywords

