


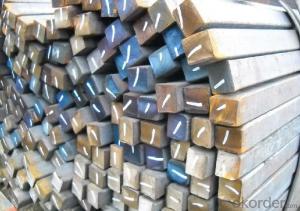
Alloyed square bar
- Ref Price:
-

- Loading Port:
- China Main Port
- Payment Terms:
- TT OR LC
- Min Order Qty:
- -
- Supply Capability:
- -
OKorder Service Pledge
OKorder Financial Service
You Might Also Like


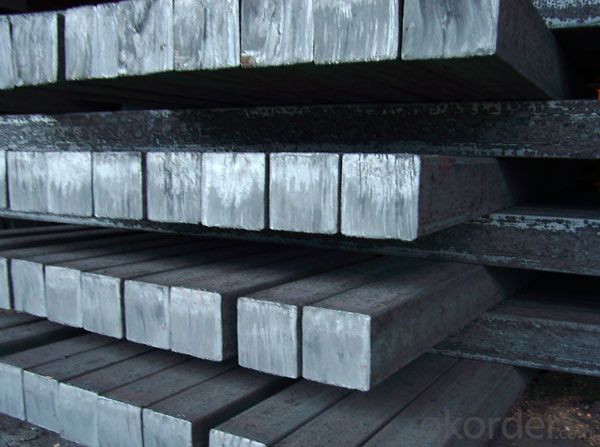
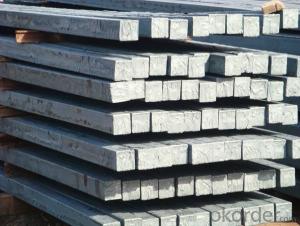
hot rolled square steel billet
1.Q195 Q235 Q345B
2.terms of payment: L/C T/T
3.size: 100~150mm length: 5.8~12m
4.certificate:GB
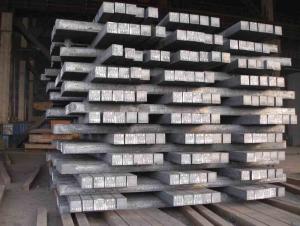
Type | Steel billet |
Standard Grade | a. 3SP/PS |
b. Q235 | |
c. 5SP d. Q275 | |
Size | 120mm x 120mm-150mm x 150mm etc. as per customers' requirement |
Length | 12m as standard |
Application | Carbon structural steel, Alloy steel, Gear steel, etc. |
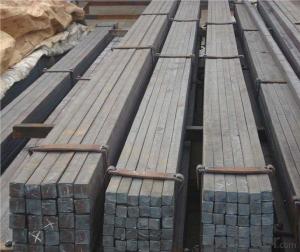
Packing | standard export packing, or as per customers' requirement |
Quality | First quality |
Delivery time | Right now after the deposit. |
Others | 1. our products conform to all the standards |
2. we can offer special specification products as per our customers | |
3. we can offer the original mill test certificate and original production |
- Q: Can a steel square be used for measuring the height of a flagpole?
- No, a steel square cannot be used for measuring the height of a flagpole. A steel square, also known as a try square, is a tool used primarily for measuring and marking angles of 90 degrees. It is not designed or equipped to measure vertical distances or heights. To measure the height of a flagpole, one would typically use a measuring tape, a laser distance meter, or some other device specifically designed for measuring vertical distances.
- Q: What are the different sizes of steel squares available?
- Steel squares are available in various sizes, ranging from small squares with sides measuring a few inches to larger squares with sides measuring several feet. The specific sizes available may vary depending on the manufacturer and supplier.
- Q: Can a steel square be used for other materials besides wood?
- Yes, a steel square can be used for other materials besides wood. A steel square is a versatile tool that is commonly used in carpentry and other trades for measuring and marking right angles. It is made of steel, which is a strong and durable material, capable of withstanding the pressure and wear associated with various materials. While it is commonly associated with woodworking, a steel square can also be used for measuring and marking right angles in other materials such as metal, concrete, and plastic. Its accuracy and sturdiness make it a reliable tool for precise measurements and layout work across multiple materials.
- Q: Can a steel square be used for measuring and marking compound bevel cuts?
- Yes, a steel square can be used for measuring and marking compound bevel cuts. A steel square is a versatile tool that can be used for various woodworking tasks, including measuring and marking angles for compound bevel cuts. However, it is important to note that a steel square alone may not provide the precise measurements required for compound bevel cuts. It is recommended to use additional tools, such as a bevel gauge or a protractor, to accurately determine the angles needed for compound bevel cuts.
- Q: How do you use a steel square to measure the height of a wall?
- To use a steel square to measure the height of a wall, you will need a few additional tools such as a measuring tape, a pencil, and a ladder if the wall is tall. Begin by setting up the ladder securely near the wall so that you can easily access its top. Next, position yourself on the ladder and hold the steel square against the wall with one arm extended. Ensure that the long side of the square is vertical and rests flush against the wall. Now, take the measuring tape and measure the length of the steel square from the bottom to the top. This measurement represents the height of the square. After obtaining the height measurement, mark it with a pencil on the wall at the bottom of the square. Repeat this process for any additional measurements needed for the wall. Finally, climb down the ladder and use the measuring tape to measure the distance from the marked point on the wall to the floor. This measurement will give you the height of the wall. Remember to take safety precautions when using a ladder and ensure that it is stable. Additionally, double-check your measurements to ensure accuracy.
- Q: What are the different techniques for using a steel square in metal fabrication?
- There are several techniques for using a steel square in metal fabrication, depending on the specific task at hand. One common technique is using the steel square as a measuring and marking tool. The square's straight edge can be used to mark straight lines on metal sheets or other surfaces, ensuring accurate and precise measurements. Additionally, the square's 90-degree angle can be used to mark perpendicular lines, helping to create square cuts and accurate angles during fabrication. Another technique involves using the steel square as a guide for cutting and shaping metal. By placing the square's edge against the metal surface, it can act as a guide for sawing, shearing, or cutting tools, ensuring straight and accurate cuts. This technique is particularly useful when creating parts that require precise measurements or when fabricating joints that need to fit together perfectly. The steel square can also be used as a layout tool for creating patterns and templates. By using the square's angles and edges, fabricators can easily transfer measurements and dimensions onto a metal surface, allowing for consistent and uniform fabrication. This technique is often used when creating complex shapes or intricate designs that require careful planning and layout. Furthermore, the steel square can be utilized as a checking tool to ensure accuracy and alignment. By placing the square against a surface or joint, fabricators can quickly verify if the angle is true or if the workpiece is square. This technique is crucial in metal fabrication, as it helps prevent errors and ensures the final product meets the required specifications. In summary, the different techniques for using a steel square in metal fabrication include measuring and marking, guiding cutting tools, layout and pattern creation, as well as checking for accuracy and alignment. These techniques are essential for achieving precision and quality in metal fabrication processes.
- Q: How do you use a steel square to mark out 75-degree angles?
- To use a steel square to mark out 75-degree angles, you would typically follow these steps: 1. Place the steel square on a flat surface or workpiece, ensuring that the long side of the square is parallel to the edge you want to mark the angle on. 2. Align one edge of the square with the desired starting point of the angle. This edge will serve as the reference line for marking the angle. 3. Locate the 45-degree angle line on the steel square. This line is usually marked with a number or a symbol. 4. From the reference line, measure in the direction of the angle you want to mark, counting inwards along the 45-degree angle line. In this case, measure 30 degrees inwards along the 45-degree line. 5. Once you have measured the appropriate distance, make a mark at that point. This mark indicates the starting point of the 75-degree angle. 6. From the starting point, measure an additional 75 degrees in the desired direction, using the appropriate scale on the steel square. This could be the 90-degree line or a specific angle scale marked on the square. 7. Make a second mark at the endpoint of the 75-degree angle, completing the marking process. Remember to double-check your measurements and use a sharp pencil or marker to ensure accurate and visible markings. Additionally, practice using the steel square on scrap material before marking your final workpiece to ensure precision.
- Q: Can a steel square be used for checking the squareness of bookshelves?
- Bookshelves can be checked for squareness using a steel square, which is a versatile tool frequently employed by carpenters and woodworkers to guarantee precision and accuracy in their projects. With its straight edges and right angles, the steel square is well-suited for assessing the squareness of various objects, including bookshelves. To employ a steel square, position one of its straight edges against the bookshelf's edge and align the other edge perpendicularly to it. This will enable you to ascertain if the shelf is perfectly square or if there are any disparities. By comparing the angles formed by the steel square with the corners of the bookshelf, you can identify any misalignments and make necessary adjustments. The verification of bookshelf squareness is crucial for stability, proper alignment, and functionality. A square bookshelf will offer superior support to the books, preventing them from leaning or toppling over. It will also ensure that the bookshelf fits seamlessly into its designated space, avoiding any gaps or irregularities. Therefore, if you possess a steel square, it can serve as a valuable tool for evaluating bookshelf squareness and guaranteeing the quality and functionality of your furniture.
- Q: Can a steel square be used for marking out tenon shoulders?
- Tenon shoulders can be marked out using a steel square. A steel square, also referred to as a try square, is a commonly used woodworking tool for layout and marking. Its straight edge and 90-degree angle make it perfect for precise and accurate line marking. In order to achieve a well-fitted tenon joint, it is crucial to ensure that the lines are perpendicular to the wood's face and edge. This can be achieved by aligning the straight edge of the steel square with the wood's face and edge, and then marking the shoulder lines along the square's edge. By doing so, the tenon's shoulders will be square and straight, resulting in a sturdy and well-fitted joint.
- Q: Can a steel square be used for checking the squareness of a bandsaw table?
- Yes, a steel square can be used for checking the squareness of a bandsaw table. A steel square is a tool with a right angle shape, typically made of steel, and is commonly used for measuring and checking the squareness of various woodworking and metalworking tools, including bandsaw tables. To check the squareness of a bandsaw table using a steel square, you would place the square against the table's surface and ensure that it is flush against both the front and side edges. By doing so, you can visually inspect if the table is perfectly square or if there is any deviation. If the table is perfectly square, the square's edges will align perfectly with the table's edges. However, if there is a gap or overlap between the square and the table's edges, it indicates that the table is not square and adjustments may need to be made. It is important to note that while a steel square is a useful tool for checking squareness, it is always a good practice to use multiple measurement and checking methods to ensure accuracy. Additionally, following the manufacturer's instructions and guidelines for your specific bandsaw model is crucial when making any adjustments to the table's squareness.
Send your message to us
Alloyed square bar
- Ref Price:
-
- Loading Port:
- China Main Port
- Payment Terms:
- TT OR LC
- Min Order Qty:
- -
- Supply Capability:
- -
OKorder Service Pledge
OKorder Financial Service
Similar products


Hot products


Hot Searches
Related keywords

