


Steel Square Bar with Length of 6M, 8M and 12M
- Ref Price:
-

- Loading Port:
- Tianjin
- Payment Terms:
- TT OR LC
- Min Order Qty:
- 25 m.t.
- Supply Capability:
- 1000 m.t./month
OKorder Service Pledge
OKorder Financial Service
You Might Also Like


1. Structure of Steel Square Bar with Length of 6M, 8M and 12M Description:
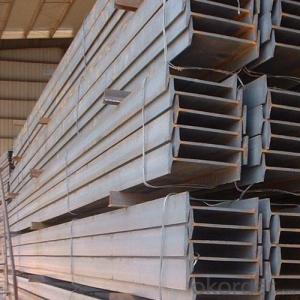
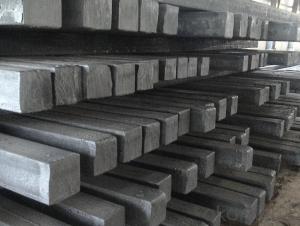
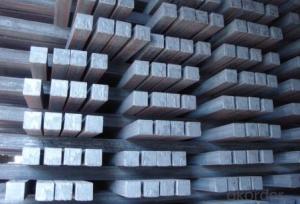
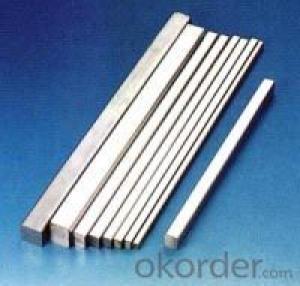
Steel square bar with length of 6M, 8M and 12M is a bar with square shaped cross-section. It is special case of equal sides. Before steel products are sold on the market, the steel must first be processed into more functional pieces. Raw steel cannot be of use while in its pure form, thus it has to be cast into shape. The freshly made steel, steel square bar with length of 6M, 8M and 12M is still in the form of a metal bar or rectangle. Small sizes of steel square bar with length of 6M, 8M and 12M are used in ship building.
2. Main Features of Steel Square Bar with Length of 6M, 8M and 12M :
• Grade: Q235
• Type: Mild carbon steel
• A quadrilateral with four equal sides and four right angles.
• Vibration: The stiffness and mass are chosen to prevent unacceptable vibrations, particularly in settings sensitive to vibrations, such as offices and libraries.
• Local yield: Caused by concentrated loads, such as at the beam's point of support.
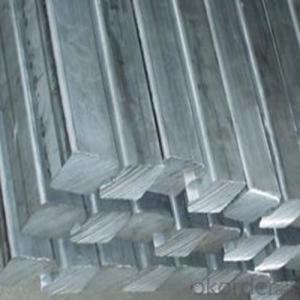
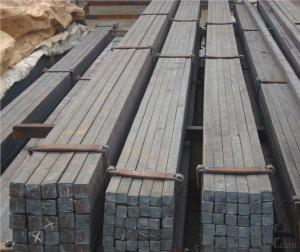
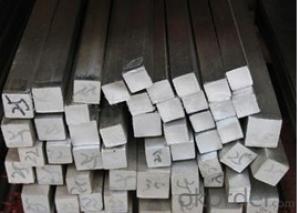
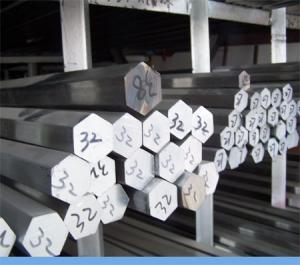
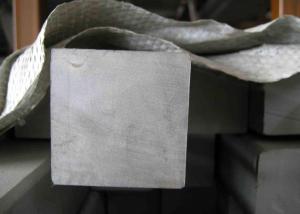
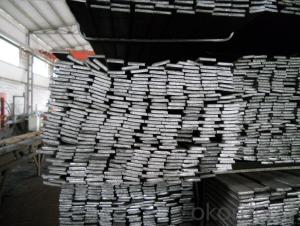
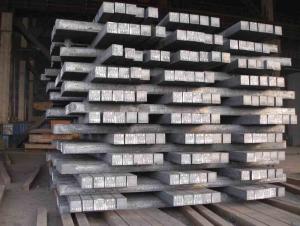
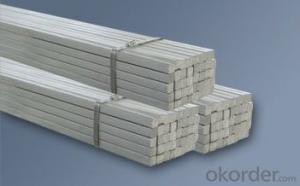
3. Steel Square Bar with Length of 6M, 8M and 12M Images:


4. Steel Square Bar with Length of 6M, 8M and 12M Specification:
Mechanical Properties | Grade | Steel diameter(mm) | |||
≤16 | 16~40 | 40~60 | 60~100 | ||
Yield Point Δs/MPa | Q195 | ≥195 | ≥185 | - | - |
Q235 | 235 | 225 | 215 | 205 | |
Tensile Strength | Q195 | 315~390 | |||
Q235 | 375~500 | ||||
Elongation δ5% | Q195 | ≥33 | ≥32 | - | - |
Q235 | 26 | 25 | 24 | 23 | |
5. FAQ
We have organized several common questions for our clients,may help you sincerely:
①What is the main material?
There are two types of Square Bar, one is hot rolled square bar and other one is cold drawn square bar. Our principal products is hot rolled square bar. We dedicate to products with material Q195 and Q235. We offer products with high quality and low price.
②How to inspect the quality?
We have a professional inspection group which belongs to our company. We resolutely put an end to unqualified products flowing into the market. At the same time, we will provide necessary follow-up service assurance.
③Is there any advantage about this kind of product?
Steel I beam bar IPE has a reduced capacity in the transverse direction, and is also inefficient in carrying torsion, for which hollow structural sections are often preferred.
- Q: What are some common applications for a steel square in stair construction?
- A steel square, also known as a framing square or carpenter's square, is a versatile tool that is commonly used in stair construction. Here are some common applications for a steel square in this context: 1. Layout and marking: Steel squares are used to lay out and mark the dimensions of stair stringers, which are the structural supports of the stairs. By using the square's measurements and angles, carpenters can accurately mark the length, width, and angle cuts needed for the stringers. 2. Angle cuts: Steel squares are essential for making accurate angle cuts on stair stringers. By aligning the square with the desired angle, carpenters can ensure precise cuts that will result in properly fitting and stable stairs. 3. Checking for squareness: During stair construction, it is crucial to ensure that all corners and joints are perfectly square. Steel squares can be used to check the squareness of stringer cuts, treads, risers, and other stair components. This helps in achieving a level and balanced staircase. 4. Determining rise and run: The rise and run of a staircase are critical factors that determine the overall comfort and safety of the stairs. Steel squares can be used to measure and mark the rise (vertical distance between steps) and run (horizontal distance of each step) accurately, ensuring consistency and compliance with building codes. 5. Bracing and support: Steel squares can also be used to create bracing and support structures for stairs. By using the square to measure and cut the necessary angles, carpenters can fabricate sturdy brackets and supports that ensure the stability and strength of the staircase. Overall, a steel square is an indispensable tool in stair construction. Its accuracy, versatility, and ability to measure and mark angles make it a reliable companion for carpenters and builders when designing, constructing, and ensuring the quality of stairs.
- Q: What are the different techniques for using a steel square in welding?
- To ensure accurate measurements and angles during the welding process, various techniques can be employed using a steel square. These techniques encompass: 1. Verifying angles: Before and after welding, welders can employ a steel square to verify the accuracy of angles. By positioning the square against the joint, welders can confirm if the angles are square (90 degrees) or match the desired angle. 2. Layout and marking: Steel squares serve as exceptional tools for laying out and marking lines on the workpiece. They facilitate the creation of straight lines, marking reference points, and accurate measurement transfer. 3. Aligning corners: Prior to welding, it is crucial to ensure proper alignment and squareness of corners. By placing a steel square against the corners, welders can ascertain if they are square, allowing any necessary adjustments to be made before welding. 4. Aligning fixtures and jigs: When setting up fixtures or jigs for welding, a steel square can be utilized to ensure proper alignment. It can be applied against the fixture or jig to check for squareness or parallelism, enabling adjustments if required. 5. Measuring and transferring dimensions: Steel squares possess precise markings along their edges, enabling welders to measure and transfer dimensions accurately. This is especially beneficial when aligning or fitting pieces together before welding. 6. Detecting distortion: Following welding, a steel square can be used to detect any distortion or warping in the workpiece. By placing the square against the welded joint, any irregularities can be easily identified and rectified. In essence, a steel square is a versatile tool in welding, aiding in layout, alignment, measurement, and angle verification. By employing these techniques, welders can ensure the precision and quality of their work.
- Q: How do you use a steel square to mark out 20-degree angles?
- In order to mark out a 20-degree angle using a steel square, it is necessary to follow these instructions: 1. Ensure that the steel square is properly aligned and secured by placing it on a flat surface. 2. Identify the L-shaped corner of the steel square where the longer and shorter sides meet; this is the 90-degree angle. 3. Locate the 45-degree angle on the longer side of the square, usually marked close to the 90-degree angle. 4. Position the steel square with the 90-degree angle facing towards you in order to find the 20-degree angle. 5. Starting from the 45-degree angle, count towards the shorter side of the square, measuring a distance less than halfway between the 45-degree and 90-degree angles. 6. Mark a point on the shorter side of the square at this measured distance. 7. Align a straight edge or ruler with the marked point and the 90-degree angle on the square. 8. Draw a line connecting the marked point on the square and the straight edge/ruler, extending it beyond the square. 9. This line will create a 20-degree angle with the square, allowing you to accurately mark the desired angle on your workpiece. Always remember to double-check your measurements and use a reliable protractor or angle gauge to ensure the accuracy of your marked angles.
- Q: Can a steel square be used for checking the alignment of a planer table?
- Yes, a steel square can be used for checking the alignment of a planer table.
- Q: How do you use a steel square to find angles for compound bevel miter cuts?
- To find angles for compound bevel miter cuts using a steel square, follow these steps: 1. Clean your steel square thoroughly, removing any debris. 2. Decide on the desired angle for the compound bevel miter cut based on your specific project or design. 3. Align the steel square properly and firmly against the edge of the material where the cut will be made. 4. Find the angle measurement on the steel square that corresponds to your desired angle. This measurement is usually marked on the square. 5. Mark the material at the corresponding angle on the square, using a pencil or marker. This mark will serve as a guide for making the cut. 6. Repeat this process for any other edges or sides of the material that require the same angle for the compound bevel miter cut. 7. Once all the necessary marks are made, use a saw or appropriate cutting tool to carefully follow the marked lines and make the desired compound bevel miter cuts. It is crucial to note that using a steel square demands accuracy and precision. Before cutting, double-check your measurements and marks to ensure the best results. Furthermore, with practice and experience, your ability to effectively use a steel square for compound bevel miter cuts will improve.
- Q: Can a steel square be used for setting up a scroll saw?
- Indeed, the setup of a scroll saw can involve the utilization of a steel square. A steel square possesses great versatility as a woodworking tool, serving multiple purposes, such as the establishment of a scroll saw. By implementing this tool, one can guarantee that the table of the scroll saw aligns flawlessly with the blade, resulting in meticulous and precise cuts. Simply position the steel square against both the blade and the table, enabling the adjustment of the table's angle until it achieves complete squareness. This technique will greatly aid in the attainment of straight and immaculate cuts when operating the scroll saw.
- Q: Can a steel square be used for measuring roof pitch?
- Yes, a steel square can be used for measuring roof pitch. It is a versatile tool that can be used for various carpentry tasks, including determining the pitch of a roof. The measurements and angles on a steel square can help calculate the roof's slope and pitch accurately.
- Q: How do you use a steel square to determine the angle of a compound cove cut?
- To use a steel square to determine the angle of a compound cove cut, you would first place the steel square against the edge of the material being cut. Then, you would align one side of the square with the straight edge of the material and the other side with the curved edge. By measuring the angle formed between the straight edge and the curved edge using the markings on the steel square, you can determine the angle of the compound cove cut.
- Q: Can a steel square be used for countertop installation?
- Yes, a steel square can be used for countertop installation. It can be used to ensure accurate measurements and right angles during the installation process.
- Q: Can a steel square be used for laying out a foundation?
- Yes, a steel square can be used for laying out a foundation. Steel squares are commonly used in construction for various purposes, including laying out foundation lines, checking right angles, and measuring angles and distances. Their durability and accuracy make them a reliable tool for ensuring proper alignment and dimensions during the foundation laying process.
Send your message to us
Steel Square Bar with Length of 6M, 8M and 12M
- Ref Price:
-
- Loading Port:
- Tianjin
- Payment Terms:
- TT OR LC
- Min Order Qty:
- 25 m.t.
- Supply Capability:
- 1000 m.t./month
OKorder Service Pledge
OKorder Financial Service
Similar products

Hot products


Hot Searches
Related keywords

