


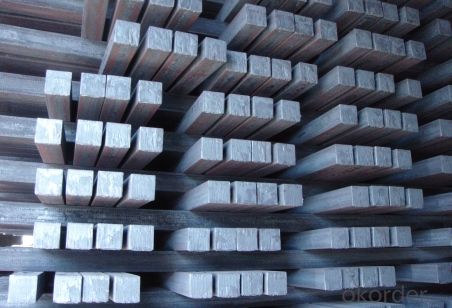


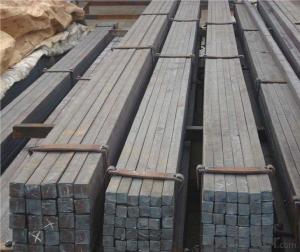
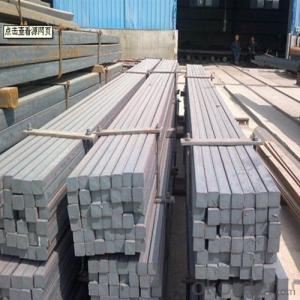
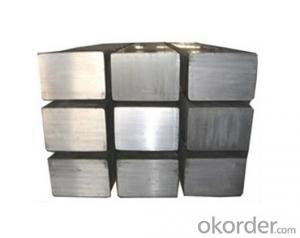
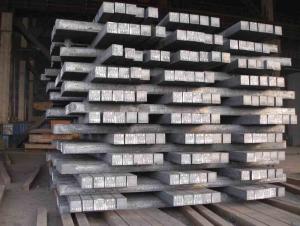
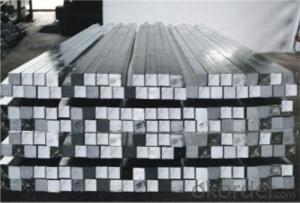
Good Quality Square Steel
- Ref Price:
-

- Loading Port:
- China Main Port
- Payment Terms:
- TT OR LC
- Min Order Qty:
- -
- Supply Capability:
- -
OKorder Service Pledge
Quality Product, Order Online Tracking, Timely Delivery
OKorder Financial Service
Credit Rating, Credit Services, Credit Purchasing
You Might Also Like


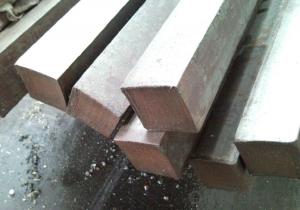
Product name | Square Bar |
SIZE | 5-80mm |
Technique | cold drawn |
Shape | Round square flat hexagonan, irregular bar. |
Material | Q235,45#,40Cr,20# 55Cr3,SAE9254,SUP12V,55CrSi,60Si2CrVA,SUP6.SUP7,SUP9 |
Quality grade | First grade |
Tolerence of OD | ±0.5mm |
Length | Acorrding customer’s requirement |
MOQ | 1MetricTon |
Deliver Time | 15-30 days after receive your deposits. |
Package | Inneer bunding with steel wires, steel stripes or steel rebars; outer packing is plastic braided bags; standard seaworthy export packing; other types of packings can be customized. |
- Q: Can a steel square be used for measuring angles in concrete formwork?
- Typically, a steel square is not employed for measuring angles in concrete formwork. In woodworking and various construction applications, steel squares are chiefly utilized for measuring and marking right angles. On the other hand, specialized tools like angle finders or protractors are commonly employed in concrete formwork to precisely measure and set desired angles. These tools are specifically designed for angle measurement and offer more accuracy compared to a steel square.
- Q: Can a steel square be used for marking out tenons?
- Yes, a steel square can be used for marking out tenons. It is a versatile tool commonly used in woodworking for measuring, marking, and checking right angles. The steel square can help ensure accuracy and precision when marking the dimensions and angles required for cutting tenons.
- Q: Can a steel square be used for checking the squareness of a door jamb?
- The squareness of a door jamb can be checked using a steel square. This versatile tool, known as a framing square or carpenter's square, is commonly used in carpentry and woodworking projects. Its purpose is to ensure accuracy and squareness in various construction tasks with its 90-degree angle. To check the squareness of a door jamb, simply place the steel square against the inside edge of the jamb, making sure that the 90-degree angle of the square lines up with the corner of the jamb. By visually inspecting the alignment of the square against the jamb, any deviations from a perfect 90-degree angle can be detected. If the steel square reveals that the jamb is not perfectly square, adjustments can be made to achieve proper alignment. This might require shimming or trimming the jamb to obtain the desired squareness. Overall, a steel square is an invaluable tool for checking and correcting the squareness of a door jamb, ensuring that the door fits properly.
- Q: How does a steel square assist in determining the correct angle for a half-blind dovetail joint?
- Determining the correct angle for a half-blind dovetail joint can be facilitated by employing a steel square. This implement is a valuable asset in woodworking as it enables the creation of a durable and aesthetically pleasing connection between two pieces of wood, commonly found in drawers or boxes. When constructing a half-blind dovetail joint, one side of the joint is exposed while the other remains concealed within the wood. The exposed side is typically cut at a 90-degree angle to achieve a tidy and polished appearance. Conversely, the concealed side necessitates an angle that aligns with the slope of the dovetail pins. This is crucial to ensure a snug and robust joint. This is where a steel square becomes advantageous. A steel square is a flat, triangular tool with a 90-degree angle. Utilizing this instrument allows for the precise determination of the angle required to cut the concealed side of the joint. To begin, designate the desired angle on the steel square. This angle should correspond to the inclination of the dovetail pins, typically ranging from 7 to 9 degrees. Subsequently, position the steel square against the wood piece's edge, aligning the marked angle with the edge. By firmly securing the square in place, you can utilize it as a guide to accurately cut the concealed side of the joint at the appropriate angle. Employing a steel square guarantees the accuracy of the half-blind dovetail joint's angle, ensuring it matches the dovetail pins' slope. This precision contributes to the creation of a tight and professionally-crafted joint, enhancing both the strength and visual appeal of the final woodworking project.
- Q: What are the different features to consider when buying a steel square?
- When buying a steel square, there are several important features to consider. Firstly, the size of the square is crucial. Steel squares come in various sizes, typically ranging from 6 inches to 24 inches. The size you choose will depend on the scale of your projects and the level of precision you require. Secondly, the material and build quality of the square are important considerations. Look for a steel square made from high-quality, durable steel that can withstand heavy use and resist corrosion. Additionally, check for accuracy in the square's construction, ensuring that the edges are straight and the angles are precise. The markings and measurements on the square are also vital features to consider. Look for clear, easy-to-read markings that are permanently etched or stamped onto the square. These markings should include accurate measurements, such as inches, centimeters, and degrees, allowing for precise measurements and layout work. Another feature to consider is the type of square. There are different types available, including combination squares, framing squares, and try squares, each serving different purposes. Consider the specific tasks you will be using the square for and choose the type that best suits your needs. Additionally, the square's weight and handle design should be taken into account. A heavier square may provide more stability, while a lighter one may be more comfortable to use for extended periods. The handle should be ergonomic and easy to grip, ensuring comfort and control during use. Lastly, consider the brand and price of the steel square. It is generally recommended to choose a reputable brand that has a track record of producing high-quality tools. While price is not always an accurate indicator of quality, it is important to find a balance between affordability and durability, ensuring that you are getting the best value for your money. In conclusion, when buying a steel square, consider the size, material quality, markings, type, weight, handle design, brand, and price. By carefully considering these features, you can find a steel square that meets your specific needs and provides accurate and reliable measurements for your projects.
- Q: Can a steel square be used for measuring angles in concrete formwork?
- No, a steel square is not typically used for measuring angles in concrete formwork. Steel squares are primarily used for measuring and marking right angles in woodworking and other construction applications. When it comes to concrete formwork, specialized tools such as angle finders or protractors are more commonly used to accurately measure and set the desired angles. These tools are designed specifically for measuring angles and provide a more precise measurement than a steel square.
- Q: Can a steel square be used for checking the squareness of a door opening?
- Yes, a steel square can be used for checking the squareness of a door opening. A steel square, also known as a framing square or carpenter's square, is a versatile tool typically made of steel with markings for measuring angles and ensuring right angles. It has a 90-degree angle and can be used to check the squareness of various objects, including door openings. To check the squareness of a door opening using a steel square, you would position the square against the edges of the door jamb or frame, ensuring it is flush and flat against both sides. By observing the alignment of the square's edge against the door jamb, you can determine if the corners of the opening are 90 degrees or if there is any deviation from a perfect square. If the steel square fits perfectly against both sides of the door jamb and there are no gaps or overlaps, then the door opening is square. However, if there is a gap or the square does not align properly with the edges, it indicates that the door opening is not square, and adjustments need to be made to ensure proper installation of the door. In conclusion, a steel square is an effective tool for checking the squareness of a door opening. It allows for accurate measurement and assessment, helping to ensure that the door will fit properly and function correctly once installed.
- Q: How do you use a steel square to determine the slope of a drainage pipe?
- In order to determine the slope of a drainage pipe using a steel square, a few steps must be followed. Firstly, it is important to ensure that the steel square is clean and free from any dirt or debris that could impact the accuracy of the measurement. Next, locate the specific section of the drainage pipe where the slope needs to be determined. It is preferable for this section to be straight, without any curves or bends. Place the steel square on top of the pipe, making sure that one of the edges of the square runs parallel to the length of the pipe. Observe the position of the steel square on the pipe. If the pipe is sloping downwards, one corner of the square will be resting while the other corner will be raised. Conversely, if the pipe is sloping upwards, one corner of the square will be resting while the other corner will be lowered. To determine the slope of the drainage pipe, measure the difference in height between the two corners of the square. This can be accomplished by employing a tape measure or a ruler to measure the vertical distance between the two corners. It is essential to take multiple measurements along the length of the pipe to ensure accuracy since the slope may vary in different sections. Using a steel square to determine the slope of a drainage pipe is a straightforward and efficient method that can be utilized by professionals and DIY enthusiasts alike to guarantee proper drainage and prevent issues such as water pooling or blockages.
- Q: Can a steel square be used for checking the levelness of shelves?
- No, a steel square cannot be used for checking the levelness of shelves. A steel square, also known as a framing square, is primarily used in carpentry and woodworking to measure and mark angles and to ensure the accuracy of right angles. It is not designed or suitable for checking the levelness of shelves. To check the levelness of shelves, a level tool such as a spirit level or a laser level should be used. These tools are specifically designed to determine if a surface is perfectly horizontal or level. They provide a much more accurate and reliable measurement for ensuring the levelness of shelves.
- Q: Can a steel square be used for cabinet making?
- Yes, a steel square can be used for cabinet making. A steel square, also known as a framing square or carpenter's square, is a versatile tool that is commonly used in woodworking. While it is not specifically designed for cabinet making, it can still be effectively used for various tasks in the cabinet making process. A steel square is typically made of durable steel and consists of two arms, one longer than the other, that meet at a right angle. It is used to mark and measure angles, check for squareness, and ensure accurate and precise cuts. These features make it an essential tool for cabinet making. When building cabinets, a steel square can be used to determine and mark the correct angles and measurements for cutting and joining the cabinet components, such as the panels, shelves, and doors. It can help ensure that the cabinet is square and properly aligned, resulting in a well-built and structurally sound piece of furniture. Additionally, a steel square can be used to check the squareness of corners and joints, ensuring that they are perfectly 90 degrees. This is crucial for achieving a professional and seamless finish in cabinet making. Although there are specialized tools available for specific tasks in cabinet making, a steel square is a versatile and cost-effective option that can be used for a wide range of measurements and marking purposes. It is a tool that is commonly found in the toolbox of both amateur and professional cabinet makers alike.
Send your message to us
Good Quality Square Steel
- Ref Price:
-
- Loading Port:
- China Main Port
- Payment Terms:
- TT OR LC
- Min Order Qty:
- -
- Supply Capability:
- -
OKorder Service Pledge
Quality Product, Order Online Tracking, Timely Delivery
OKorder Financial Service
Credit Rating, Credit Services, Credit Purchasing
Similar products


Hot products


Hot Searches
Related keywords

