
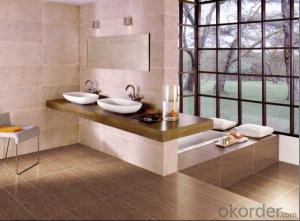
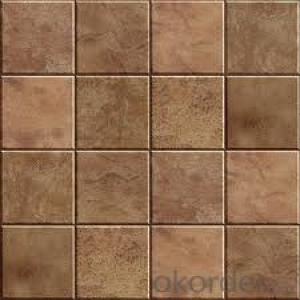
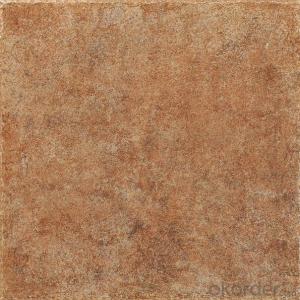


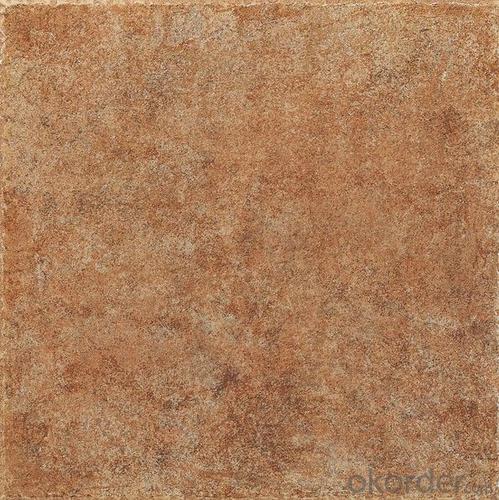
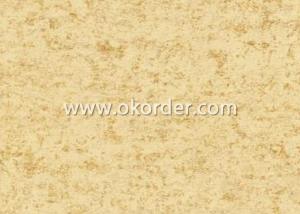
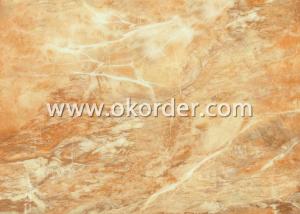
Rustic Tile CMAX 6883
- Ref Price:
-

- Loading Port:
- China Main Port
- Payment Terms:
- TT OR LC
- Min Order Qty:
- -
- Supply Capability:
- -
OKorder Service Pledge
OKorder Financial Service
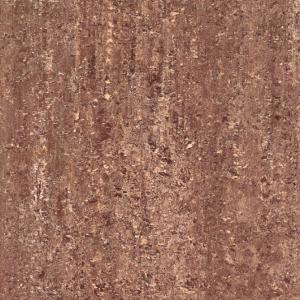
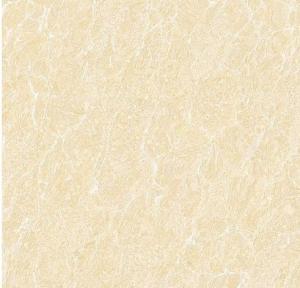
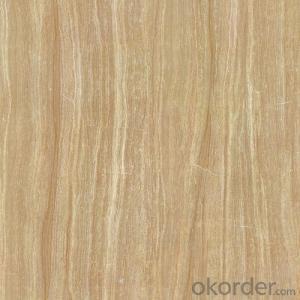
You Might Also Like


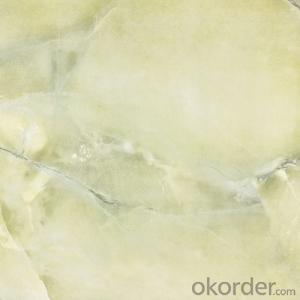

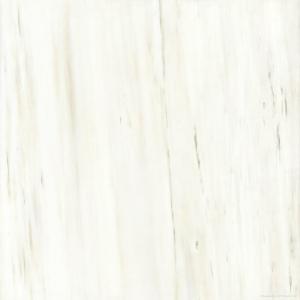
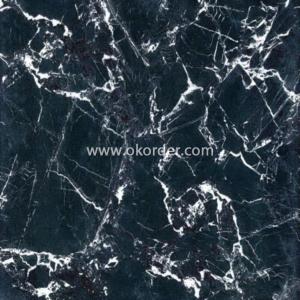
Product Description:
Key Specifications/Special Features:
Size: 300 x 300mm; 400 x 400 mm; 500 x 500 mm;
MOQ: 1 x 20ft FCL
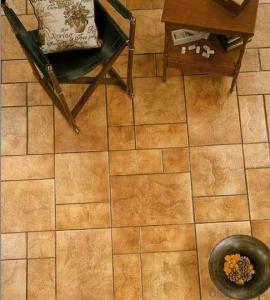
Applications:
Thin slabs are made from clay and other inorganic raw materials
Generally used as coverings for floors and walls, usually shaped by extruding (A) or pressing (B) at room temperature but may be formed by other processes (C), then dried and subsequently fired at temperatures sufficient to develop the required properties
Tiles can be glazed (GL) or unglazed (UGL) and are incombustible and unaffected by light
Standards: GB/T 4100-2006, ISO 13006:1998 (E)
Certificates: ISO 13006:1998 (E), SASO 1031/1998
Primary Competitive Advantages:
Brand-name Parts
Experienced Staff
Price
Prompt Delivery
Quality Approvals
Stock
Good Payment Term
Main Export Markets:
Eastern Europe
North America
Mid East/Africa
Central/South America
Asia
Western Europe
Australasia

Packing:
Tiles are packed in styrfoam boxes and are further packed into fumigated wooden crate. For slabs, each slab is packed in a separate polythene wrapper to reduce or avoid scratching of tiles and slabs which are packed face to face. 2cm slabs about 15-18pcs in one bundle; 3cm slabs about 10-13pcs in one bundle


About the certificate:


Our Advantanges:
1. Our company is a state-owned group company. So we have good reputation and credibility.
2. We own many qurries in china,brazil,iran,india to ensure our supply of different types of granite,marble,limestone,sandstone,etc.
3. We are a professional manufacturer so we can provide you various tiles with high quality and best price.
4. We have more than 5 years exports experience.So we can make your order more smooth.
5. All of our goods will pass THREE QUALITY INSPECTIONS before shippment.
6. Best after sale service, customer can follow their orders situation any time, no matter on production line, warehouse or shippment.
7.Special dimensions available according to your request.
8.We have many certifications of our tiles.
Here you can find good productions, better price and best service; please enjoying and welcome inquirying!
Choose us is your best choice! Our purpose is: CUSTOMER IS FIRST!
- Q: My dad layed tiles in his kitchen recently. He had some plywood type stuff that he layed them on top of so they are on a flat, even surface. But then someone told him he should have put a netting type stuff underneith the tiles too, to keep them from breaking. Is that very important, will his floor be ruined now?
- Its called wire mesh. Its not used as much anymore. What makes tiles or grout crack is the wood below the tiles. If the floor joists are too far apart and the plywood is not thick enough it can cause the floor to move. Even a little bit of movement can cause the tiles and the grout to crack. The wire mesh will not help if the floor moves.
- Q: I‘m installing 13x13 floor tile on a slab. Any tips on how to do it right
- If your not overly familiar with doing tile a diagonal isn t the easiest to start on. Lay out and proper tools are a big help in your preplanning. Right size trowel and large enough wet saw and had cutter is a must. Get the longest straight site line and split the room in 1/2 with a chalk line. Lay tile back to the wall and figure the size of pc(pcs) you need. You can cut a few of these pcs as a starting point. Knowing you split the room you should be equal when you get to the other side. A perfect straight edge will help keep your lines straight. Use this on all sides as you build out from that wall and lay as though your doing a straight lay just that your on a 45 degree. Or if you are doing an open ended area , you can cut several tiles in 1/2 and work back. A bit trickier but overall look is better. Don t cut tiles directly in 1/2, you must cut just off center if this is a starting point. Very hard to do and takes experience. Any specific questions you can e mail me through my avatar and check my qualifications there. GL
- Q: We have a basic, square foot tiles - rough ceramic floor, standard grade in a white-ish shade (HATE IT!). It is always dirty looking! Nothing keeps it clean. Can we stain it or paint it like people do cement floors??? Anyone done this? How? Thanks!
- Do your self a choose! flow to a house area and lease whats pronounced as a chipper hammer. it is going to make the job 10 events much less puzzling. It does all the paintings so as which you dont could desire to. attack the tiles from a slant function, instead than a promptly up down and watch em fly off the concrete.
- Q: A family member purchased 12x12 non gloss tiles for our shower stall and I don‘t think I ever saw a shower stall with non gloss tiles. Our old tiles had gloss. Can you use non gloss tiles for the shower stall?
- My husband finished a project with the help of pro tile : For DIY home owners and professional tile installers, Pro Tile Helper shows you everything you need to know to make your next tiling project a success! The creator, a master tile installer with over 20 years experience installing tiles, put all the tips and secrets learned over the years together in one AWESOME APP for your benefit. You will save tons of time installing and save hundreds even thousands of dollars on tools and materials. All this for only $4.99. hope this can help u too =)
- Q: I have 12x12 field tile and a strip of accent that‘s about 2 high. Everything I‘ve read says that you want to have the accent at eye level, which makes sense to me. Judging for myself, it LOOKS best at eye level. If I place it at eye level, I wind up with a full 12x12 tile above it, or at least, a 12 space above it. So going down to the tub, I would have a 2 1/2 cut tile at the bottom, right above the tub.Everything I have read also says that you want to have the cut tiles at the top and bottom symmetrical.
- Provided the tub is fairly level, start a full tile at the bottom and work up. Tile will look fine at a 5 or six foot level ( I prefer 5 ft.) Not every one has the same eye level so the strip will be fine. The tub surround will be a bit different too so what I suggest is measuring on the tub wall the tile heights and stand back and look at it. Use a pc of tape the approx width of the strip and tape it or draw it on the tub wall s prior to tiling. Will give you a better idea. Also take into account any fixtures you may put in such as a shampoo/soap shelf. Any questions you can e mail me through my avatar and check my qualifications there. I ve also have down 100s of tub surrounds. GL
- Q: making a counter top from spare tile pieces
- Prep your counter to meet tile standards, Each one can be different so with out knowing what yours is I cant say there. You ll need to figure what you want to do with the edge to trim it out. You can use a tile bull nose or a wood trim. Spread the needed glue, usually a thin set , over a small area. Then you can break tiles , ( very carefully) with a hammer or a pair of tile nippers. I use tile nippers to create the piece effect. These methods are called rubble effect. You ll need a honing stone to hone the tile edges so they are not sharp. Set into the wet glue, don t let it skim over or become dry. Grout as needed depending on what type of tile you use. Any questions you can e mail me through my avatar and check my qualifications there. GL
- Q: I need step by step instructions on how to install ceramic tile in a bathroom on a concrete slab.
- first of all measure ur bathroom and calculate how many square meters u need. Then decide on your tile layout (where u want the tiles to start and end.) normally you want to have full tiles in visible areas and have the cut tiles in less visible areas (behind doors, under basin cabinet, behind toilet) You should check ur levels to make sure the water runs to the floor drain, and if there is no floor drain make sure it runs to one area that is accesible to dry. Make sure it doesnt run towards the door and that you dont get multiple puddles. If the levels are not already done you will need to apply a screed of concrete (no coarse aggregate) and trowl it to the desired levels. Once that is set you decide on what type of binding agent (glue or mortar) that best suites your needs. pick a starting point (a corner in which u would use a whole tile) and as you go keep checking ur levels to maintain the correct slope for the water. You will probably need a tile cutting tool for area where you cant use a whole tile. That is just a basic idea of what ull need to do.
- Q: Is it hard to fit tile around the toilet? Should I start there first?
- it's not hard to do but you have a little bit of cutting to do. to start with the peel an stick, i would start in the middle of you doorway to the bathroom and go straight across the room( you want full tiles in front of the door) and leave cut ends to the one side. once you get that line across and use a laser line if you have one, everything else is smooth sailing... before you put the peel and stick down... what do you have on the floor now? if you have other tile down, i would not put new stuff over top of it, it usually don't stick right, try putting a thin sheet of plywood down or(i believe it's called mahogany) you can buy thin sheets of this. put it down first and then tile. it's a little bit more work but it's worth it, cost less too if your not replacing in a few months too. Have fun, it's easy, i did mine first try!!! :)
- Q: How to look at the quality of tiles
- Ordinary people to buy tiles bad identification of two local brick surface and brick quality. Is also the most easily identified. (Not to listen, this is very interesting, the first hit objects can not be measured, the second voice can not be measured, this is not the way most people can use, but also has been said that the errors, but also has been used, This is a professional. Only professional workers to identify.) Most people asked is affixed to the kitchen, bathroom wall, almost all with plywood for paving. Identify the surface of the tiles, only need to take two pieces of the same brick surface together, the gap can not see the better. The porcelain surface has no holes in the surface. (High flatness, posted on the wall will not be uneven) the quality of the tiles, the hand to feel the same type of brick with the heavier the better. If you do not feel it, then try density, pour in the back of the tile, the more the better water seepage. (Kitchen, bathroom, hot summer heat, these factors directly affect the tile will crack, the higher the quality of the more difficult to appear.
- Q: I‘m looking to replace a ceramic tile floor in my kitchen with a different style ceramic tile. The contractor says I have two options. He can either lay the new ceramic tile on the old, which will be cheaper than bringing up the old tile but then the floor will be raised 1 to 1 1/2 above current level. Or, he can take up the old ceramic tile but then he‘d have to remove the old layer of plywood and put down a new layer, which will be more labor-intensive and expensive. Is there any other issues regarding these two scenarios that I should take into account?
- Best to rip it out and start new. And start with a new sub floor made for and the proper thickness for tile.. NEVER, EVER use a thin 1/4 luan or ply wood.. This is totally inadequate for tile and goes against all tile hand book guides such as the ATC and TCA guide book.Minimum substrate thickness for tile is 1 1/4 not the 1 as suggested.Thus you must use 1/2 board or backer board ( properly installed) to meet minimum standards for stability for tile.There are other methods to install but this is very common way. Going over the old with new tile is a possible option but tile setter need to know what their doing. Thus raising floor only thickness of the tile and thin set. I d never go over it raising it that much. Any questions you can e mail me through my avatar and check my qualifications there. GL
Send your message to us
Rustic Tile CMAX 6883
- Ref Price:
-
- Loading Port:
- China Main Port
- Payment Terms:
- TT OR LC
- Min Order Qty:
- -
- Supply Capability:
- -
OKorder Service Pledge
OKorder Financial Service
Similar products

Hot products


Hot Searches
Related keywords

