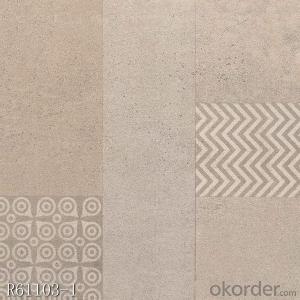

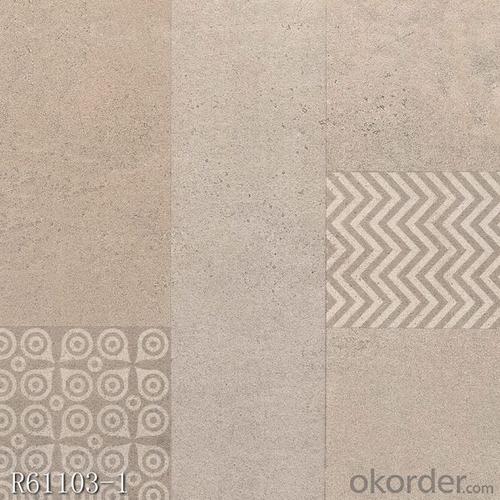

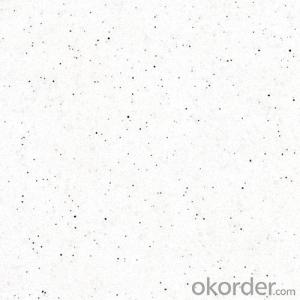
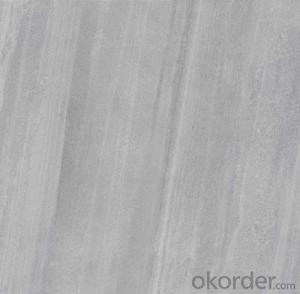
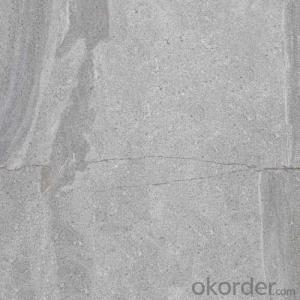
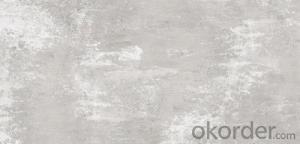
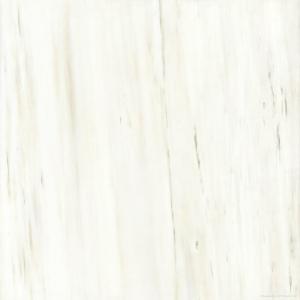
Glazed Porcelain Tile Petra Series R61103
- Ref Price:
-

- Loading Port:
- Qingdao
- Payment Terms:
- TT OR LC
- Min Order Qty:
- 1267.2
- Supply Capability:
- 100000 m²/month
OKorder Service Pledge
OKorder Financial Service
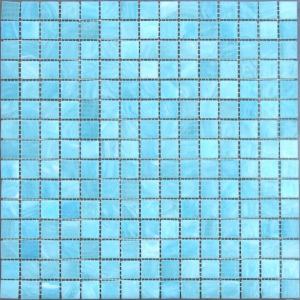
You Might Also Like


Product Brief Introduction
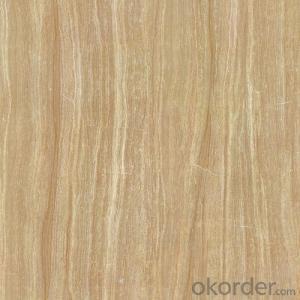
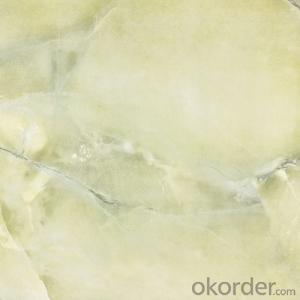
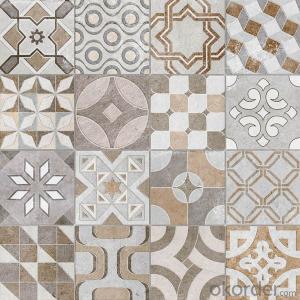
Glazed Porcelain Tile Petra Series R61103 is one of the most popular series of Glazed Porcelain Tile, which is one most popular serie of Glazed Porcelain Tile in the present market. Just like other series, it could be used for interior floor for apartment, villa, super market as well as other public areas. Cement tile with decor finish which has given this series more choices.
Product Features
Glazed Porcelain Tiale
Only Grade AAA available
Strict control on color shade, deformation, anti-pollution as well as packing
Competitive price
Standard export packing: Pater Carton+ Wooden Pallet
Fast delivery
OEM service could be offered
Marketing support on samples, catalogues as well as carton designing
Professional sales team for product, document and schedule of importing and exporting.
Product Specification
Tile Type: Glazed Porcelain Tile
Quality standard: GB/T4100-2006, ISO13006, ISO9001
Water Absorption Rate: 1-3%
Breaking Strength: 》 1800 N
Rupture Modulus: 》40 MPa
Length and Width Tolerance: ±0.1%
Surface Smoothness: ±0.15%
Edge Straightness: ±0.15%
Wearing Strength: 《1600 mm3
Resistance to Chemical: Class UA
Resistance to Staining: Class 3.
Packing Information (For 27.5 Tons heavy 20’Fcl)
For 600x600mm, 4pcs/Ctn, 40 Ctns/Pallet, 960 Ctns/20’Fcl, 1382.4m2/20’Fcl
Production Line & Package


FAQ
1. For Glazed Porcelain Tile, is the 30*60 available?
—— Yes, 30*60 is available. Due to the basic size is 60*60, we need to cut 60*60 tile into 30*60. 6 pcs are packed into one carton.
- Q: the bathroom at work has lenulium sheet. I slip when it rains, b cos it is wet. I want to replace home carpeting with tiles or vynal. which one is less slippery? thanks
- i belive there are several different tiles with different surfaces. i would just suggest going to lowes or something and feel the surfaces. i think tiles would be less slippery then vynal
- Q: I am looking for an obsolete 8X8 ceramic tile I believe was made by Interceramic. It‘s described on my original sales slip from 1999 as IC WestPalm Surf It‘s solid white in color and has a slight pebble texture. I need to modify my kitchen some and don‘t want to tear up the entire floor to install new type tile. Any ideas how to find this tile if there‘s any left out there.
- IC did away with the 8x8 tile about 8 to 10 years ago .. They revamped there line to a 10 and 13 inch tile..10 didn t last long at all..Soon the did away with most all the red bodied tile.. So please don t even bother trying.. You will have to do something else , like a border and or accents. There were reclamation places that bought up old lots of tile but none that I know about now.. Any questions you can e mail me through my avatar.. GL
- Q: My husband and I are disagreeing about tile on the wall. What is your opinion about tile on the bathroom wall, half way up? Here are the yes and no‘s of arguments:YES:The tile is neutral and beautiful. There is a WOW factor when you walk in and see the extra tile. It‘s practical for our household with a one year old who splashes and may smudge a non-tiled bathroom wall.NO:It‘s old fashioned, not necessary and I would rather have empty wall space available to paint from top to bottom. There only needs to be tile around the bath tub, for splashing and practicality purposes.
- I would definitely tile! especially with children in the house. I still love the idea that my teenage boys' bathroom is STILL tiled! and who says it has to be old fashioned? only if you are using 3x3 white tiles. use bigger, more earthy toned tile. even if you can't afford travertine, you can still get look-a-like ceramic! Good luck to y'all!
- Q: are tiles get really dirty fast and i tried everything and i cant get them to stay white could i use bleach?
- Get a product called Black Magic. It's a bleach-like spray that works good on mildew. Follow the directions
- Q: My husband and I are building a new home. I would love to put ceramic tiling in my kitchen/dining room (they are combined). Do you think that 14‘X23‘ is too large for tiling? Its a concrete slap, and we will be doing the work ourselves. Any tips would be helpful!! I am looking for tips, suggestions, tools needed, extra supplies, ideas, horror stories, turned out good stories, I will take it all! Thanks so much!
- A quality tile saw will make things easier but understand going in that tile saws use water and make one hell of a mess. Plan to do your cutting outside (I speak from experience). Also expect that this job will take a LOT of time to complete. Plan your layout so that there are no tiny or thin slivers of tile where the walls meet the floors. Unless there's a good reason to do otherwise, be certain that your layout lines are perfectly parallel with the longest wall and are perfectly straight. You'll need a notched trowel (available widely and cheaply) to smooth out the adhesive/mortar. You'll need to be sure your subfloor is level, smooth and very clean. If it isn't smooth AND level, ask an expert for advice on how to correct it BEFORE you begin. If you are going to leave a space between tiles, you WILL need spacers (available at Lowe's, Home Depot and every hardware store). Above all, TAKE YOUR TIME. Tile is not a job to rush. You will look at this floor many times a day, every day for many years. The final result will be no better than the time and attention you devote to it. Most big box hardware stores have occasional classes in varying trades. Taking a tile class can't hurt.
- Q: I am installing 4x4 ceramic tiles on a shower wall. I have been using a 1/4 x 1/4 sq. notch trowel, but am having trouble with the tiles staying put...should I use a 3/16 x 5/32 v-notch trowel instead?
- Mike and Rob are correct - 1/4 square notch for a 4x4 tile. A 4x4 ceramic is a pretty light tile, if they're not sticking, there's an issue with your technique. You should be using a modified thinset (do NOT use pre-mixed (the stuff in a tub) thinset - it's actually a water-based adhesive and it will NOT last in wet areas ), mixed to the consistencey of peanut butter. A common DIY'er mistake is to mix their mortar too wet. First apply the thinset to the wall with the smooth edge of the trowel and work it back and forth a couple times. This keys the mortar into the backer board (you are applying over cement backer board, right?) for good adhesion to the wall. Then using the notched edge, held at a consistent 45 degree angle to the wall, remove the excess mortar. And work in small sections - with 4x4 tiles, apply the thinset in 2' squares -- otherwise the thinset will set up (and loose adhesion) before you get all the tiles in place. Small batches goes for mixing the thinset, too. Check the label, but most thinsets have a 1-2 hour pot time (how long it can sit in the bucket before it sets up) -- exceed that and the mortar will loose it's adhesion and the tiles won't stick. You can simplify wall tile installation by screwing a starter board to the wall (1x2 or strip of plywood works well), 3-4 courses up from the floor. This will support your first course, and tile spacers will support succesive courses. Then remove the board and finish up the bottom courses.
- Q: We are using some leftover floor tile (6x6 size) and some new decorative tile (2x2 and 1x1) to tile our backsplash. Can we use the same mortar that we used on the floor? Also, we used a 1/4 inch notched trowel when doing the floor -- should we use a smaller notch for the backsplash (say, a 1/8 inch notched trowel)? Finally, the floor tile and the 1x1 tiles are porcelain. The 2x2 tile is tumbled travertine with quite a few pits on the surface. We don‘t know if we should fill those pits with grout or not. On one hand -- it will make the tiles easier to clean if they are filled (yes?). On the other, we like the look of the pits and don‘t know if we want the grout (which is a slightly darker color) filling the pits. Any suggestions?
- If you are not tiling a lot later don't buy another trowel. The porcelain thin set should be fine for back-splash, because it is stronger than the regular one. The pits are the beautiful parts of the tile, don't fill grout on it, otherwise it looks like you pick them from trash. You should use tile sealer to seal the surface of the tile, not the bottom, it would easy to clean out the thin set or grout and avoid it absorb water.
- Q: Can you suggest any methods to clean the floor and wall tiles?
- If you are talking about the bathroom tile around a shower you will need a lime remover it will clean the soap scum and water deposits. The floor tiles just need a general cleaner. If you want to clean tiles in a kitchen use a de greaser.
- Q: How does the concrete on the tiles clean?
- Daily cleaning: clean soapy water Mud: linseed oil Precipitate, rust, mortar: nitric acid, sulfuric acid, hydrochloric acid solution
- Q: The hammer took a chip out of one tile, the chip is about the size of a pencil eraser. I‘m just heartbroken as we just had this tile installed 12 days ago! Is there any way to fix this- short of replacing the tile? I‘ve already bought a rug that will cover the hole but I‘d still like to fix it if I can. Just in case we ever would like to go without a rug. Thank you!!!
- Got any tiles left over from the job? You can (carefully!) chip the old tile out in pieces with a hammer and a chisel, (VERY carefully!) chip out the grout between the broken tile and the ones next to it. and chip out the cement under the broken tile until you're down to the backer board. Once that's done, clean out all the chips, dust, etc, and chip out the cement that you missed. Clean again, check for still more cement (it's persistent stuff), until the area is clean. Set the spare tile down in the space to make sure it fits OK. It should set below the level of the other tiles. If not, you missed some cement. Go back to step B. Finally, you're ready. Mix some tile cement, dump a glop in the center of the cleared area, spread it around, and use a tile trowel if you have one to spread it and groove the cement. The grooves let you spread the cement and give it some extra area to fasten to the back of the tile. Put the tile in place, wiggle it around and move it until you like where it's sitting, wipe up any cement that oozed up around the sides, and don't walk on it for 2 days. Finally, mix up some grout, spread it into the seams, wipe it off the tiles around the seams, and don't walk on it for another day. Seal the seams, and carry your hammer carefully from now on.
Send your message to us
Glazed Porcelain Tile Petra Series R61103
- Ref Price:
-
- Loading Port:
- Qingdao
- Payment Terms:
- TT OR LC
- Min Order Qty:
- 1267.2
- Supply Capability:
- 100000 m²/month
OKorder Service Pledge
OKorder Financial Service
Similar products
Hot products

Hot Searches
Related keywords

