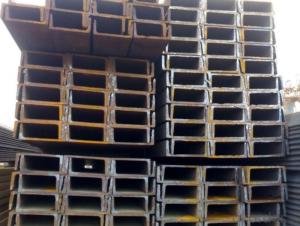


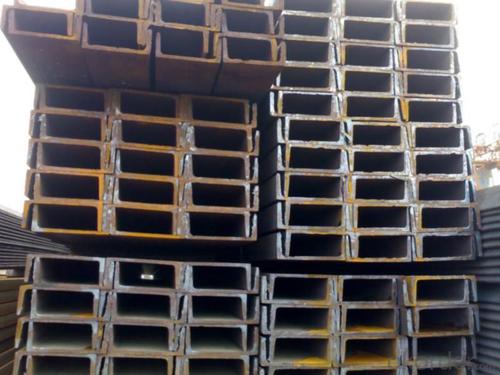


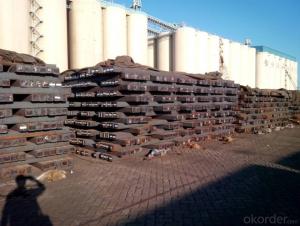
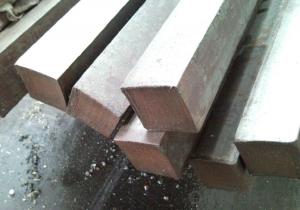
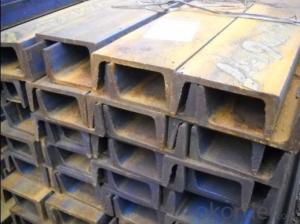
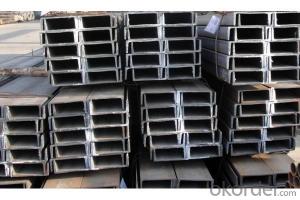
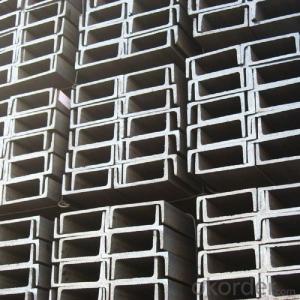
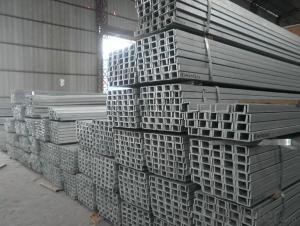
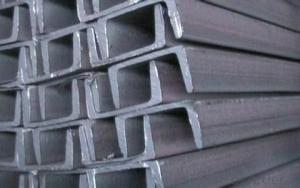
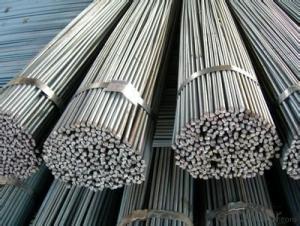
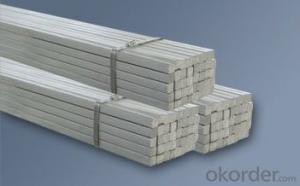
100mm*50mm U channel steel for construction
- Ref Price:
-

- Loading Port:
- Tianjin
- Payment Terms:
- TT or LC
- Min Order Qty:
- 25 m.t.
- Supply Capability:
- 100000 m.t./month
OKorder Service Pledge
OKorder Financial Service
You Might Also Like


Product Description:
OKorder is offering 100mm*50mm U channel steel for construction at great prices with worldwide shipping. Our supplier is a world-class manufacturer of steel, with our products utilized the world over. OKorder annually supplies products to European, North American and Asian markets. We provide quotations within 24 hours of receiving an inquiry and guarantee competitive prices.
Product Applications:
100mm*50mm U channel steel are ideal for structural applications and are widely used in the construction of buildings and bridges, and the manufacturing, petrochemical, and transportation industries.
Product Advantages:
OKorder's U channel steel are durable, strong, and resist corrosion.
Main Product Features:
· Premium quality
· Prompt delivery & seaworthy packing (30 days after receiving deposit)
· Corrosion resistance
· Can be recycled and reused
· Mill test certification
· Professional Service
· Competitive pricing
Product Specifications:
Galvanized Channel Steel
1. Professional factory
2. Size: 50MM-400MM
3. Standard: GB,JIS,ASTM
4. Materials: Q235,SS400,A36..
A Hot Dip Galvanized U channel coating is relatively easier and cheaper to specify than an organic paint coating of equivalent corrosion protection performance. The British, European and International standard for Hot Dip Galvanizing is BS EN ISO 1461 which specifies a minimum coating thickness to be applied to steel in relation to the steels section thickness e.g. a steel fabrication with a section size thicker than 6 mm shall have a minimum galvanized coating thickness of 85 µm.
Further performance and design information for galvanizing can be found in BS EN ISO 14713-1 AND BS EN ISO 14713-2. The durability performance of a galvanized coating depends solely on the corrosion rate of the environment in which it is placed. Corrosion rates for different environments can be found in BS EN ISO 14713-1 where typical corrosion rates are given with a description of the environment in which the steel would be used.


Galvanized Steel Channel | (mm) | (mm) | (mm) | (mm) |
|
50x25 | 50 | 25 | 3.0 | 6.00 | 2.37 |
75X40 | 75 | 40 | 3.8 | 7.00 | 5.30 |
75X40 | 75 | 40 | 4.0 | 7.00 | 5.60 |
75X40 | 75 | 40 | 4.5 | 7.00 | 5.85 |
75X40 | 75 | 40 | 5.0 | 7.00 | 6.92 |
|
|
|
|
|
|
100X50 | 100 | 50 | 3.8 | 6.00 | 7.30 |
100X50 | 100 | 50 | 4.2 | 6.00 | 8.03 |
100X50 | 100 | 50 | 4.5 | 7.50 | 8.97 |
100X50 | 100 | 50 | 5.0 | 7.50 | 9.36 |
|
|
|
|
|
|
125X65 | 125 | 65 | 5.2 | 6.80 | 11.66 |
125X65 | 125 | 65 | 5.3 | 6.80 | 12.17 |
125X65 | 125 | 65 | 5.5 | 8.00 | 12.91 |
125X65 | 125 | 65 | 6.0 | 8.00 | 13.40 |
|
|
|
|
|
|
150x75 | 150 | 75 | 5.5 | 7.30 | 14.66 |
150x75 | 150 | 75 | 5.7 | 10.00 | 16.71 |
150x75 | 150 | 75 | 6.0 | 10.00 | 17.90 |
150x75 | 150 | 75 | 6.5 | 10.00 | 18.60 |
150x75 | 150 | 75 | 6.5 | 10.00 | 24.00 |
|
|
|
|
|
|
200X80 | 200 | 80 | 7.5 | 11.00 | 24.60 |
2. The Mechanical property of Galvanized Steel Channel:
Grade | Yield Strength,N/mm² | Extension Strength N/mm² | |||
Thickness of Steel,mm | |||||
≦16 | >16-≦40 | >40-≦100 | >100 | ||
SS330 | ≧205 | ≧195 | ≧175 | ≧165 | 330-430 |
SS400 | ≧245 | ≧235 | ≧215 | ≧205 | 400-510 |
SS490 | ≧285 | ≧275 | ≧255 | ≧245 | 490-610 |
SS540 | ≧400 | ≧390 | - | - | ≧540 |
3. The chemical composition of Galvanized Steel Channel
Grade | Element(%) | |||
C | Mn | P | S | |
SS330 | -- | -- | ≦0.050 | ≦0.050 |
SS400 | ||||
SS490 | ||||
SS540 | ≦0.30 | ≦1.60 | ≦0.040 | ≦0.040 |
Usage of Galvanized Steel Channel:


Applications: Galvanized for outdoor use or exposed evironments. Walkways, Ramps, Structural support
The process of hot-dip galvanizing results in a metallurgical bond between zinc and steel with a series of distinct iron-zinc alloys. The resulting coated steel can be used in much the same way as uncoated.
A typical hot-dip galvanizing line operates as follows:
Steel is cleaned using a caustic solution. This removes oil/grease, dirt, and paint.
The caustic cleaning solution is rinsed off.
The steel is pickled in an acidic solution to remove mill scale.
The pickling solution is rinsed off.
A flux, often zinc ammonium chloride is applied to the steel to inhibit oxidation of the cleaned surface upon exposure to air. The flux is allowed to dry on the steel and aids in the process of the liquid zinc wetting and adhering to the steel.
The steel is dipped into the molten zinc bath and held there until the temperature of the steel equilibrates with that of the bath.
The steel is cooled in a quench tank to reduce its temperature and inhibit undesirable reactions of the newly formed coating with the atmosphere
Package & Delivery of Galvanized Steel Channel:
1.The channel steel will be packed in bundle with steel wire at each end of every bundle and color marking in order to help the customer to recognize his goods more easily at sight.
2. And the channel steel could be loaded into 20ft or 40ft container, or by bulk cargo.If the weight of each bundle reaches more than 3.5 mt, the loading by break bulk cargo should be choosed.When the weight of each bundle reaches less than 3mt, the loading by container should be choosed.
3.As for the transportaion from mill to loading port, the truck will be usually used. And the maximum quantity for each truck is 40mt.
4.All in all, we could do in accordance with customer's request.
FAQ:
Q1: How do we guarantee the quality of our products?
A1: We have established an advanced quality management system which conducts strict quality tests at every step, from raw materials to the final product. At the same time, we provide extensive follow-up service assurances as required.
Q2: Can stainless steel rust?
A2: Stainless does not "rust" as you think of regular steel rusting with a red oxide on the surface that flakes off. If you see red rust it is probably due to some iron particles that have contaminated the surface of the stainless steel and it is these iron particles that are rusting. Look at the source of the rusting and see if you can remove it from the surface.
- Q: How do you use a steel square for marking stair tread and riser dimensions?
- To use a steel square for marking stair tread and riser dimensions, follow these steps: 1. Start by measuring the total rise of the stairs, which is the vertical distance from the top of the landing to the finished floor level. Note down this measurement. 2. Next, determine the desired height of each riser. This can be calculated by dividing the total rise by the number of risers. For example, if the total rise is 48 inches and you want 6 risers, each riser should be 48/6 = 8 inches high. 3. Now, take your steel square and place it on a flat surface. Position the long edge of the square vertically, ensuring it is perpendicular to the surface. 4. Align the bottom corner of the square with the edge of the material you are marking, such as a piece of wood or the stringer on the stairs. 5. With the square held firmly against the material, use a pencil or marking knife to draw a line along the inside edge of the square. 6. For marking the tread dimensions, use the inside edge of the square to measure and mark the desired depth of each tread. The tread depth can be calculated by subtracting the riser height from the desired total run (the horizontal distance covered by the stairs). For instance, if you want a total run of 72 inches and have 6 risers, each tread should be 72/6 = 12 inches deep. 7. Repeat this process for each riser and tread, ensuring that the square remains held firmly against the material to maintain accuracy. Using a steel square for marking stair tread and riser dimensions allows for precise and consistent measurements, resulting in well-balanced and safe stairs. Remember to always double-check your measurements before cutting or installing any materials.
- Q: How do you use a steel square to measure and mark 50.625-degree angles?
- To use a steel square to measure and mark 50.625-degree angles, you would place the square on the surface and align one of its edges with the reference line or surface. Then, using the degree markings on the square, locate the 50.625-degree mark. Next, position a straightedge along this mark and draw a line to mark the desired angle.
- Q: How does a steel square assist in determining the correct miter angle?
- A steel square assists in determining the correct miter angle by providing a precise tool for measuring and marking angles on wood or other materials. It consists of a long metal blade with a ruler-like scale and a shorter perpendicular blade, forming a right angle. To determine the correct miter angle, you can use the steel square in several ways. One method is by placing the longer blade along the edge of the material you want to cut, and then aligning the shorter blade with the desired angle. The scale on the blade allows you to accurately measure the angle and make adjustments as needed. Once the angle is set, you can mark the material accordingly for cutting. Another way to use a steel square for miter angle determination is by creating a reference line. By aligning the longer blade with one edge of the material and the shorter blade with another edge, you can establish a reference line at the intersection of the two blades. This reference line can then be used to guide the cutting process and ensure the correct miter angle. Overall, a steel square is a versatile tool that allows for precise measurement and marking of angles, making it an essential aid in determining the correct miter angle. Its accuracy and ease of use make it indispensable for carpenters, woodworkers, and anyone else working with angles in construction or DIY projects.
- Q: How do you use a steel square for creating accurate box joints?
- To use a steel square for creating accurate box joints, you would first mark the width and depth of the joint on the edges of the two pieces you're joining. Then, align the steel square with the marked lines to ensure a 90-degree angle. Use the square to guide your saw or chisel while cutting along the marked lines, ensuring precise and accurate box joints.
- Q: What are some common measurements that can be taken with a steel square in welding?
- Some common measurements that can be taken with a steel square in welding include: 1. 90-degree angle: A steel square is commonly used to ensure that welded joints are welded at a perfect 90-degree angle. This is crucial for maintaining structural integrity and ensuring proper fit-up of the welded components. 2. Alignment: A steel square can be used to verify the alignment of various parts in welding, such as ensuring that two pipes are aligned properly before welding them together. It helps in achieving accurate and precise welds. 3. Checking for squareness: A steel square can be used to check if a corner or joint is perfectly square. This is important for maintaining the stability and strength of the welded structure. 4. Measuring dimensions: Steel squares often have inch and metric measurements marked on their edges, allowing welders to take accurate measurements. These measurements can be used to determine the length, height, or width of the weld joint, ensuring precise fabrication and welding. 5. Checking flatness: A steel square can be used to check if a surface is flat or level. This is important in welding to ensure that the welded parts are aligned correctly and that the finished product is not distorted. Overall, a steel square is a versatile and indispensable tool in welding, allowing welders to measure angles, dimensions, alignment, and flatness accurately to achieve high-quality welds.
- Q: Can a steel square be used for deck stair layout and construction?
- Yes, a steel square can definitely be used for deck stair layout and construction. Steel squares are versatile tools that can be used to accurately measure and mark angles, lengths, and dimensions, making them suitable for laying out and constructing deck stairs. They provide precise measurements and angles, ensuring that the stairs are built correctly and safely.
- Q: What are the advantages of using a steel square over other measuring tools?
- There are several advantages of using a steel square over other measuring tools. Firstly, steel squares are known for their accuracy and precision. They are designed with a right angle and straight edges, which ensures that the measurements taken using a steel square are highly reliable. This is especially important in construction and carpentry work where precise measurements are crucial for the success of a project. Additionally, steel squares are extremely durable and long-lasting. Made from high-quality steel, they can withstand heavy use and are resistant to wear and tear. This makes them a cost-effective tool as they do not need to be replaced frequently. Another advantage of using a steel square is its versatility. It can be used for a variety of purposes such as marking and measuring angles, checking the straightness of edges, and laying out lines for cutting or marking. This versatility makes it a valuable tool for professionals in various fields such as woodworking, metalworking, and masonry. Furthermore, steel squares often come with additional features such as built-in scales and measurement markings. These markings make it easier to take accurate measurements without the need for additional tools. This saves time and increases efficiency, making the steel square a practical choice for professionals and DIY enthusiasts alike. Lastly, steel squares are relatively compact and easy to carry around. They can easily fit in a tool belt or toolbox, making them convenient to use on-site or in tight spaces. This portability factor adds to their overall practicality and usefulness. In summary, the advantages of using a steel square over other measuring tools include its accuracy, durability, versatility, additional features, and portability. These features make the steel square a reliable and indispensable tool for professionals in various industries.
- Q: Can a steel square be used for checking the levelness of shelves?
- No, a steel square cannot be used for checking the levelness of shelves. A steel square, also known as a framing square, is primarily used in carpentry and woodworking to measure and mark angles and to ensure the accuracy of right angles. It is not designed or suitable for checking the levelness of shelves. To check the levelness of shelves, a level tool such as a spirit level or a laser level should be used. These tools are specifically designed to determine if a surface is perfectly horizontal or level. They provide a much more accurate and reliable measurement for ensuring the levelness of shelves.
- Q: Can a steel square be used for checking the squareness of a miter saw blade?
- No, a steel square cannot be used for checking the squareness of a miter saw blade. A specialized tool called a miter gauge or a combination square is typically used for this purpose.
- Q: How do you use a steel square to measure the width of a countertop?
- To use a steel square to measure the width of a countertop, you would start by placing one arm of the square flush against one edge of the countertop. Ensure that the square is aligned perfectly perpendicular to the edge of the countertop. Then, extend the other arm of the square across the width of the countertop until it reaches the opposite edge. Take note of the measurement on the scale of the square where the edge of the countertop intersects with the other arm of the square. This measurement will indicate the width of the countertop. Make sure to hold the square firmly in place while taking the measurement to ensure accuracy.
Send your message to us
100mm*50mm U channel steel for construction
- Ref Price:
-
- Loading Port:
- Tianjin
- Payment Terms:
- TT or LC
- Min Order Qty:
- 25 m.t.
- Supply Capability:
- 100000 m.t./month
OKorder Service Pledge
OKorder Financial Service
Similar products

Hot products


Hot Searches
Related keywords

