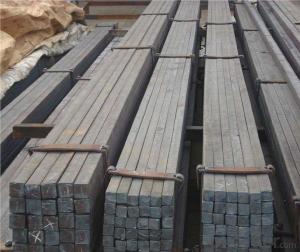


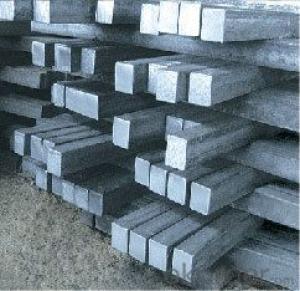
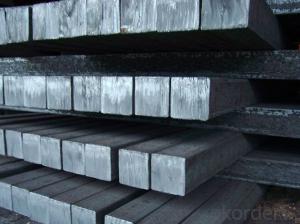
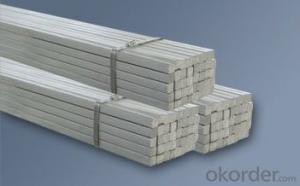
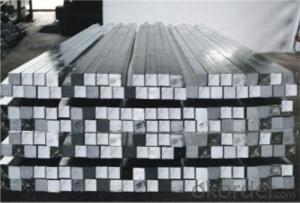
Hot Rolled Square Steel Bar Q235, SAE1020, SAE1045
- Ref Price:
-

- Loading Port:
- Shanghai
- Payment Terms:
- TT or LC
- Min Order Qty:
- 25 m.t.
- Supply Capability:
- 200000 m.t./month
OKorder Service Pledge
OKorder Financial Service
You Might Also Like


Product Description:
OKorder is offering Hot Rolled Square Steel Bar Q235, SAE1020, SAE1045 at great prices with worldwide shipping. Our supplier is a world-class manufacturer of steel, with our products utilized the world over. OKorder annually supplies products to European, North American and Asian markets. We provide quotations within 24 hours of receiving an inquiry and guarantee competitive prices.
Product Applications:
Hot Rolled Square Steel Bar Q235, SAE1020, SAE1045 are ideal for structural applications and are widely used in the construction of buildings and bridges, and the manufacturing, petrochemical, and transportation industries.
-The Square Steel is normally used as structure steel.
-Row material for other structure steel like steel angles, channels, I-beams, H-beams, etc…
Product Advantages:
OKorder's Hot Rolled Square Steel Bar Q235, SAE1020, SAE1045 are durable, strong, and resist corrosion.
Main Product Features:
· Premium quality
· Prompt delivery & seaworthy packing (30 days after receiving deposit)
· Corrosion resistance
· Can be recycled and reused
· Mill test certification
· Professional Service
· Competitive pricing
Product Description:
Specifications of High Quality Square Steel Bar Q235, SAE1020:
-Standard: GB,
-Grade: Q195/Q235 or equivalent.
Chemical Composition:
-Chemical Composition. Q195
Standard | Grade | Element (%) | ||||
GB | Q195 | C | Mn | S | P | Si |
0.06~0.12 | 0.25~0.50 | ≤0.050 | ≤0.045 | ≤0.30 | ||
-Chemical Composition. Q235
Standard | Grade | Element (%) | ||||
GB | Q235B | C | Mn | S | P | Si |
0.12~0.20 | 0.30~0.70 | ≤0.045 | ≤0.045 | ≤0.30 | ||
Measures and Tolerances of Square Steel Bar:
(The section of Square Steel Bar)
-The length of a side and the theoretical weight of Square Steel.
Length of a side(a, mm) | Theoretical weight(kg/m) | Length of a side(a, mm) | Theoretical weight(kg/m) |
6 | 0.283 | 32 | 8.04 |
7 | 0.385 | *33 | 8.55 |
8 | 0.502 | 34 | 9.07 |
9 | 0.636 | *35 | 9.62 |
10 | 0.785 | 36 | 10.17 |
11 | 0.950 | 38 | 11.24 |
12 | 1.13 | 40 | 12.56 |
13 | 1.33 | 42 | 13.85 |
14 | 1.54 | 45 | 15.90 |
15 | 1.77 | 48 | 18.09 |
16 | 2.01 | 50 | 19.63 |
17 | 2.27 | 53 | 22.05 |
18 | 2.54 | *55 | 23.6 |
19 | 2.82 | 56 | 24.61 |
20 | 3.14 | *58 | 26.4 |
21 | 3.46 | 60 | 28.26 |
22 | 3.80 | 63 | 31.16 |
*23 | 4.15 | *65 | 33.17 |
24 | 4.52 | *68 | 36.3 |
25 | 4.91 | 79 | 38.49 |
26 | 5.30 | 75 | 44.16 |
*27 | 5.72 | 80 | 50.24 |
28 | 6.15 | 85 | 56.72 |
*29 | 6.60 | 90 | 63.59 |
30 | 7.06 | 95 | 70.85 |
*31 | 7.54 | 100 | 78.50 |
Notes:
1, The theoretical weights in the list, base on the density of 7.85 g/cm3.
2, The numbers with *mean that they are not regulars or we don’t offer them.
-The allowed tolerance of Square Steel:
Length of a side(mm) | Allowed Tolerance | ||
Group1 | Group2 | Group3 | |
5.5~7 | ±0.20 | ±0.30 | ±0.40 |
7~20 | ±0.25 | ±0.35 | ±0.40 |
20~30 | ±0.30 | ±0.40 | ±0.50 |
30~50 | ±0.40 | ±0.50 | ±0.60 |
60~80 | ±0.60 | ±0.70 | ±0.80 |
80~110 | ±0.90 | ±1.0 | ±1.1 |
110~150 | ±1.2 | ±1.3 | ±1.1 |
150~190 | ―― | ―― | ±2.0 |
190~250 | ―― | ―― | ±2.5 |
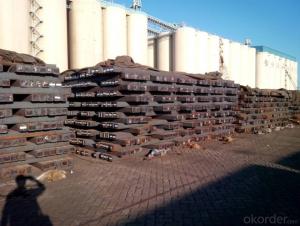
Packaging & Delivery of Hot Rolled Square Steel Bar Q235, SAE1020, SAE1045:
-Packing Detail: The products can be packed in bundles by steel wires.
-Marks:
1, Tag marks: the tag marks will be tied up to each bundle of the products. The information is usually including supplier’s logo and name, product name, made in China, products’ specifications, the painted color and other information requested by customers.
2, Color marks: we will paint both ends of the bundles of these products to make sure that they are more evident. It’s will be more convenient for the customers to distinguish them at the destination port.
-Delivery Detail: 30~45 working days after receive buyer’s T.T. or L/C.
Transportation:
-The products can be delivered by bulk vessel or by container. As for container, products with the length of 6m will be loaded in 20’ container, with 9m or 12m, in 40’ container.
-The maximum quantity of loading of container is 25 tons.
-The products usually are transported to the nearest port from the production place.
Payment:
-Invoicing on theoretical weight or actual weight a s customer’s request.
-FOB, CFR or CIF.


FAQ:
Q1: How soon can we receive the product after purchase?
A1: Within three days of placing an order, we will begin production. The specific shipping date is dependent upon international and government factors, but is typically 7 to 10 workdays.
Q2: The products are invoicing on theoritical weight or on actual weight?
A2: We can do it in both manners, according to the customers' request.
Q3: How do we guarantee the quality of our products?
A3: We have established an advanced quality management system which conducts strict quality tests at every step, from raw materials to the final product. At the same time, we provide extensive follow-up service assurances as required.
- Q:Can a steel square be used for measuring diagonals?
- No, a steel square cannot be used for measuring diagonals as it is specifically designed for measuring right angles and not diagonals.
- Q:How do you use a steel square to lay out a parallelogram?
- To lay out a parallelogram using a steel square, follow these steps: 1. Determine the desired measurements for the parallelogram, such as side lengths and angles. 2. Place the steel square on a flat surface, ensuring proper alignment. 3. Use one edge of the square as a reference line and mark the starting point for the first side of the parallelogram on the material. 4. Align the reference line of the square with the marked point and firmly hold it in place. 5. Extend a straight line along the other edge of the square using a pencil or scribing tool, making it the desired length for the first side of the parallelogram. 6. Rotate the square while keeping the reference line aligned with the previously drawn line. 7. Mark the starting point for the second side of the parallelogram on the material. 8. Align the reference line with the marked point and draw a straight line along the other edge of the square to create the second side. 9. Finally, connect the endpoints of both sides with straight lines to form the remaining two sides of the parallelogram. By utilizing a steel square as a guide, you can ensure the accuracy and correct angles when laying out a parallelogram. Remember to verify your measurements and maintain proper alignment of the square throughout the process to achieve the desired shape.
- Q:How do you use a steel square to determine the length of a beam?
- To use a steel square to determine the length of a beam, follow these steps: 1. Start by finding a level and flat surface to work on. This will ensure accurate measurements. 2. Place the steel square on one end of the beam, with the long side of the square against the side of the beam. 3. Align the square so that the 90-degree angle is perpendicular to the beam's length. 4. With one hand holding the square firmly in place, extend the other hand to mark the point where the beam ends on the square's long side. 5. Move the square along the beam, aligning the 90-degree angle with the previous mark made on the square. Repeat the process of marking the beam's length on the square. 6. Continue moving the square along the beam and marking its length until you reach the other end. 7. Once you have marked the entire length of the beam on the square, measure the distance between the first and last marks on the square using a measuring tape or ruler. 8. The measured distance between the marks on the square represents the length of the beam. It is important to note that when using a steel square, ensuring the square is securely placed against the beam and maintaining a consistent angle throughout the process will result in accurate measurements.
- Q:What is the weight of a typical steel square?
- The weight of a typical steel square can vary depending on its dimensions, but it is generally calculated by multiplying the density of steel (usually around 7850 kg/m^3) by the volume of the square.
- Q:How do you use a steel square to find angles for compound bevel miter cuts?
- To find angles for compound bevel miter cuts using a steel square, follow these steps: 1. Clean your steel square thoroughly, removing any debris. 2. Decide on the desired angle for the compound bevel miter cut based on your specific project or design. 3. Align the steel square properly and firmly against the edge of the material where the cut will be made. 4. Find the angle measurement on the steel square that corresponds to your desired angle. This measurement is usually marked on the square. 5. Mark the material at the corresponding angle on the square, using a pencil or marker. This mark will serve as a guide for making the cut. 6. Repeat this process for any other edges or sides of the material that require the same angle for the compound bevel miter cut. 7. Once all the necessary marks are made, use a saw or appropriate cutting tool to carefully follow the marked lines and make the desired compound bevel miter cuts. It is crucial to note that using a steel square demands accuracy and precision. Before cutting, double-check your measurements and marks to ensure the best results. Furthermore, with practice and experience, your ability to effectively use a steel square for compound bevel miter cuts will improve.
- Q:How do you use a steel square to determine the height of a countertop?
- To use a steel square to determine the height of a countertop, you need to follow a few simple steps: 1. Start by placing the steel square on top of the countertop, making sure it is aligned with one of the corners. The long side of the square should rest on the countertop surface. 2. Next, extend the square vertically until it reaches the desired height you want to measure. Ensure that the square is perfectly perpendicular to the countertop surface. 3. Once the square is in position, take a tape measure and measure the distance from the bottom of the square to the countertop surface. This measurement will give you the height of the countertop. 4. Repeat the process on each corner of the countertop to ensure accuracy. It is important to measure multiple points to account for any unevenness or irregularities in the countertop surface. By using a steel square and following these steps, you can accurately determine the height of a countertop. This method is particularly useful when you need precise measurements for installing appliances, cabinets, or any other elements that require a specific countertop height.
- Q:Can a steel square be used for measuring angles in masonry work?
- Absolutely! Masonry work can indeed benefit from the utilization of a steel square. This multipurpose tool, commonly referred to as a framing square or carpenter's square, possesses the ability to perform an array of measurements and layout tasks. Although its primary application lies in the realm of woodworking, it can also prove invaluable in masonry endeavors, ensuring precise cuts and layouts through angle measurement. By utilizing the square's right angle and diverse markings, one can easily ascertain and transfer angles, thereby elevating its usefulness in any masonry project. However, it is worth noting that for utmost accuracy or specific angles, the employment of specialized tools such as a protractor or angle finder may be necessitated.
- Q:How do you use a steel square to lay out a irregular shape with curved sides?
- To use a steel square to lay out an irregular shape with curved sides, you will need to follow these steps: 1. Begin by analyzing the irregular shape and identifying the key points and angles required to construct it accurately. This step is crucial to ensure that your layout is precise. 2. Place the steel square flat on a surface, ensuring that the longer side of the square is perpendicular to the surface. This longer side is called the blade. 3. Align one edge of the steel square, preferably the shorter side known as the tongue, with one of the key points or angles of the irregular shape. Make sure that the blade remains perpendicular to the surface. 4. Trace the edge of the tongue along the curved side of the irregular shape, keeping the blade steady and perpendicular as you move along. 5. Continue tracing the curved sides of the irregular shape, adjusting the position of the steel square as needed to maintain accuracy and ensure a smooth layout. 6. Make sure to take multiple measurements and double-check your work to guarantee precision. This is particularly important when dealing with irregular shapes and curved sides. 7. If necessary, use additional tools like a compass or flexible curve ruler to help you accurately trace the curved sides of the irregular shape. These tools can provide greater flexibility and precision when dealing with curves. Remember, using a steel square to lay out an irregular shape with curved sides can be complex, and it is essential to take your time, measure carefully, and make adjustments as needed to achieve an accurate layout.
- Q:How do you use a steel square to find the height of a roof peak?
- To use a steel square to find the height of a roof peak, you can follow these steps: 1. Start by positioning yourself at the base of the roof where the peak is located. Make sure you have a clear view of the entire peak. 2. Hold the steel square in your hand, with one leg of the square resting on the roof surface and the other leg pointing straight up towards the peak. The long side of the square should be parallel to the ridge line of the roof. 3. Adjust the position of the square until the leg resting on the roof is level, ensuring that the square is perfectly vertical. You can use a bubble level or simply visually align it. 4. Once the square is properly positioned, hold it steady and look at the scale on the long side of the square. This scale represents the rise or height of the roof. 5. Locate the point where the other leg of the square intersects the scale. This point will indicate the height of the roof peak. Take note of the measurement or mark it on the square for reference. By using a steel square in this way, you can easily determine the height of a roof peak without the need for additional tools or complicated calculations. It provides a simple and accurate method for estimating the height of the peak, which can be helpful for planning and construction purposes.
- Q:How do you use a steel square for cutting rafters?
- To use a steel square for cutting rafters, you will need to follow a few steps. Firstly, mark the desired pitch of the roof on the rafter timber. The pitch is the slope or angle of the roof. You can usually find this information in the building plans or by measuring an existing roof. Next, place the steel square on the timber, with the long arm (body) of the square on the edge of the timber and the shorter arm (tongue) extending towards the middle of the timber. Align the edge of the square with the pitch mark you made earlier. Once the square is positioned correctly, use a pencil or marking knife to trace along the edge of the square, marking the timber. This will create a straight line that represents the angle of the rafter. After marking the first side, rotate the square and align it with the opposite edge of the timber. Repeat the process of tracing along the edge to mark the second side of the rafter. Now you have a clear outline of the rafter shape on the timber. To cut the rafter, use a saw to carefully follow the marked lines. Take your time and ensure the cuts are straight and accurate. It is important to note that if you are cutting multiple rafters, you can use the first one as a template for the rest. Simply align the steel square with the already cut rafter and trace along the edges to mark the remaining ones. Using a steel square for cutting rafters is a precise and reliable method that helps ensure the correct angles and dimensions for a successful roof construction.
1. Manufacturer Overview |
|
|---|---|
| Location | |
| Year Established | |
| Annual Output Value | |
| Main Markets | |
| Company Certifications | |
2. Manufacturer Certificates |
|
|---|---|
| a) Certification Name | |
| Range | |
| Reference | |
| Validity Period | |
3. Manufacturer Capability |
|
|---|---|
| a)Trade Capacity | |
| Nearest Port | |
| Export Percentage | |
| No.of Employees in Trade Department | |
| Language Spoken: | |
| b)Factory Information | |
| Factory Size: | |
| No. of Production Lines | |
| Contract Manufacturing | |
| Product Price Range | |
Send your message to us
Hot Rolled Square Steel Bar Q235, SAE1020, SAE1045
- Ref Price:
-
- Loading Port:
- Shanghai
- Payment Terms:
- TT or LC
- Min Order Qty:
- 25 m.t.
- Supply Capability:
- 200000 m.t./month
OKorder Service Pledge
OKorder Financial Service
Similar products


New products

Hot products


Related keywords

