


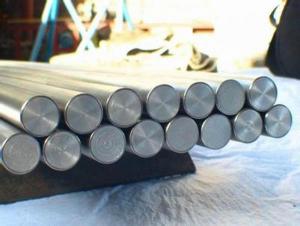
5mm Stainless steel round bar for construction
- Ref Price:
-

- Loading Port:
- Tianjin
- Payment Terms:
- TT or LC
- Min Order Qty:
- 25 m.t.
- Supply Capability:
- 10000 m.t./month
OKorder Service Pledge
OKorder Financial Service
You Might Also Like


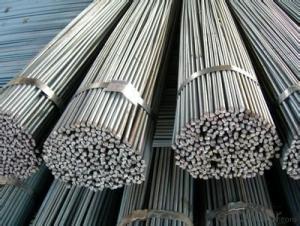
Product Description:
OKorder is offering 5mm Stainless steel round bar for construction at great prices with worldwide shipping. Our supplier is a world-class manufacturer of steel, with our products utilized the world over. OKorder annually supplies products to European, North American and Asian markets. We provide quotations within 24 hours of receiving an inquiry and guarantee competitive prices.
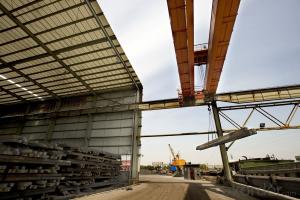
Product Applications:
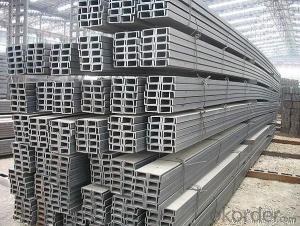
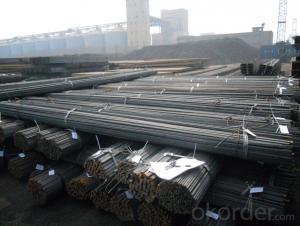
5mm Stainless steel round bar for construction are ideal for structural applications and are widely used in the construction of buildings and bridges, and the manufacturing, petrochemical, and transportation industries.
Product Advantages:
OKorder's 5mm Stainless steel round bar for construction are durable, strong, and resist corrosion.
Main Product Features:
· Premium quality
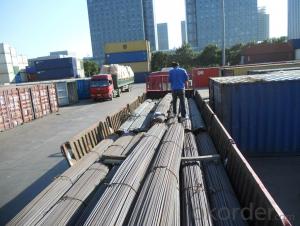
· Prompt delivery & seaworthy packing (30 days after receiving deposit)
· Corrosion resistance
· Can be recycled and reused
· Mill test certification
· Professional Service
· Competitive pricing
Product Specifications:
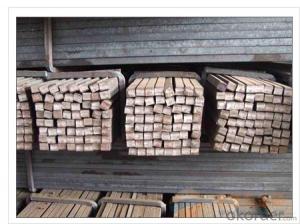
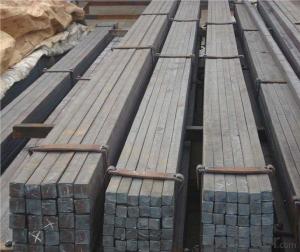
square steel billet
1.3SP, 5SP
2.terms of payment: L/C at sight
3.size: 120*120mm
4.length: 5.8~12m
square steel billet
Specifications
square steel billets
1)We procure world class quality steel billets which meets the specific requirements of the clients
The Billets produced by the company can be broadly divided into three main types i.e.
M.S. Billets
CRS Billets
Special Alloy Billets
M.S. Billets are used for rolling of TMT Re-Bars of Fe415 and Fe500 Grade and various other structural steel products.
CRS Billets are used fro rolling of CRS TMT Re-Bars.
Special Alloy Billets are used for rolling of any special grade TMT Re-Bars like Earthquake resistant TMT Re-Bars and for special grade structural steel products.
The following are the sizes of Billets available with Shyam Steel Industries Ltd.:
100 X 100
120x120
150 X 150
Physical Properties:
Description
As per IS 2830
Shyam Billets
Bend (max.) 5 mm per meter >= 5 mm per meter
Carbon (max.) 3mm per meter >= 3 mm per meter
Length 3 mt - 13 mt 3 mt - 9 mt
Chemical Properties:
Ladle Analysis:
Designation
Carbon
Manganese
C15 0.12-0.18 0.30-0.60
C18 0.15-0.21 0.30-0.60
C20 0.17-0.23 0.30-0.60
C15 MMn 0.12-0.18 0.60-1.00
C18 MMn 0.15-0.21 0.60-1.00
C20 MMn 0.17-0.23 0.60-1.00
C15 HMn 0.12-0.18 1.00-1.50
C18 HMn 0.15-0.21 1.00-1.50
C20 HMn
0.17-0.23 1.00-1.50
Billets of different designations are manufactured in three different grades namely A, B, C having sulphur, phosphorous content (on ladle analysis) and carbon equivalent as follows:
Chemical Analysis:
Grade Sulphur Phosphorous Carbon Equivalent (CE)1
Max Max Max
A 0.05 0.05 0.42
B 0.045 0.045 0.41
C 0.04 0.04 0.39
FAQ:
Q1: How do we guarantee the quality of our products?
A1: We have established an advanced quality management system which conducts strict quality tests at every step, from raw materials to the final product. At the same time, we provide extensive follow-up service assurances as required.
Q2: How soon can we receive the product after purchase?
A2: Within three days of placing an order, we will begin production. The specific shipping date is dependent upon international and government factors, but is typically 7 to 10 workdays.


- Q: Can a steel square be used for crown molding installation?
- Yes, a steel square can be used for crown molding installation. It can help in measuring and marking angles accurately, ensuring precise cuts and a professional finish.
- Q: How do you use a steel square to determine the angle of a profile cut?
- To use a steel square to determine the angle of a profile cut, you will need to follow a few steps. First, ensure that your steel square is clean and free from any debris or rust. Next, place the steel square against the side of the material you wish to cut at a right angle, making sure that it is flush and snugly fits against the surface. Once the steel square is properly positioned, observe the markings on the square. Most steel squares have markings that indicate angles, typically ranging from 0 to 90 degrees. These markings can be found on both the blade and the tongue of the square. To determine the angle of the profile cut, locate the marking on the blade that aligns with the edge of the material. This marking will indicate the angle at which the cut needs to be made. If the marking on the blade does not align exactly, you can estimate the angle by looking at the nearest marking and measuring the difference. Once you have determined the angle, you can transfer it to your cutting tool or machine to make the profile cut accurately. It is important to note that the accuracy of the angle measurement depends on the precision and calibration of your steel square, so ensure that it is in good condition before using it for such measurements. Using a steel square to determine the angle of a profile cut is a simple and effective method, especially when working with materials that require precise and accurate cuts.
- Q: How do you use a steel square for creating accurate box joints?
- To use a steel square for creating accurate box joints, you would first mark the width and depth of the joint on the edges of the two pieces you're joining. Then, align the steel square with the marked lines to ensure a 90-degree angle. Use the square to guide your saw or chisel while cutting along the marked lines, ensuring precise and accurate box joints.
- Q: Can a steel square be used for tile grouting?
- No, a steel square cannot be used for tile grouting. Tile grouting requires a specialized tool called a grout float, which is made of rubber or foam.
- Q: Can a steel square be used for measuring the thickness of tiles?
- No, a steel square cannot be used for measuring the thickness of tiles.
- Q: How do you use a steel square for marking miter cuts?
- To use a steel square for marking miter cuts, first, ensure that the square is properly aligned and squared. Then, place the square against the edge of the material to be cut, making sure it is positioned at the desired angle for the miter cut. With a pencil or marking tool, trace along the edge of the square to create a precise line for the miter cut. Finally, use this marked line as a guide when making the actual cut with a saw or other appropriate cutting tool.
- Q: Can a steel square be used for furniture making?
- Yes, a steel square can be used for furniture making. It can be used as a reliable tool for measuring and marking precise angles, ensuring accurate cuts, and maintaining the squareness and alignment of joints.
- Q: Can a steel square be used for checking the flatness of a floor joist?
- Using a steel square to check the flatness of a floor joist? Not possible. A steel square is specifically crafted for measuring right angles and establishing perpendicular lines. It does not possess the capability or appropriateness for assessing the flatness of a floor joist. To properly gauge the flatness of a floor joist, one must employ a straight edge or a level that is capable of spanning the length of the joist and delivering precise measurements of any deviations from a level surface.
- Q: How do you use a steel square to lay out a hip rafter?
- In order to lay out a hip rafter using a steel square, there are several steps that must be followed. Firstly, the pitch of the roof needs to be determined. Typically, this is expressed as a ratio, such as 4:12 or 6:12, which represents the rise over the run. The rise is the vertical distance from the top of the wall plate to the highest point of the roof, while the run is the horizontal distance from the outside of the wall plate to the ridge. Next, measure the run of the hip rafter from the outside of the wall plate to the point where it intersects with the ridge. This measurement is then used to mark the run on the blade of the square. Afterwards, find the rise of the hip rafter by multiplying the run by the pitch ratio. This measurement is marked on the tongue of the square. Now, position the square on the edge of the rafter stock, ensuring that the marks on the blade and tongue align with the appropriate edges. Hold the square with the tongue pointing upwards. Using the square as a guide, mark the plumb cut of the hip rafter on the stock. This cut is made at the top end of the rafter where it meets the ridge. Then, rotate the square so that the blade faces upwards and the tongue points to the left. Align the marks on the blade and tongue with the edges of the rafter stock. Using the square as a guide once again, mark the seat cut of the hip rafter on the stock. This cut is made at the bottom end of the rafter where it rests on the wall plate. Finally, make the necessary cuts along the marked lines to shape the hip rafter according to the layout determined by the steel square. It is important to keep in mind that accuracy and precision are crucial when using a steel square to lay out a hip rafter. It is recommended to practice and double-check measurements to ensure that the rafter fits correctly within the roof structure.
- Q: How do you use a steel square to lay out a valley rafter?
- To use a steel square to lay out a valley rafter, follow these steps: 1. Start by determining the pitch of the roof. The pitch is the ratio of the rise to the run of the roof. It is usually given as a fraction, such as 6/12 or 8/12. 2. Lay the steel square on a flat surface with the long edge (blade) facing up and the shorter edge (tongue) pointing towards you. 3. Find the line on the blade that corresponds to the roof pitch. This line is usually labeled with the pitch ratio. For example, if the pitch is 6/12, find the line that reads "6" on the blade. 4. Place the steel square on the valley rafter stock, aligning the tongue with the edge of the rafter. 5. Mark the plumb cut by tracing along the edge of the tongue. This represents the cut that will be made at the top of the rafter to fit against the ridge board. 6. Next, mark the bird's mouth cut by tracing along the edge of the blade. This represents the cut that will be made at the bottom of the rafter to fit against the wall or other supporting structure. 7. Measure and mark the length of the rafter from the plumb cut to the bird's mouth cut. 8. Repeat this process for the opposite side of the valley rafter if needed. 9. Finally, cut along the marked lines using a saw, ensuring accuracy and precision. By using a steel square to lay out a valley rafter, you can ensure that the cuts are properly aligned and the rafter will fit securely in place, contributing to a structurally sound and aesthetically pleasing roof.
Send your message to us
5mm Stainless steel round bar for construction
- Ref Price:
-
- Loading Port:
- Tianjin
- Payment Terms:
- TT or LC
- Min Order Qty:
- 25 m.t.
- Supply Capability:
- 10000 m.t./month
OKorder Service Pledge
OKorder Financial Service
Similar products


Hot products


Hot Searches
Related keywords

