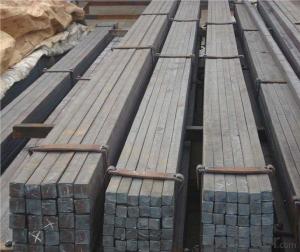
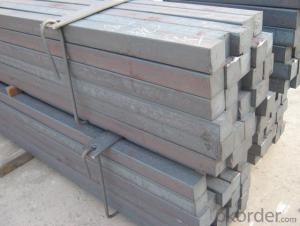

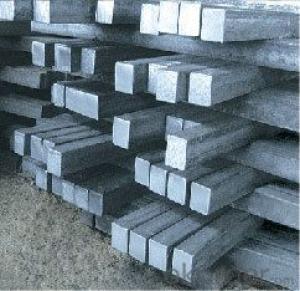
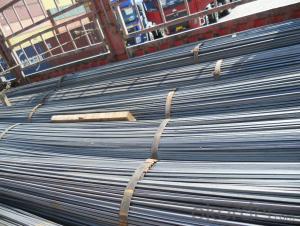
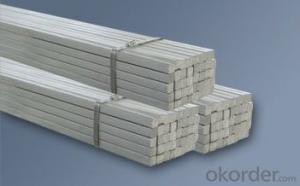
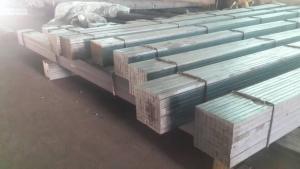
Steel Square Bar High Quality 5mm-100mm Q195 or Q235
- Ref Price:
-
$410.00 - 430.00
/ m.t.

- Loading Port:
- Shanghai
- Payment Terms:
- TT or LC
- Min Order Qty:
- 50 m.t.
- Supply Capability:
- 20000 m.t./month
OKorder Service Pledge
OKorder Financial Service
You Might Also Like


Product Description:
OKorder is offering High Quality Square Bar 5mm-100mm Q195 or Q235 at great prices with worldwide shipping. Our supplier is a world-class manufacturer of steel, with our products utilized the world over. OKorder annually supplies products to European, North American and Asian markets. We provide quotations within 24 hours of receiving an inquiry and guarantee competitive prices.
Product Applications:
1) Suitable for making various strong cutting tool abrasion resistance, impact resistance.
2) Used to produce all kinds of high hard and super hard saw blade, drill, tap, broach, gear hob and various kinds of milling cutter.
3) Used for advanced punching die, screw die, and the toughness and complicated shape of the punch, etc.
4) Is used for cold forging die and drawing mode, etc.
5) Recommended watchcase factory, screw factory and other cold stamping products industry use.
Product Advantages:
OKorder's High Quality Square Bar 5mm-100mm Q195 or Q235 are durable, strong, and resist corrosion.
Main Product Features:
· Premium quality
· Prompt delivery & seaworthy packing (30 days after receiving deposit)
· Corrosion resistance
· Can be recycled and reused
· Mill test certification
· Professional Service
· Competitive pricing
Product Specifications:
Standard: GB,
-Grade: Q195 or equivalent.
-Chemical Composition:
Standard | Grade | Element (%) | ||||
GB | Q195 | C | Mn | S | P | Si |
0.06~0.12 | 0.25~0.50 | ≤0.050 | ≤0.045 | ≤0.30 | ||
Measures of HR Square Bar (small measures):
-Length of a side and Theoretical weight of Square Bar.
Length of a side(mm) | Theoretical weight(kg/m) | Length of a side(mm) | Theoretical weight(kg/m) |
7 | 0.385 | 22 | 3.80 |
8 | 0.502 | 24 | 4.52 |
9 | 0.636 | 25 | 4.91 |
10 | 0.785 | 26 | 5.30 |
11 | 0.950 | 28 | 6.15 |
12 | 1.13 | 30 | 7.06 |
13 | 1.33 | 32 | 8.04 |
14 | 1.54 | 34 | 9.07 |
15 | 1.77 | 36 | 10.17 |
16 | 2.01 | 38 | 11.24 |
17 | 2.27 | 40 | 12.56 |
18 | 2.54 | 42 | 13.85 |
19 | 2.82 | 45 | 15.90 |
20 | 3.14 | 48 | 18.09 |
21 | 3.46 | 50 | 19.63 |
Notes:
1, The theoretical weights in the list, base on the density of 7.85 g/cm3.
2, Formula for theoretical weight of Square bar: (length of a side)2 * 0.00785
3, The numbers with *mean that they are not regular or we don’t offer them.
-Regular length of Square Bar:
Steel | Length of a side (mm) | Length of steel (m) |
Normal steel | < 25 | 4~10 |
> 25 | 3~9 | |
Steel of high quality | All measure | 2~6 |
Tool steel >75 | 1~6 |
FAQ:
Q1: Why buy Materials & Equipment from OKorder.com?
A1: All products offered byOKorder.com are carefully selected from China's most reliable manufacturing enterprises. Through its ISO certifications, OKorder.com adheres to the highest standards and a commitment to supply chain safety and customer satisfaction.
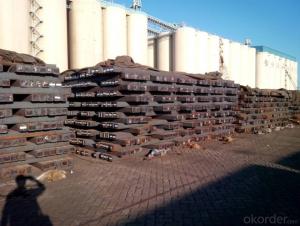
Q2: How do you package the angle steel when shipping?
A2: All goods are packed in bundles with steel strips and shipped by container or break bulk.
Q3: The products are invoicing on theoritical weight or on actual weight?
A3: We can do it in both manners, according to the customers' request.


- Q:How do you use a steel square to find the center of a round object?
- To find the center of a round object using a steel square, place the square against the edge of the object so that one of its long sides aligns with the diameter. Then, draw two diagonal lines from the corners of the square's long side onto the round object. The intersection of these lines will indicate the center of the round object.
- Q:Can a steel square be used for laying out a patio?
- Yes, a steel square can be used for laying out a patio. A steel square is a versatile tool that can be used to measure right angles and ensure accurate and square corners during the patio layout process. It can help in aligning and positioning the patio pavers or stones, resulting in a well-designed and level patio surface.
- Q:How do you use a steel square to determine the angle of a fluting cut?
- In order to determine the angle of a fluting cut using a steel square, the following steps can be followed: 1. Begin by placing the steel square flat on the material surface where the fluting is desired. Ensure that one edge of the square aligns with the material's edge. 2. Proceed to draw a line along the outer edge of the steel square using a pencil or marker. This line will serve as a reference for the fluting cut. 3. Measure the width of the material at the base of the fluting cut. This measurement will aid in determining the angle of the cut. 4. Locate the corresponding mark on the steel square that matches the width measured earlier. This mark will be along the side of the square. 5. Align the mark on the square with the previously drawn line, ensuring that the square remains flat on the material. 6. Next, place a protractor on the steel square, aligning its center with the mark on the square. The protractor should be perpendicular to the drawn line. 7. Take note of the angle indicated on the protractor where it intersects with the line. This angle represents the angle at which the fluting cut should be made. 8. Transfer the angle from the protractor to your cutting tool. A bevel gauge or miter gauge can be used to set the angle on your saw or other cutting equipment. By following these steps, the angle of a fluting cut can be accurately determined using a steel square, thus ensuring precision and accuracy in woodworking projects.
- Q:What are some common applications for a steel square in concrete formwork?
- A steel square, a tool commonly used in concrete formwork, serves various purposes. Here are some examples: 1. Precise angle measurement: Steel squares are designed with a 90-degree and a 45-degree angle, enabling accurate angle measurement in concrete formwork. This ensures the precise placement of walls, columns, and beams. 2. Checking for squareness: Steel squares are frequently used to determine if corners or edges are perfectly square. In concrete formwork, this is crucial to ensure proper alignment and prevent deformities or misalignments in the final structure. 3. Aligning and leveling formwork: Steel squares help align and level formwork components like panels, beams, and supports. Contractors can achieve plumb and level formwork by adjusting the square accordingly, resulting in a smooth concrete surface. 4. Creating straight edges: By utilizing steel squares as guides, contractors can create straight edges in concrete formwork. This guarantees a clean finish when the concrete is poured and cured. 5. Accurate measurements: Steel squares are valuable for precise measurement and marking in concrete formwork. Contractors can use them to determine the correct lengths, widths, and heights of formwork components, ensuring a precise fit and accommodating the desired dimensions of the final structure. To summarize, a steel square is an essential and versatile tool in concrete formwork. Its applications include measuring and marking angles, checking for squareness, aligning and leveling formwork, creating straight edges, and determining accurate measurements. Its versatility and accuracy make it indispensable for achieving high-quality concrete structures.
- Q:How do you use a steel square to measure board widths at different points?
- To use a steel square to measure board widths at different points, you can follow these steps: 1. Start by holding the steel square against the edge of the board at the desired point where you want to measure the width. 2. Ensure that the long side of the steel square (the blade) is aligned parallel to the edge of the board. 3. Slide the square along the edge of the board until you reach the other point where you want to measure the width. 4. Once you have positioned the steel square, take note of the measurement indicated on the square's short side (the tongue). This measurement represents the width of the board at that specific point. 5. If you need to measure the width at additional points, repeat steps 1 to 4, adjusting the position of the steel square accordingly. It's important to hold the steel square firmly against the board to ensure accurate measurements. Additionally, make sure you are using the appropriate markings on the steel square for the desired measurements (e.g., inches or centimeters).
- Q:Can a steel square be used for fabricating metal parts?
- Yes, a steel square can be used for fabricating metal parts. It is a versatile tool that provides accurate measurements, right angles, and straight lines, making it useful for layout work, marking, and checking dimensions while working on metal fabrication projects.
- Q:How do you use a steel square for marking hip and valley rafters?
- To use a steel square for marking hip and valley rafters, you would first need to understand the basic principles of roof framing and the different types of rafters involved. A steel square, also known as a framing square or carpenter's square, is a versatile tool used by carpenters, roofers, and other tradespeople to make precise measurements and markings. Here are the steps to use a steel square for marking hip and valley rafters: 1. Understand the roof framing plan: Before starting, familiarize yourself with the roof framing plan or design. This will give you an idea of the layout, angles, and dimensions of the hip and valley rafters you need to mark. 2. Identify the rafter angles: Hip and valley rafters are cut at specific angles to fit the roof's slope and geometry. Using the steel square, you can determine these angles accurately. The two main parts of a steel square are the body and the tongue. The body has a long edge called the blade, while the tongue is shorter and perpendicular to the body. 3. Position the square: Hold the steel square against the edge of the rafter stock (the piece of wood you will be cutting). Align the body's blade with the bottom edge of the rafter stock, making sure it is flush. 4. Locate the plumb or seat cut angle: To mark the plumb or seat cut angle, slide the square along the rafter until the desired angle aligns with the top corner of the rafter stock. This angle will depend on the roof's pitch and the specific design. Once aligned, mark the angle on the rafter stock using a pencil or marking knife. 5. Mark the birdsmouth cut: The birdsmouth cut is where the rafter sits on the top plate of the wall. To mark this cut, keep the square in the same position as the previous step. Locate the desired birdsmouth depth, usually specified in the framing plan, and mark it on the rafter stock by sliding the square up or down. 6. Repeat for multiple rafters: If you have multiple hip or valley rafters to mark, repeat the above steps for each rafter. Ensure consistency in your measurements and markings to maintain accuracy during the construction process. Remember, using a steel square for marking hip and valley rafters requires some knowledge of roof framing and the specific angles involved. It is always advisable to consult a professional or reference reliable resources for guidance, especially if you are not experienced in roof construction.
- Q:How do you use a steel square to determine the length of a fence?
- To use a steel square to determine the length of a fence, you would need to follow a few simple steps. First, find a flat and level surface where you can measure the fence accurately. Place the steel square on the ground or a sturdy table. Next, position one arm of the steel square against the fence post or any fixed point on the fence. Ensure that it is aligned perpendicular to the fence line. The other arm of the square should be extended along the fence line. Now, move the square along the fence line, keeping the arms aligned with the fence and perpendicular to each other. As you move, count the number of times you have to move the square's position to reach the end of the fence. Each time you move the square, mark the spot where the extended arm reaches. Once you reach the end of the fence, count the number of marks you made. Multiply this number by the length of one side of the square to obtain the total length of the fence. For example, if the length of one side of the square is 12 inches, and you made 20 marks, the total length of the fence would be 20 x 12 = 240 inches or 20 feet. Using a steel square in this manner allows for accurate measurements and helps ensure that the fence is straight and properly aligned.
- Q:4*4 steel welding frame tank do strong?
- Or more strong legs 4 legs is not easy to findAdd a circle support at the bottom of the cylinder, top two, it is better to get a board, more stable table
- Q:How do you use a steel square for making accurate miter cuts?
- To use a steel square for making accurate miter cuts, follow these steps: 1. Start by ensuring that your steel square is clean and free from any dirt or debris. This will help in achieving accurate measurements. 2. Place the steel square flat against the edge of the material you wish to make the miter cut on. Ensure that the square is aligned properly and that the angle you want to cut is perpendicular to the square. 3. Hold the square firmly against the material, making sure it doesn't move or shift. It's a good idea to use clamps or a vise to secure the square in place if necessary. 4. Use a pencil or a marking knife to mark the line where you want to make the miter cut. Make sure to align the square with the desired angle and trace along the edge of the square to create an accurate line. 5. Double-check the alignment of the square before proceeding. It's crucial to ensure that the square hasn't moved during the marking process. 6. Now, using a miter saw or a handsaw, carefully follow the marked line to make the miter cut. Take your time and make precise cuts to achieve the desired angle. 7. After making the cut, check the accuracy of the miter by placing the two cut pieces together. They should fit snugly and form a perfect angle. If adjustments are needed, use sandpaper or a file to fine-tune the cut until the desired fit is achieved. Remember, practice and patience are key when using a steel square for making accurate miter cuts. With time, you will become more proficient and achieve precise and clean cuts for your woodworking projects.
1. Manufacturer Overview |
|
|---|---|
| Location | |
| Year Established | |
| Annual Output Value | |
| Main Markets | |
| Company Certifications | |
2. Manufacturer Certificates |
|
|---|---|
| a) Certification Name | |
| Range | |
| Reference | |
| Validity Period | |
3. Manufacturer Capability |
|
|---|---|
| a)Trade Capacity | |
| Nearest Port | |
| Export Percentage | |
| No.of Employees in Trade Department | |
| Language Spoken: | |
| b)Factory Information | |
| Factory Size: | |
| No. of Production Lines | |
| Contract Manufacturing | |
| Product Price Range | |
Send your message to us
Steel Square Bar High Quality 5mm-100mm Q195 or Q235
- Ref Price:
-
$410.00 - 430.00
/ m.t.
- Loading Port:
- Shanghai
- Payment Terms:
- TT or LC
- Min Order Qty:
- 50 m.t.
- Supply Capability:
- 20000 m.t./month
OKorder Service Pledge
OKorder Financial Service
Similar products


New products

Hot products


Hot Searches
Related keywords

