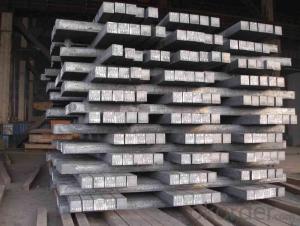


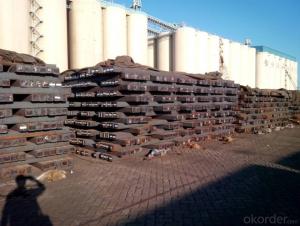
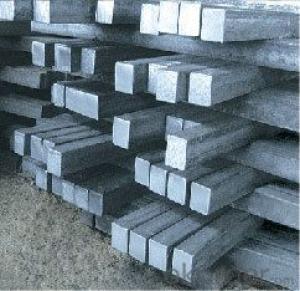
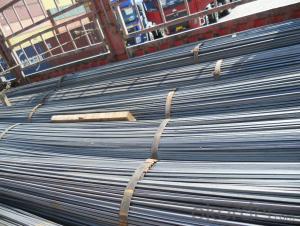
Hot rolled steel bar
- Ref Price:
-

- Loading Port:
- China Main Port
- Payment Terms:
- TT OR LC
- Min Order Qty:
- -
- Supply Capability:
- -
OKorder Service Pledge
Quality Product, Order Online Tracking, Timely Delivery
OKorder Financial Service
Credit Rating, Credit Services, Credit Purchasing
You Might Also Like


Product Description
The Detail of Product
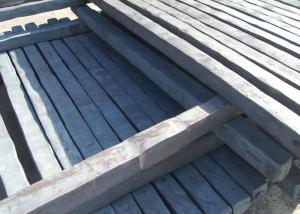
| Name: | steel billets |
| LENGTH: | 6 meter to 12 meter (+ 50mm) |
| Size: | 100*100, 120*120, 150*150, 200*200 |
| Grade: | 3SP,5SP,Q235,20MnSi. |
| Shape: | Square, Round |
| Technique: | Hot-Rolled |
| Standard: | ASTM/GB |
| BENDING | No more than 5mm in 1 meter No more than 30mm in 6 meter No more than 60mm in 12 meter |
| ANGULAR TWIST | No more than 1 degree per meter and not more than 6 degree over 12 meter length. |
| Chemical composition | C, Si, Mn, P, S, N, etc |
Chemical Properties
| Size | 60*60/90*90/100*100/120*120/150*150 |
| Length | 6000mm-12000mm |
| Standard | GB |
| Applicaton | To produce bars or other applications |
| Grade | Q195/Q235/Q275/3SP/5SP/20MnSi |
| Packing terms | TT/LC |
| Package | Mill's standard packing or as client's requirment |
| Delivery time | Within 10-30 days after receiving the deposit or LC |
Chemical Comosition
| Standard | C(%) | Mn(%) | S(%) | P(%) | Si(%) |
| Q195 | ≤0.12 | ≤0.50 | ≤0.040 | ≤0.035 | ≤0.30 |
| Q235 | ≤0.20 | ≤1.40 | ≤0.045 | ≤0.045 | ≤0.35 |
| Q275 | ≤0.22 | ≤1.50 | ≤0.045 | ≤0.045 | ≤0.35 |
| 20MnSi | 0.17-0.25 | 1.2-1.6 | ≤ 0.050 | ≤ 0.050 | 0.40-0.80 |
| 3SP | 0.14-0.22 | 0.40-0.85 | ≤ 0.050 | ≤ 0.040 | 0.05-0.15 |
| 5SP | 0.28-0.37 | 0.50-1.00 | ≤ 0.050 | ≤ 0.040 | 0.15-0.30 |
- Q:Can a steel square be used for creating dado joints?
- Yes, a steel square can be used for creating dado joints. A steel square is a versatile tool that can be used for measuring and marking precise angles and lines, which are essential for creating accurate dado joints.
- Q:How does a steel square assist in determining the correct angle for a canted cut?
- A steel square is a versatile tool used in carpentry and woodworking that can assist in determining the correct angle for a canted cut. It consists of a long steel blade with a ruler on one edge and a shorter steel tongue perpendicular to the blade. The tongue is also marked with measurements, allowing for precise measurements and angles to be determined. When it comes to determining the correct angle for a canted cut, the steel square can be used in a few different ways. First, it can be used as a guide to mark the desired angle on the material being cut. By aligning the tongue of the square with the edge of the material and adjusting the blade to the desired angle, one can easily mark the correct angle for the cut. Additionally, the steel square can be used as a reference point to check the accuracy of the angle. By placing the square against the cut surface, one can easily determine if the angle is correct. If the blade of the square aligns perfectly with the cut surface, then the angle is accurate. If there is a gap or overlap between the blade and the cut surface, adjustments can be made accordingly. Furthermore, the steel square can also be used to measure and transfer angles. By aligning the tongue of the square with one side of an angle, the blade can then be used to mark the same angle on another piece of material. This is particularly useful when needing to replicate an angle on multiple pieces or when working with complex angles. In summary, a steel square is a valuable tool in determining the correct angle for a canted cut. It can be used to mark, check, and transfer angles with precision, ensuring accurate and consistent cuts in carpentry and woodworking projects.
- Q:What are some common uses for a steel square in metal fabrication?
- A steel square, also known as a framing square or a carpenter's square, is a versatile tool that is commonly used in metal fabrication for a variety of purposes. Some of the common uses for a steel square in metal fabrication include: 1. Measuring and marking: A steel square is an essential tool for accurately measuring and marking metal pieces. It is particularly useful in ensuring precise angles and lines, which are crucial in metal fabrication. 2. Squaring corners: Metal fabrication often requires precise right angles and squared corners. A steel square is used to ensure that corners are perfectly square, allowing for accurate and seamless welding or joining of metal pieces. 3. Checking for flatness: Metal sheets or plates should ideally be flat and level before fabrication. A steel square can be used to check for any warping or bending in the metal surface, helping to identify and correct any imperfections before further processing. 4. Layout work: The tool's straight edges and angles are useful in layout work, which involves marking and positioning various components before assembly. Steel squares help in accurately transferring measurements and creating templates for cutting or shaping metal pieces. 5. Drafting and designing: Steel squares are often used in drafting and designing metal structures or components. They aid in creating precise drawings, making accurate calculations, and ensuring that the final product meets the required specifications. 6. Angle measurements: Steel squares are equipped with a protractor scale that allows for measuring and marking various angles. This feature is beneficial in metal fabrication, where specific angles are required for cutting, bending, or welding metal pieces. 7. Setting up machinery: Steel squares are also useful during the setup of machinery in metal fabrication workshops. They can be used to align and position machines, ensuring that they are level and accurately placed for optimal performance. Overall, a steel square is an indispensable tool in metal fabrication, providing accuracy, precision, and versatility in various tasks such as measuring, marking, squaring corners, checking flatness, layout work, drafting, designing, angle measurements, and machinery setup.
- Q:Can a steel square be used for setting up a scroll saw?
- No, a steel square cannot be used for setting up a scroll saw. A steel square is primarily used for checking right angles and measuring angles on woodworking projects. To set up a scroll saw, one would typically use a combination of measuring tools, such as a ruler, protractor, and adjustable square, along with adjusting the saw's table and blade tension for precise cutting.
- Q:Can a steel square be used for measuring angles in plumbing?
- No, a steel square cannot be used for measuring angles in plumbing. A steel square, also known as a framing square or carpenter's square, is primarily used in carpentry and construction to ensure accuracy in right angles and marking straight lines. However, plumbing requires the measurement of various angles that are not necessarily right angles, such as 45 degrees or 22.5 degrees. To measure these angles accurately in plumbing, specialized tools such as protractors, angle finders, or adjustable angle squares are necessary. These tools are designed specifically for measuring and marking angles and provide the precision required for plumbing tasks.
- Q:Can a steel square be used for deck railing post layout and installation?
- Yes, a steel square can be used for deck railing post layout and installation.
- Q:How do you use a steel square for checking corner squareness?
- In order to check the squareness of a corner using a steel square, the following steps should be followed: 1. Position the steel square against one corner of the object or surface to be checked. Make sure that the long edge of the square aligns perfectly with one side of the object or surface. 2. Securely hold the square in place, ensuring that it remains stable and doesn't move or shift during the measurement. 3. Extend the blade of the square along the adjacent side of the object or surface, ensuring that it runs parallel to the corresponding side. 4. Take note of the point where the blade intersects with the object or surface. If the corner is perfectly square, the blade should align perfectly with the adjacent side, creating a 90-degree angle. 5. If the corner is not square, you will observe either a gap or an overlap between the blade and the adjacent side. Observe the degree of deviation from the desired 90-degree angle. 6. Repeat the process for all corners of the object or surface being checked, ensuring that each corner is square. By utilizing a steel square in this manner, you can easily determine whether a corner is perfectly square or not. This will aid in ensuring precise measurements and accurate construction or alignment.
- Q:How do you use a steel square to mark out parallel lines on irregular surfaces?
- To achieve parallel lines on irregular surfaces using a steel square, follow these instructions: 1. Ensure the steel square is thoroughly cleaned, devoid of any dirt or debris. This will aid in maintaining precise measurements. 2. Determine the two points on the irregular surface where the parallel lines should be marked. These points can be the edges of a board or any other reference points of your choosing. 3. Position the steel square on the surface, aligning one side of the square with one of the reference points. Securely hold the square in place. 4. Utilize a pencil or scribe to glide along the edge of the square, creating a line on the surface. 5. Next, align the same side of the square with the other reference point and repeat the process of marking a line. 6. By now, you will have two parallel lines marked on the irregular surface, equidistant from the reference points. 7. If additional parallel lines are required, simply repeat steps 3 to 6, aligning the square with the previously marked lines. It is important to take note that the accuracy of the parallel lines depends on the precision of your measurements and the stability of the steel square during the marking process. Additionally, exercise caution regarding any irregularities or bumps on the surface that may impact the accuracy of the lines.
- Q:How do you use a steel square to find angles for scribe cuts?
- In order to find angles for scribe cuts using a steel square, a few steps must be followed. First and foremost, it is important to ensure that the steel square is clean and in good condition. This will guarantee precise measurements. Following that, position the square against the edge of the material where the scribe cut will be made, with one side of the square running parallel to the edge. Then, adjust the square's position until the other side aligns with the desired angle for the scribe cut. Once the square is properly positioned, mark a line along the edge of the square using a pencil or scribe. After marking the line, remove the square and carefully examine the marked line to confirm its straightness and accuracy. Lastly, using an appropriate cutting tool, proceed to make the scribe cut along the marked line. By utilizing a steel square in this manner, the process of finding and transferring angles for scribe cuts becomes effortless, resulting in precise and clean outcomes.
- Q:How do you use a steel square for measuring and marking out rafter lengths?
- To use a steel square for measuring and marking out rafter lengths, you first need to understand the different markings and features of the square. A standard steel square typically consists of two arms – a longer one called the blade and a shorter one called the tongue. To begin, place the square on the edge of the rafter board with the tongue pointing upwards. Align the tongue with the edge of the board and ensure that the blade is perpendicular to it. Next, locate the "pivot point" on the square. This is usually marked by a series of numbers and lines along the blade and tongue. The pivot point is used as a reference for making measurements. To measure and mark out the rafter length, start by determining the desired length and angle for the rafter. Let's assume we want a 45-degree angle. First, find the 45-degree mark on the blade of the square. Align this mark with the pivot point on the rafter board. Next, slide the square along the board until the desired length is reached. The length is measured along the tongue of the square. Once you have positioned the square at the desired length, make sure the blade and tongue are still aligned with the edge of the board. Now, use a pencil or marker to mark along the edge of the square, creating a line that represents the rafter length. This line will guide you when cutting the rafter. Once the first rafter is marked and cut, you can use it as a template to mark out additional rafters. Simply align the square with the edge of the board, align the pivot point with the previous mark, and repeat the process for each rafter. It's important to note that there are other features on a steel square, such as the stair gauge and scribe bar, which can be used for more advanced measurements and layout tasks. However, the basic method described above will suffice for measuring and marking out rafter lengths.
1. Manufacturer Overview |
|
|---|---|
| Location | |
| Year Established | |
| Annual Output Value | |
| Main Markets | |
| Company Certifications | |
2. Manufacturer Certificates |
|
|---|---|
| a) Certification Name | |
| Range | |
| Reference | |
| Validity Period | |
3. Manufacturer Capability |
|
|---|---|
| a)Trade Capacity | |
| Nearest Port | |
| Export Percentage | |
| No.of Employees in Trade Department | |
| Language Spoken: | |
| b)Factory Information | |
| Factory Size: | |
| No. of Production Lines | |
| Contract Manufacturing | |
| Product Price Range | |
Send your message to us
Hot rolled steel bar
- Ref Price:
-
- Loading Port:
- China Main Port
- Payment Terms:
- TT OR LC
- Min Order Qty:
- -
- Supply Capability:
- -
OKorder Service Pledge
Quality Product, Order Online Tracking, Timely Delivery
OKorder Financial Service
Credit Rating, Credit Services, Credit Purchasing
Similar products


New products

Hot products


Hot Searches
Related keywords

