All Categories
- - Steel Wire Rod
- - Steel Coils
- - Steel Profiles
- - Steel Pipes
- - Stainless Steel
- - Tinplate
- - Special Steel
- - Steel Sheets
- - Steel Rebars
- - Steel Strips
- - Hot Rolled Steel
- - Cold Rolled Steel
- - Pre-painted Steel
- - Seamless Steel Pipe
- - Welded Steel Pipe
- - Hollow Steel Tubes
- - Galvanized Pipe
- - Stainless Steel Coil
- - Stainless Steel Sheet
- - Stainless Steel Plate
- - Stainless Steel Strips
- - Electrolytic Tinplate Coil
- - Electrolytic Tinplate Sheet
- - Stainless Steel Rebars
- - Solar Panels
- - Solar Water Heater
- - Solar Related Products
- - Solar Inverter
- - Solar Cells
- - Solar Light
- - Solar Energy Systems
- - Solar Controllers
- - Solar Mounting System
- - Solar Pump
- - Solar Chargers
- - Fiberglass Chopped Strand
- - Fiberglass Mesh Cloth
- - Composite Pipes
- - FRP Pultrusion Profiles
- - Fiberglass Mat Tissue
- - Fiberglass Fabrics
- - Fiberglass Mesh
- - Composite Tank
- - Fiberglass Mesh tape
- - Polymer
- - FRP Roofing Panel
- - Fiberglass Roving
- - Monolithic Refractories
- - Ceramic Fiber Products
- - Refractory Bricks
- - Raw Materials For Refractory
- - Suspended Platform
- - Cranes
- - Concrete Machinery
- - Earthmoving Machinery
- - Building Hoist
- - Road Building Machinery
- - Plastic Pipe Fittings
- - Plastic Tubes
- - Plastic Sheets
- - Agricultural Plastic Products
- - Plastic Nets
 All Categories
Q & A
What is a solar-powered RV?
A solar-powered RV is a recreational vehicle that is equipped with solar panels to generate electricity from sunlight and power its appliances and systems.
What is a solar-powered camping grill?
A solar-powered camping grill is a portable cooking device that harnesses energy from the sun to heat and cook food while camping or outdoors. It typically consists of a solar panel that captures sunlight, converts it into electricity, and powers the grill's heating elements or fan. This eco-friendly and efficient alternative to traditional fuel-powered grills allows campers to cook their meals without relying on propane, charcoal, or other combustible fuels.
How can I install solar panels on my roof?
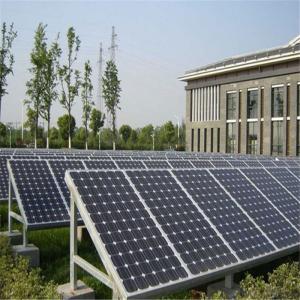
To install solar panels on your roof, follow these steps:
1. Assess your roof: Determine if your roof is suitable for solar panels by checking its orientation, angle, and shade coverage. Ideally, it should face south, have a slope between 15-40 degrees, and be free from obstructions.
2. Calculate energy needs: Evaluate your energy consumption to determine the number of panels required. Consider factors like average electricity usage, available sunlight, and desired energy independence.
3. Research and choose a solar installer: Look for reputable solar installation companies in your area. Read reviews, compare prices, and select a company that meets your requirements.
4. Obtain necessary permits: Contact your local authorities to understand the permits or licenses needed for solar panel installation. Ensure compliance with any regulations or restrictions.
5. Consult with the installer: Schedule a consultation with your chosen solar installer. They will assess your roof, provide an estimate, and discuss any specific requirements or concerns.
6. Sign a contract: Once you are satisfied with the terms and conditions, sign a contract with the solar installer, detailing the installation process, timeline, warranties, and payment terms.
7. Installation day: On the scheduled day, the solar installers will arrive with the necessary equipment and materials. They will mount the panels securely on your roof, connect them to the electrical system, and install an inverter to convert solar energy into usable electricity.
8. Inspections and interconnection: After installation, your local utility or an inspector will visit to inspect the system and ensure it meets safety standards. Once approved, your solar panels can be interconnected to the grid.
9. Enjoy the benefits: Once installed and connected, your solar panels will generate clean, renewable energy, reducing your reliance on the grid and potentially lowering your electricity bills.
Remember, it is always recommended to consult with professionals for a thorough assessment and guidance throughout the process.
Wholesale Solar Related Products from supplier in Malta
With our reliable products and services, backed by the reputation of CNBM, we are confident in our ability to meet and exceed your expectations. Contact us today to discuss your solar-related needs and let us assist you in achieving your renewable energy goals in Malta.
