


Square Bars with Firm Sides for Middle Sizes in Construction
- Ref Price:
-

- Loading Port:
- Tianjin
- Payment Terms:
- TT or LC
- Min Order Qty:
- 25 m.t.
- Supply Capability:
- 10000 m.t./month
OKorder Service Pledge
OKorder Financial Service
You Might Also Like


1. Structure of Square Bars with Firm Sides Description:
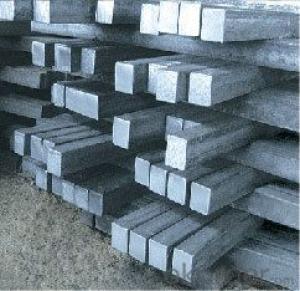
Square bars with firm sides is a bar with square shaped cross-section. It is special case of equal sides. Before steel products are sold on the market, the steel must first be processed into more functional pieces. Raw steel cannot be of use while in its pure form, thus it has to be cast into shape. The freshly made steel, square bars with firm sides is still in the form of a metal bar or rectangle. Small sizes of square bars with firm sides are used in ship building.
2. Main Features of Square Bars with Firm Sides:
• Grade: Q235
• Type: Mild carbon steel
• A quadrilateral with four equal sides and four right angles.
• Vibration: The stiffness and mass are chosen to prevent unacceptable vibrations, particularly in settings sensitive to vibrations, such as offices and libraries.
• Local yield: Caused by concentrated loads, such as at the beam's point of support.
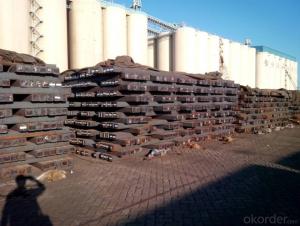
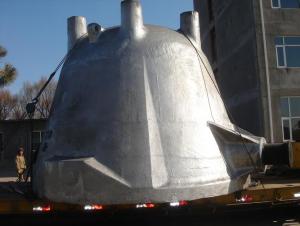
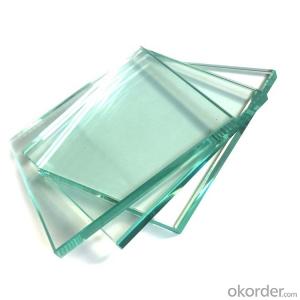
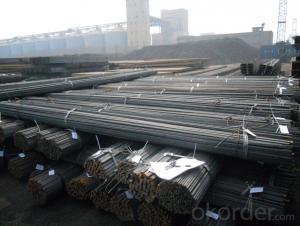
3. Square Bars with Firm Sides Images:

4. Square Bars with Firm Sides Specification:
Mechanical Properties | Grade | Steel diameter(mm) | |||
≤16 | 16~40 | 40~60 | 60~100 | ||
Yield Point Δs/MPa | Q195 | ≥195 | ≥185 | - | - |
Q235 | 235 | 225 | 215 | 205 | |
Tensile Strength | Q195 | 315~390 | |||
Q235 | 375~500 | ||||
Elongation δ5% | Q195 | ≥33 | ≥32 | - | - |
Q235 | 26 | 25 | 24 | 23 | |
5. FAQ
We have organized several common questions for our clients,may help you sincerely:
①What is the main material?
There are two types of Square Bar, one is hot rolled square bar and other one is cold drawn square bar. Our principal products is hot rolled square bar. We dedicate to products with material Q195 and Q235. We offer products with high quality and low price.
②How to inspect the quality?
We have a professional inspection group which belongs to our company. We resolutely put an end to unqualified products flowing into the market. At the same time, we will provide necessary follow-up service assurance.
③Is there any advantage about this kind of product?
Steel I beam bar IPE has a reduced capacity in the transverse direction, and is also inefficient in carrying torsion, for which hollow structural sections are often preferred.
- Q:What are some common uses for a steel square in box making?
- A steel square, also known as a framing square or carpenter's square, is a versatile tool that is commonly used in box making for a variety of purposes. Here are some common uses: 1. Measuring and marking: One of the primary uses of a steel square is for measuring and marking the dimensions of the box. It has markings along its edges that allow precise measurements to be made, ensuring accurate cuts and joints. 2. Checking for squareness: A steel square is vital in ensuring that the corners of the box are perfectly square. By placing the square against the edges or corners of the box, you can easily determine if they are at right angles to each other. This ensures the box is properly aligned and will assemble correctly. 3. Guiding cuts: When making cuts on the box material, a steel square can be used as a guide to ensure straight and accurate cuts. By aligning the square along the cutting line, you can use it as a reference point for guiding your saw or knife, resulting in precise cuts. 4. Setting up miter cuts: Miter joints are commonly used in box making to create clean and decorative corners. A steel square can be used to set up and guide the cutting angles for these miter joints. By aligning the square with the desired angle, you can accurately mark and cut the box material to create the perfect miter joint. 5. Checking board flatness: Before assembling a box, it is important to ensure the boards or panels are flat and free from any warping or bowing. A steel square can be used to check the flatness of the boards by placing it along the surface. If there are any gaps or spaces between the board and the square, it indicates an uneven surface that needs to be addressed before assembly. Overall, a steel square is an essential tool in box making, providing accurate measurements, ensuring squareness, guiding cuts, setting up miter joints, and checking board flatness. It helps in achieving precise and professional results in box construction.
- Q:What are some common techniques for using a steel square in cabinetry?
- A steel square, which is also referred to as a framing square or carpenter's square, is a tool that is widely used in cabinetry for the purpose of measuring and marking angles, thus guaranteeing precise cuts and joinery. Presented below are several customary methods for employing a steel square in cabinetry: 1. Squareness verification: One of the primary functions of a steel square is to ascertain if a corner is perfectly square. To accomplish this, position the square against the inside corner, and if the edge aligns with the adjacent edge, it indicates that the corner is square. This aids in ensuring that all corners of the cabinets are at right angles. 2. Indication of 45-degree cuts: The body of the steel square contains a 45-degree angle mark. By aligning the square with the material's edge, you can accurately mark a 45-degree angle for mitered cuts, such as those used for trim or decorative elements on cabinet doors and panels. 3. Marking of parallel lines: The lengthy edge of a steel square is utilized for marking parallel lines. Just align the square with the material's edge and draw a line along the other edge of the square. This technique is useful for marking the locations of shelves and cabinet bottoms or for ensuring parallel cuts. 4. Layout of cuts: The steel square is highly effective for marking precise lines for cuts. By aligning the square with the material's edge, you can draw a line perpendicular or parallel to the edge. This facilitates the marking of cuts for various cabinet components like shelves, drawer dividers, and door frames. 5. Determination of pitch and slope: A steel square can be utilized to determine the pitch or slope of a roof or any inclined surface. By placing the square on the surface, you can ascertain the degree of pitch or slope by referring to the markings on the square. 6. Measurement and transfer of dimensions: The steel square can also function as a ruler for the purpose of measuring and transferring dimensions. The body of the square typically features a scale on one or both edges, enabling you to measure and mark precise lengths or distances. All in all, a steel square is an indispensable tool in cabinetry, providing accuracy and versatility in terms of measuring, marking, and verifying angles. Whether you are constructing cabinets from scratch or making meticulous modifications, incorporating these common techniques will ensure that your cabinetry projects are executed with precision and craftsmanship.
- Q:How do you use a steel square to measure stair treads and risers?
- To use a steel square to measure stair treads and risers, follow these steps: 1. Start by ensuring that your steel square is clean and in good condition. Any dents or damage may affect the accuracy of your measurements. 2. Position the steel square on the edge of the stair tread, aligning the tongue (the shorter arm) with the edge of the tread. Make sure the blade (the longer arm) is flat against the riser. 3. Hold the square firmly in place and mark the measurement on the tread. This will give you the width of the tread. 4. Next, move the square to the riser. Align the tongue with the edge of the tread and the blade with the bottom of the tread above. Again, mark the measurement on the riser. This will give you the height of the riser. 5. Repeat this process for each tread and riser, ensuring that your measurements are accurate and consistent. 6. Once you have measured all the treads and risers, check your measurements to ensure they are within the acceptable range for building codes or the project requirements. Using a steel square to measure stair treads and risers is a straightforward process that can provide accurate measurements. It is important to be precise and consistent to ensure the stairs are safe and meet the necessary standards.
- Q:How do you use a steel square to determine the angle of a roof pitch?
- To use a steel square to determine the angle of a roof pitch, you will need to follow a few simple steps. First, position the steel square on the roof in such a way that one leg of the square is aligned with the horizontal edge of the roof. Ensure that the long edge of the square extends over the slope of the roof. Next, find the notch on the square that corresponds to the desired angle of the roof pitch. This notch is often labeled with the degree of the angle it represents. Once you have located the correct notch, pivot the square until the other leg aligns with the roof pitch. Ensure that the square is securely held against the roof surface to obtain accurate results. Finally, read the degree or angle value indicated on the square at the intersection of the two legs. This measurement represents the angle of the roof pitch. By following these steps and using a steel square correctly, you can determine the angle of a roof pitch accurately and efficiently.
- Q:Can a steel square be used for checking the squareness of a planer bed?
- To determine the squareness of a planer bed, one can utilize a steel square. A steel square is a handy tool featuring a right angle, enabling it to assess the perpendicularity of two surfaces. In the case of a planer bed, which ideally possesses a level and square surface, the steel square can be positioned on the bed and compared to its edges. If the steel square flawlessly aligns with the edges of the planer bed, one can confidently conclude that the bed is indeed square. Nevertheless, it is crucial to ensure the accuracy and proper calibration of the steel square employed in order to obtain precise outcomes.
- Q:How do you use a steel square to determine the angle of a roundover cut?
- To determine the angle of a roundover cut using a steel square, the following steps can be followed: 1. Begin by positioning the steel square against the desired edge of the workpiece where the roundover cut will be made. Make sure that the square is perpendicular to the edge. 2. Identify the corner of the square that aligns with the edge of the workpiece. This corner will serve as the reference point for measuring the angle. 3. Place a protractor on top of the steel square, making sure that the center of the protractor aligns with the reference corner. 4. Observe the angle measurement on the protractor where the edge of the workpiece intersects it. This measurement will provide the angle of the roundover cut. 5. Once the angle has been determined, it can be transferred to the woodworking tool you are using, such as a router or table saw, in order to set the appropriate cutting angle. Remember to thoroughly check your measurements and alignment before making any cuts to ensure accuracy. Additionally, exercise caution and adhere to proper safety protocols when working with power tools.
- Q:How do you use a steel square to create compound miter cuts?
- To use a steel square to create compound miter cuts, first, you need to determine the angles required for the cut. Use the square to mark a 90-degree angle on the piece of wood. Then, adjust the square to the desired angle for the miter cut and mark it on the wood. Next, adjust the square to the desired bevel angle and mark it on the wood as well. Finally, align the saw blade with the marks and make the compound miter cut following the marked angles.
- Q:Can a steel square be used for shed post layout and installation?
- Yes, a steel square can be used for shed post layout and installation. Steel squares, also known as framing squares or carpenter squares, are versatile tools commonly used in construction and woodworking projects. They have a right angle shape with a long tongue and a shorter blade, which allows them to accurately measure and mark angles and distances. When it comes to shed post layout and installation, a steel square can be used in several ways. Firstly, it can be used to ensure that the shed posts are positioned at right angles to each other. By placing the square against the edge of one post, the tongue can be extended along the adjacent post, and the blade can be used to check if the angle is 90 degrees. This ensures that the posts are properly aligned and will result in a square and sturdy structure. Additionally, a steel square can be used to mark the correct height for each post. By placing the square against the side of the post and aligning it with the desired height, a pencil or marker can be used to mark the cutting point accurately. This ensures that all posts are cut to the correct length, resulting in a level and even foundation for the shed. Furthermore, a steel square can also be used to check if the posts are plumb, meaning they are perfectly vertical. By aligning the square against the side of each post and checking for any gaps or deviations, adjustments can be made to ensure that all posts are installed in a straight and upright position. In conclusion, a steel square is a versatile tool that can be used effectively for shed post layout and installation. It can help ensure that the posts are positioned at right angles, cut to the correct length, and installed in a plumb and level manner.
- Q:Can a steel square be used for checking the squareness of furniture assemblies?
- Furniture assemblies can be checked for squareness using a steel square. This versatile tool, also known as a framing square or carpenter's square, is commonly used in carpentry and woodworking to guarantee accurate right angles and squareness. It features a right-angle shape, comprising one long arm and one shorter arm joined at a 90-degree angle. To evaluate the squareness of furniture assemblies, simply position the steel square against the corners or edges of the furniture piece. By aligning the long arm of the square with one side of the furniture and the shorter arm with the adjacent side, you can visually examine whether the two sides meet at a perfect right angle. If the furniture is square, the steel square's edges should align flawlessly with the furniture's edges, signifying proper assembly. Using a steel square offers a convenient and swift method to ensure the squareness of furniture assemblies, particularly for smaller or less intricate pieces. However, for larger or more complex furniture items, additional measuring and leveling tools may be necessary to guarantee precise squareness.
- Q:How do you use a steel square for creating precise miter joints?
- To use a steel square for creating precise miter joints, follow these steps: 1. Start by selecting a steel square that is accurately calibrated and has clear markings. Ensure that it is in good condition and free from any rust or damage. 2. Measure and mark the desired angles for your miter joints on the pieces of wood you are working with. Miter joints are typically cut at a 45-degree angle, but this may vary depending on your project. 3. Lay the steel square on the edge of one of the pieces of wood, aligning the edge of the square with the marked line for the miter joint. 4. Hold the square firmly against the wood and use a pencil or a marking knife to mark the cut line along the edge of the square. Ensure that the marking is clear and accurate. 5. Repeat the process on the other piece of wood, making sure both pieces are marked correctly and aligned properly. 6. Once the marking is complete, use a miter saw or a hand saw to cut along the marked lines. Take your time and make precise cuts to ensure a tight and accurate miter joint. 7. After cutting, test-fit the two pieces of wood together to check the accuracy of the miter joint. If necessary, make any adjustments or refinements to achieve a perfect fit. Using a steel square for creating precise miter joints is a straightforward process that requires careful measurement, marking, and accurate cutting. By following these steps and paying attention to detail, you can achieve clean and seamless miter joints for your woodworking projects.
1. Manufacturer Overview |
|
|---|---|
| Location | |
| Year Established | |
| Annual Output Value | |
| Main Markets | |
| Company Certifications | |
2. Manufacturer Certificates |
|
|---|---|
| a) Certification Name | |
| Range | |
| Reference | |
| Validity Period | |
3. Manufacturer Capability |
|
|---|---|
| a)Trade Capacity | |
| Nearest Port | |
| Export Percentage | |
| No.of Employees in Trade Department | |
| Language Spoken: | |
| b)Factory Information | |
| Factory Size: | |
| No. of Production Lines | |
| Contract Manufacturing | |
| Product Price Range | |
Send your message to us
Square Bars with Firm Sides for Middle Sizes in Construction
- Ref Price:
-
- Loading Port:
- Tianjin
- Payment Terms:
- TT or LC
- Min Order Qty:
- 25 m.t.
- Supply Capability:
- 10000 m.t./month
OKorder Service Pledge
OKorder Financial Service
Similar products


New products

Hot products


Related keywords

