

Hot Rolled Square Steel Bars 6mm-150mm
- Ref Price:
-

- Loading Port:
- Tianjin
- Payment Terms:
- TT OR LC
- Min Order Qty:
- -
- Supply Capability:
- 100000 m.t./month
OKorder Service Pledge
OKorder Financial Service
You Might Also Like


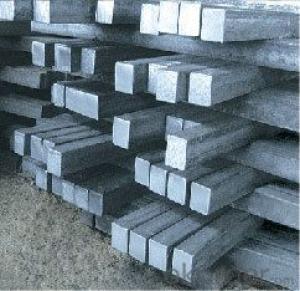

Product Description:
There are two types of Square Bar, one is hot rolled square bar and other one is cold drawn square bar. Our principal products is hot rolled square bar. We dedicate to products with material Q195 and Q235. We offer products with high quality and low price.
Specifications of Hot-rolled Square Steel Bar:
-Standard: GB,
-Grade: Q195/Q235 or equivalent.
-Chemical Composition:
Standard | Grade | Element (%) | ||||
C | Mn | S | P | Si | ||
GB | Q195 | 0.06~0.12 | 0.25~0.50 | ≤0.050 | ≤0.045 | ≤0.30 |
GB | Q235B | 0.12~0.20 | 0.30~0.70 | ≤0.045 | ≤0.045 | ≤0.30 |
-Mechanical Properties:
Mechanical Properties | Grade | Steel diameter(mm) | |||
≤16 | 16~40 | 40~60 | 60~100 | ||
Yield Point Δs/MPa | Q195 | ≥195 | ≥185 | - | - |
Q235 | 235 | 225 | 215 | 205 | |
Tensile Strength | Q195 | 315~390 | |||
Q235 | 375~500 | ||||
Elongation δ5% | Q195 | ≥33 | ≥32 | - | - |
Q235 | 26 | 25 | 24 | 23 | |
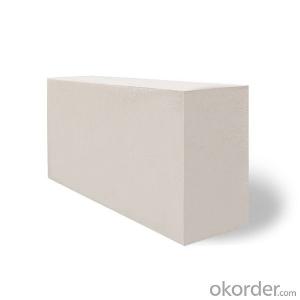
Measures of Hot-rolled Square Steel Bar (Big measures):

(Section of Hot-rolled Square Steel Bar)
-Length of a side and Theoretical weight of Square Bar (Big measures).
Length of a side(mm) | Theoretical weight(kg/m) | Length of a side(mm) | Theoretical weight(kg/m) |
53 | 22.05 | 80 | 50.24 |
56 | 24.61 | 85 | 56.72 |
60 | 28.26 | 90 | 63.59 |
63 | 31.16 | 95 | 70.85 |
70 | 38.49 | 100 | 78.50 |
75 | 44.16 |
|
|
Notes:
1, The theoretical weights in the list, base on the density of 7.85 g/cm3.
2, Formula for theoretical weight of Square bar: a(length of a side) * a * 0.00785
3, The numbers with *mean that they are not regular or we don’t offer them.
-Regular length of Square Bar:
Steel | Length of a side (mm) | Length of steel (m) |
Normal steel | < 25 | 4~10 |
> 25 | 3~9 | |
Steel of high quality | All measure | 2~6 |
Tool steel >75 | 1~6 |
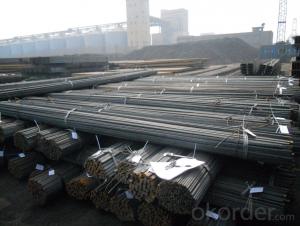
Usage/Applications of Hot-rolled Square Steel Bar:
-The Square Steel is normally used as structure steel.
-Row material for other structure steel like steel angles, channels, I-beams, H-beams, etc…
-Row material for steel pipes.
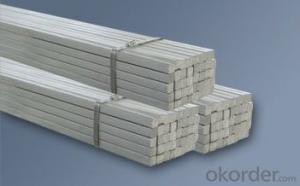
Packaging & Delivery of Hot-rolled Square Steel Bar:
-Packing Detail:
1, The products can be packed in bundles by steel wires.
2, The weight of each bundle no exceed normally 3 tons.
-Marks: We make tag marks and color marks for each bundle. The tag marks with white background and red company log will be tied up to each bundle. The information is usually including basic information of company and products like product name, specification, etc...and other information required by customers. As for color marks, we will paint both ends of each bundles to make sure that it will be more convenient for customers to distinguish theme from other products.
-Delivery Detail: 30~45 working days after receive buyer’s T.T. or L/C.
Payment:
-Invoicing on theoretical weight or actual weight as customer’s request.
-FOB, CFR or CIF.
-Regular terms of payment:
1, 30% payment in advance, the remaining balance (70% payment) against the copy of B/L.
2, 30% payment in advance, the remaining balance (70% L/C) against the copy of B/L.
3, Negotiable.
-The payment terms will be written in contraction detailedly.
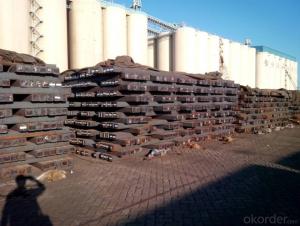
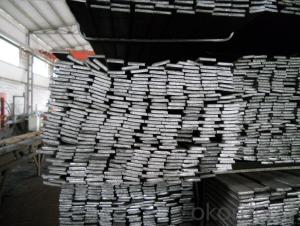
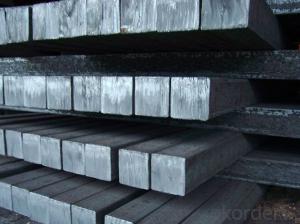
Photos of Hot-rolled Square Steel Bar:


We sincerely welcome partners around the world to establish business cooperation with us on the basis of mutual trust, benefit and development.
- Q:How do you store a steel square to prevent damage?
- To store a steel square and prevent damage, there are a few key steps you can follow. Firstly, it is important to clean the steel square thoroughly to remove any dirt, dust, or debris that may cause scratches or rust. Use a clean cloth or paper towel to wipe it down and ensure it is dry before proceeding. Next, you should apply a thin layer of protective oil or grease to the steel square. This will help create a barrier against moisture and prevent rust formation. Be sure to use a rust-preventive product specifically designed for steel or metal surfaces. Apply the oil or grease evenly across all surfaces of the steel square, including the blade, handle, and any exposed edges. Once the protective coating is applied, it is recommended to wrap the steel square in a soft cloth or towel. This will provide an extra layer of cushioning and protection against accidental impacts or scratches. Make sure the cloth is clean and free from any abrasive materials that could damage the steel square. Finally, choose an appropriate storage location for the steel square. Ideally, it should be stored in a dry area with controlled humidity to minimize the risk of rust formation. Avoid storing it in areas prone to moisture, such as basements or areas with high humidity levels. Additionally, try to keep it away from other tools or objects that could potentially scratch or damage the steel square. By following these steps, you can protect your steel square from damage and ensure its longevity. Regularly inspect and maintain the protective coating to keep it in optimal condition, and your steel square will be ready for use whenever needed.
- Q:How do you use a steel square to create finger joints?
- Achieving finger joints using a steel square requires a set of essential tools and following a step-by-step process. Here is a breakdown of how you can accomplish it: 1. Gather the necessary tools: You should have a marking knife or pencil, a chisel set, a mallet or hammer, a sturdy workbench or surface, and, most importantly, a steel square. 2. Prepare the wood: Begin by carefully selecting suitable wood for your finger joints. Ensure that it is defect-free and flat. Cut the wood pieces to the desired dimensions for your project. 3. Mark the wood: Utilize the steel square to mark the width and location of the finger joints on both wood pieces. This square will assist in creating accurate and straight lines. Measure and mark the width of the fingers and the gaps between them. 4. Determine the depth: Use a marking knife or pencil to score the marked lines on the wood. This step will serve as a guide for your chisel during the cutting process. Ensure that the depth of the cuts matches the thickness of the adjacent wood piece. 5. Remove the excess wood: Securely place the wood on a workbench or sturdy surface. Employ the chisel and mallet or hammer to cautiously eliminate the excess wood between the scored lines. Start by making shallow cuts along the marked lines and gradually deepen them until the waste wood is removed. 6. Test the fit: Once you have completed the cuts on one wood piece, assess the fit by inserting the fingers into the corresponding gaps of the adjacent wood piece. The joints should fit snugly without any gaps or looseness. If necessary, make the required adjustments using the chisel until you achieve a perfect fit. 7. Glue and assemble: Apply a thin layer of wood glue to the joints and press the pieces together. Use clamps or other appropriate methods to hold the joint in place while the glue dries. Follow the recommended drying time provided by the manufacturer. 8. Finalize the details: Once the glue has dried, utilize sandpaper or a file to smoothen any rough edges or imperfections in the joint. This final step will result in a clean and professional finish. By adhering to these steps and relying on a steel square as your guide, you can create precise and sturdy finger joints for your woodworking projects. Remember to exercise caution and work slowly and carefully to achieve optimal results.
- Q:Can a steel square be used for cabinet hardware installation?
- No, a steel square is not typically used for cabinet hardware installation. Cabinet hardware installation usually requires specific tools such as drills, screwdrivers, and measuring tapes.
- Q:Can a steel square be used for crown molding installation?
- Yes, a steel square can be used for crown molding installation. A steel square is a versatile and accurate tool that can be used for various carpentry tasks, including crown molding installation. It can be used to mark and measure angles, ensuring precise cuts and a proper fit for crown molding pieces. However, it is important to note that using a steel square for crown molding installation may require some additional calculations and adjustments due to the complex nature of crown molding angles. It is advisable to consult a professional or refer to a comprehensive guide for accurate measurements and cutting techniques specific to crown molding installation.
- Q:How do you use a steel square to determine angles for chair rail molding?
- To use a steel square for determining angles for chair rail molding, start by placing the square against the wall with one leg touching the bottom edge of the chair rail. Then, rotate the square until the other leg aligns with the wall. The angle formed by the square's blade and the wall will indicate the angle at which the chair rail needs to be cut. Use this measurement to accurately cut the chair rail molding for a perfect fit.
- Q:What are some common uses for a steel square in roofing?
- A steel square is commonly used in roofing for tasks such as measuring and marking angles, cutting straight lines, checking for squareness, and laying out roof rafters and trusses accurately.
- Q:Can a steel square be used for checking the squareness of a fence post?
- Certainly, a fence post's squareness can be verified using a steel square. A steel square, which is also referred to as a framing square or carpenter's square, is a versatile tool extensively utilized in carpentry and construction projects to ascertain right angles and guarantee measurement accuracy. To check a fence post's squareness, one can position the steel square against the post to assess its perfect perpendicularity to the ground. Through aligning the square with the post and examining if the edges are flush against the post and the ground, any deviations from a right angle can be easily detected. Consequently, adjustments can be made to ensure proper alignment and upright positioning of the fence post, resulting in a straight and robust fence.
- Q:How do you use a steel square for laying out stair stringers?
- To use a steel square for laying out stair stringers, start by determining the total rise and run of the staircase. Then, locate the desired number of treads and risers on the steel square, aligning it with the edge of the stringer. Next, mark the position of each tread and riser on the stringer using the appropriate measurements from the square. Finally, connect the marks to form the outline of the stringer, providing a precise template for cutting and installing the stairs.
- Q:How do you use a steel square to measure board diagonals?
- In order to measure board diagonals using a steel square, you must follow a series of steps. Initially, position the steel square on one corner of the board, making certain that one of the arms aligns with the board's edge. Confirm that the steel square lies flat against the surface of the board. Subsequently, extend the arm of the steel square across the width of the board until it reaches the opposite edge. Take note of the measurement at the point where the arm intersects the edge of the board. Afterwards, relocate the steel square to the adjacent corner of the board. Align one of the arms with the same edge as before and extend it across the width of the board until it reaches the opposite edge. Once again, record the measurement where the arm intersects the edge. Lastly, compare the two measurements you have obtained. If they are equivalent, it signifies that the board is perfectly square. However, if they differ, it indicates that the board is not square, and the disparity between the two measurements signifies the extent to which the board deviates from being square. Utilizing a steel square to measure board diagonals presents a straightforward and efficient technique for assessing squareness. This is of utmost importance in various woodworking and construction projects, as it ensures precise and accurate outcomes.
- Q:How do you use a steel square to measure the width of a picture frame?
- To measure the width of a picture frame using a steel square, you would place one edge of the square against the inside of the frame, ensuring it is flush with the corner. Then, you can read the measurement off the scale on the square where the other edge aligns with the opposite side of the frame. This will give you an accurate measurement of the frame's width.
1. Manufacturer Overview |
|
|---|---|
| Location | |
| Year Established | |
| Annual Output Value | |
| Main Markets | |
| Company Certifications | |
2. Manufacturer Certificates |
|
|---|---|
| a) Certification Name | |
| Range | |
| Reference | |
| Validity Period | |
3. Manufacturer Capability |
|
|---|---|
| a)Trade Capacity | |
| Nearest Port | |
| Export Percentage | |
| No.of Employees in Trade Department | |
| Language Spoken: | |
| b)Factory Information | |
| Factory Size: | |
| No. of Production Lines | |
| Contract Manufacturing | |
| Product Price Range | |
Send your message to us
Hot Rolled Square Steel Bars 6mm-150mm
- Ref Price:
-
- Loading Port:
- Tianjin
- Payment Terms:
- TT OR LC
- Min Order Qty:
- -
- Supply Capability:
- 100000 m.t./month
OKorder Service Pledge
OKorder Financial Service
Similar products


New products
Hot products


Hot Searches
Related keywords

