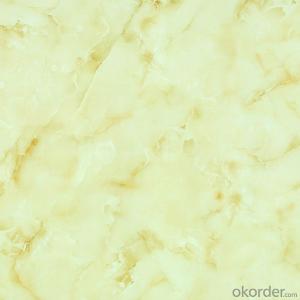
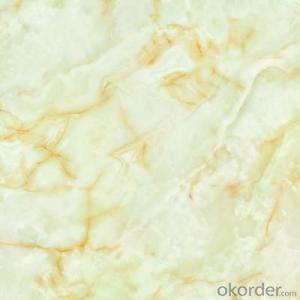
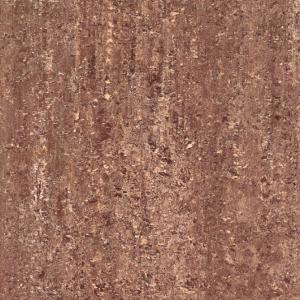
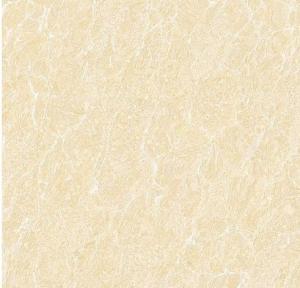
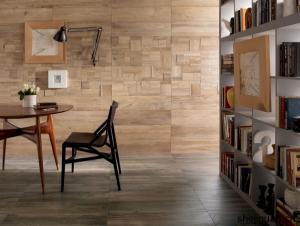
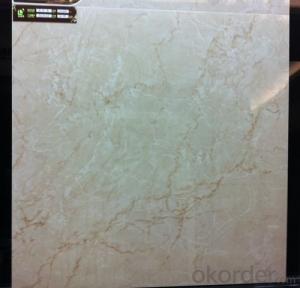
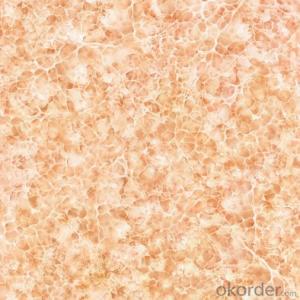
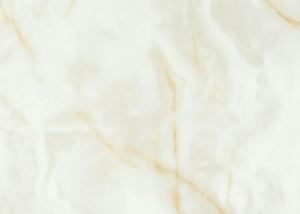
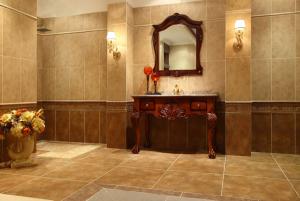
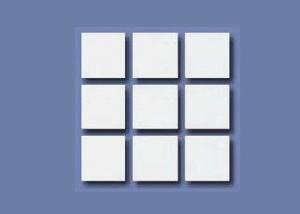
Sunshine 600x600mm Polished Porcelain Vitrified Tiles With Price 6008
- Ref Price:
-

- Loading Port:
- China main port
- Payment Terms:
- TT OR LC
- Min Order Qty:
- 1296 m²
- Supply Capability:
- 100000 m²/month
OKorder Service Pledge
OKorder Financial Service
You Might Also Like


Quick Details
| Type: | Tiles | Place of Origin: | Guangdong China (Mainland) | Brand Name: | Sunshine |
| Model Number: | 6008 | Size: | 600 x 600mm,800 x 800mm | Material: | Porcelain Tiles |
| Usage: | Interior Tiles | Function: | Antibacterial,Non-Slip | Surface Treatment: | Polished Tiles |
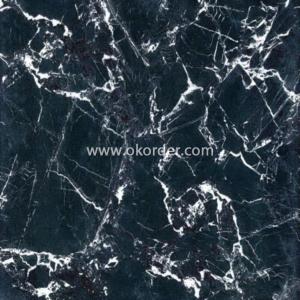
| Technique: | Vitrified Tiles | Tile Type: | Floor Tiles | Color: | beige ,black ,white |
| Thickness: | 9.5mm | Water absorbtion: | <0.5%< p=""> | Design: | Various |
| Type details: | Polished Porcelain Vitrified Tiles With Price | Delivery time: | Quick ,on time |
Packaging & Delivery
| Packaging Detail: | White carton with wooden pallet with fumigation in 20'GP container |
| Delivery Detail: | 15-25 days after receiving deposit |
Product Description
Product Types:
1. Spot Feeder Porcelain Floor Tiles Series,
2. Micro Powder Porcelain Floor Tiles Series,
3. Unpolished Salt and Pepper Porcelain Floor Tiles Series,
4. Polished Salt and Pepper Porcelain Floor Tiles Series,
The Advantage of Vitrified Tiles with price:
1.No Radioactivity.
2.No color difference.
3.Low water absorption.
4.Resistence to bending strength.
5.Resistence to fading ,discoloration.
6.Glazed surface ,top grade quality.
7. Equipment from German and Italy.
8.It is good for house decoration of interior flooring and wall tile bulding materil , kitchen wall tile building materils ,bathroom wall tiles build material ,Balcony ,super market ,house design ,shopping mall ,warehouse construction material
- Q:How would one grout mosaic tiles on standing mirror?
- Grout application on a mirror is exactly the same process as grouting a tile floor, back-splash, counter top, or table. Since the mirror is standing, I'd be sure that the mirror won't topple over when applying the grout because it has to be floated into the crevices between the tiles / tile pieces. If possible I'd suggest laying the mirror flat, either on the floor or on a sturdy worktable A grout float is basically a block shaped pushing tool used to force the grout between the tiles. Hold the float at an angle against the tiled surface and use a firm sweeping motion across the tile to push/force the grout into all the nooks, crannies, cracks and openings between the tiles. You'll have to work fairly quickly because grout becomes hard to work once it starts drying out. Work in a diagonal pattern and go back over any low or missed areas. Allow the grout to sit for 20-30 minutes. You'll know the grout is starting to cure when there is a light haze on the tile surface. Using a sponge and a bucket of clean water lightly buff the tile to remove the haze. This step may have to be repeated once or twice to be sure that all of the excess grout has been removed from the tile surface. If you want to seal the grout and tile, there are a number of sealant products available but you'll need to wait 3 or 4 days before applying in order to allow the grout to cure properly.
- Q:Okay, I‘m doing a tub surround with porcelain tile. Got the last cut around the fixtures that requires a hole to be cut in the center of the tile. Long story short, I‘ve busted 22 tiles trying. I‘ve tried every single drill bit I‘ve got. Everything from metal hole punchers to concrete bits. Nothing even scratches this porcelain tile. Any tips on how to punch a hole in this tile? I‘m desperate!
- If you'd tried Big T advise and it didn't work then there's another way. Cut the tile in two pieces and notch out the pipe hole with a blade for cutting tile (a hand blade) it's easier then tossing out 22 bad pieces.
- Q:i have just bought a house and my ceiling tiles needs cleaning. i would like to know if anyone out there knows what i can use to clean them. the ceiling tiles has dust but also has mildew on some of them. i don‘t want to replace them, i just want to clean them for now. thank you everyone.
- depends on what the tiles are made out of you idiot....
- Q:Can I leave them alone and simply go over them w/ mud and ceramic tile . I really don‘t want to open the hazmat can of worms by getting the tiles tested.The tiles look like that mutfti pattern common in office buildings and schools and secured w/ a mastic.Thanks
- If the tiles are 9x9, they are VA, vinyl asbestos. If the tiles are 12x12, they are VCT, vinyl composite, and the same installation rules apply to both types. Most quality latex modified thin set motars will set over the VA and VCT with no problem, as long as the VA or VCT are bonded securely to the concrete slab. Use TEC Superflex or Mapei Ultraflex 3, which have more portland cement and latex for better bonding. Prior to installation of your porcelain or ceramic, please thoroughly wash the VA or VCT tile with a strong stripper to remove any oils or waxes that might interfere with the mortar bonding. Then, rinse the tile with clean water. You will not have any hazardous waste problems, since you have not disturbed the VA tile and have encapsulated them permanently.
- Q:pattern is made up of black and white tiles. it is 7 tiles across .In the City Hall there is a pattern like this which is 149 tiles across. How many tiles all together? Please show work and how you got it.
- Consider the tiles in the pattern above, but not including the 149 tile row. That row contains 147 tiles. The next higher row contains 145 tiles and the number decreases by 2 for each successive row. The number of tiles above the 149 tile row is the sum of the odd integers from 1 to 147. N = 1 + 3 + 5 + 7 + ... + 145 + 147 N = Σ(2n-1) for n = 1 to 74 = 2Σn - Σ1 = 2(n)(n+1)/2 - n = 2(74)(75/2) - 74 = 74*75 - 74 = 74? tiles The pattern is symmetric about the 149 tile row so there are the same number of tiles below that row as there are above it. Including the 149 tile row the total number of tiles is: T = 2N + 149 = 2(74?) + 149 = 11101
- Q:I have recently glued mosaic (mirrior finish) tiles onto a wall of mine, however I have noticed a few tiles, have almost sorta withered away at the back, it also almost looks as if the mirror backing scraped away, now giving more of a clear look. I would now want to remove some of the tiles out, Would it be advisable to use a chisel and hammer, to chip away the tile, or is there anything I can use to repair the tile.Much Appreciated
- I'm not sure if the tiles are individual, or part of a mat. Either way I wouldn't use a chisel because you could damage the surrounding tiles, you could loosen the backing (mirror finish) of the surrounding tiles, and you could even damage the backing the tile is attached to, especially if it's attached to drywall instead of backerboard. First you want to cut through any grout. You can buy a cheap blade for this, or if you have a dremel tool or something similar, they make inexpensive grout removal tips. If there isn't any grout, you'll need to cut through the webbing if the tiles came attached to each other. You can do this with a knife, box cutter etc... At this point the only thing holding the tile in will be the glue. At this point you can gently use a chisel to break the bond. Hold the chisel upside-down, so the back of the chisel faces you and the angle is against the wall. Some call this paring, basically it allows the chisel to ride across the surface cutting behind the tile. Using it the standard way will cause the chisel to dig into the drywall or backerboard. Hope this helps, e-mail with any questions, Alan
- Q:I want to lay tile in my mobile home, and I want a cheaper alternative to wonderboard for the tile that I want to install. My home is on a concrete foundation tied down and the flooring is solid I‘m just concerned with the tile not sticking to the osb plywood. Any serious answers would be appreciated
- 1-1/4 thick of plywood. not osb or k3 board, but real plywood (2 layers 5/8th thick. then, when you lay your tile, use a polymer-modified thinset mortar, instead of a dry-set mortar. they have a powdered latex additive that helps it bond well to the plywood. of you look at the back of the bag it will tell you if it will stick to plywood.
- Q:Standard Specification for Common Tile and Flat Table
- 80x80 floor tile is 0.64 square 60X60 floor tile is 0.36 square 0.3X0.3 floor tile is 0.09 square 0.3X0.45 wall tile is 0.135 square square square ÷ brick square number = brick number such as 80 square floor laying 80X80 floor tiles 80 ÷ 0.64 = 125 tablets ? The answer was adopted by the questioner
- Q:how I can install ceramic tile on a wall and what tools do I need to do so? Any other tip that I should know about it to do a good job would be appreciated.
- Okay, the gory details are too numerous to detail here. Basically, you need: notched trowel for your tile size, grout float, wet saw/tile cutter, tile cleaning sponge, blue painter's tape, Mastic/thiinset, and grout. The grout should be unsanded for gaps between tiles less than 1/8. For gaps 1/8 or greater, use sanded grout. Thinset works well but is a pain in the b*tt to mix and has a short working time. I recommend you use Mastic or a similar product. You will have to remove all outlet and light switch wall plates as well as loosening the screws on all outlets and switches so you can install the tile underneath them. Otherwise, your switches and outlets will be recessed behind the wall plates and will look terrible. Of course, remove power at your fuse panel/breaker panel to each switch and outlet you work on before you do any of this. You will need to rough up your wall so that it has a good tooth for the Mastic to adhere to. I recommend either 60 grit sandpaper or a wire wheel in a drill. Rough it up in a horizontal direction. This will reduce the chance of tile droop (sliding down) after installation. Mark the boundaries of your backsplash with blue painter's tape to prevent Excess Mastic/grout from getting onto the painted part of your wall. Do a dry layout first, of your backsplash to check its look before you put it up. Now's the time to make any last-minute changes. Work from the bottom up. Use spacers between tiles. Cut tiles to fit around outlets, switches, and any other wall obstructions. Clean up any excess Mastic from between tiles, otherwise there won't be room for the grout. Let dry 24 hours before grouting. Use the float for grouting. Push the grout into the spaces between tiles. Don't worry about getting grout on the tiles. This will be cleaned up. Wait about fifteen minutes, then with a damp, clean sponge, wipe away the excess grout. That's about it. Check with other tile professionals and get their tips and advice as well.
- Q:I‘m redoing a sunroom in florida and the floor is in good condition but white textured vinyl floor tile prof laid, I want a cork tile look and wondered if there is a plastic type paint to do the job. It will not get a lot of shoe traffic. TKS.
- You okorder /
1. Manufacturer Overview |
|
|---|---|
| Location | |
| Year Established | |
| Annual Output Value | |
| Main Markets | |
| Company Certifications | |
2. Manufacturer Certificates |
|
|---|---|
| a) Certification Name | |
| Range | |
| Reference | |
| Validity Period | |
3. Manufacturer Capability |
|
|---|---|
| a)Trade Capacity | |
| Nearest Port | |
| Export Percentage | |
| No.of Employees in Trade Department | |
| Language Spoken: | |
| b)Factory Information | |
| Factory Size: | |
| No. of Production Lines | |
| Contract Manufacturing | |
| Product Price Range | |
Send your message to us
Sunshine 600x600mm Polished Porcelain Vitrified Tiles With Price 6008
- Ref Price:
-
- Loading Port:
- China main port
- Payment Terms:
- TT OR LC
- Min Order Qty:
- 1296 m²
- Supply Capability:
- 100000 m²/month
OKorder Service Pledge
OKorder Financial Service
Similar products


New products

Hot products
Related keywords

