

Steel Long Product of Square Section Bar High Quality
- Ref Price:
-

- Loading Port:
- Tianjin
- Payment Terms:
- TT or LC
- Min Order Qty:
- 25 m.t.
- Supply Capability:
- 10000 m.t./month
OKorder Service Pledge
OKorder Financial Service
You Might Also Like


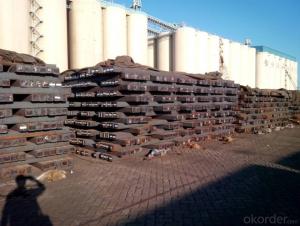
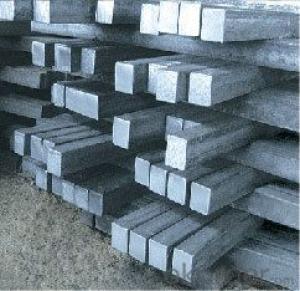

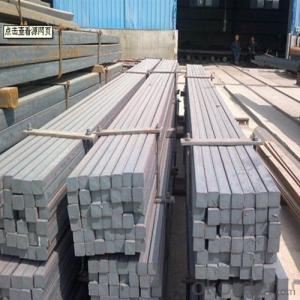
1. Structure of Steel Long Product of Square Section Bar Description:
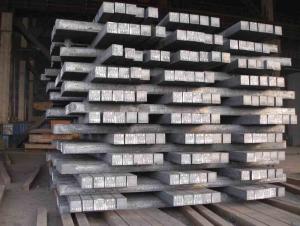
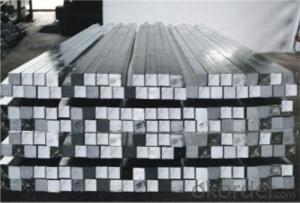
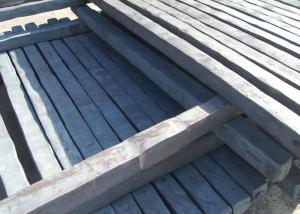
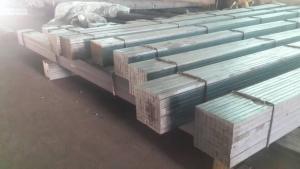
Steel long product of square section bar is a bar with square shaped cross-section. It is special case of equal sides. Before steel products are sold on the market, the steel must first be processed into more functional pieces. Raw steel cannot be of use while in its pure form, thus it has to be cast into shape. The freshly made steel, steel long product of square section bar is still in the form of a metal bar or rectangle. Small sizes of steel long product of square section bar are used in ship building.
2. Main Features of Steel Long Product of Square Section Bar:
• Grade: Q235
• Type: Mild carbon steel
• A quadrilateral with four equal sides and four right angles.
• Vibration: The stiffness and mass are chosen to prevent unacceptable vibrations, particularly in settings sensitive to vibrations, such as offices and libraries.
• Local yield: Caused by concentrated loads, such as at the beam's point of support.
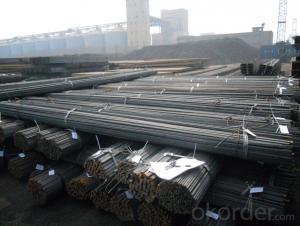
3. Steel Long Product of Square Section Bar Images:


4. Steel Long Product of Square Section Bar Specification:
Mechanical Properties | Grade | Steel diameter(mm) | |||
≤16 | 16~40 | 40~60 | 60~100 | ||
Yield Point Δs/MPa | Q195 | ≥195 | ≥185 | - | - |
Q235 | 235 | 225 | 215 | 205 | |
Tensile Strength | Q195 | 315~390 | |||
Q235 | 375~500 | ||||
Elongation δ5% | Q195 | ≥33 | ≥32 | - | - |
Q235 | 26 | 25 | 24 | 23 | |
5. FAQ
We have organized several common questions for our clients,may help you sincerely:
①What is the main material?
There are two types of Square Bar, one is hot rolled square bar and other one is cold drawn square bar. Our principal products is hot rolled square bar. We dedicate to products with material Q195 and Q235. We offer products with high quality and low price.
②How to inspect the quality?
We have a professional inspection group which belongs to our company. We resolutely put an end to unqualified products flowing into the market. At the same time, we will provide necessary follow-up service assurance. How to guarantee the quality of the products?We have established the international advanced quality management system,every link from raw material to final product we have strict quality test;We resolutely put an end to unqualified products flowing into the market. At the same time, we will provide necessary follow-up service assurance.
③Is there any advantage about this kind of product?
Steel I beam bar IPE has a reduced capacity in the transverse direction, and is also inefficient in carrying torsion, for which hollow structural sections are often preferred.
- Q:Can a steel square be used for setting up a router table?
- Certainly! A router table can indeed be set up using a steel square. This multipurpose tool is frequently employed for measuring and marking right angles. Its versatility allows for proper alignment and squareness of the router table. To verify perpendicularity, simply position the steel square against the tabletop and fence of the router table. Furthermore, during the setup process, the square can be utilized for assessing the precision of measurements and alignments. Nonetheless, it is worth mentioning that specialized tools, like router table setup gauges, are designed explicitly for this task and may yield more accurate outcomes.
- Q:What are some common uses for a steel square in picture framing?
- A steel square, also known as a framing square or carpenter's square, is a versatile tool that can be used for various purposes in picture framing. Some common uses for a steel square in picture framing include: 1. Measuring and marking: Steel squares have precise measurements etched onto their surfaces, allowing framers to accurately measure and mark the dimensions of picture frames. This is particularly useful for ensuring the frame is square and the corners are properly aligned. 2. Checking angles: Steel squares have a 90-degree angle, which makes them helpful for checking the squareness of corners and ensuring the frame is properly aligned. Framers can place the square against the corners of the frame to verify if they are perfectly square or need adjustments. 3. Cutting miters: When creating mitered corners for picture frames, a steel square can be used to mark and guide the cuts. By placing the square against the frame's edge, framers can draw a straight cutting line at the desired angle, ensuring precise and accurate mitered corners. 4. Determining the center: Framers often need to find the center point of a frame to ensure proper placement of artwork or mounting hardware. A steel square can be used to mark the center by aligning the edges of the square diagonally across the frame, intersecting at the center point. 5. Squaring up mat boards: Mat boards are commonly used in picture framing to enhance the appearance and protect the artwork. A steel square can be used to square up the mat boards by aligning the square against the edges and ensuring they are perpendicular to each other. 6. Aligning hardware: Picture frames often require the installation of various hardware components such as D-rings, wire, or hooks for hanging. A steel square can be used to ensure these hardware pieces are aligned properly and evenly spaced, resulting in a balanced and well-hung frame. Overall, a steel square is a valuable tool for picture framers as it helps ensure accurate measurements, square corners, precise cuts, and proper alignment of frames and mat boards.
- Q:Can a steel square be used for marking out mortise and tenon joints?
- When marking out mortise and tenon joints, a steel square proves to be a valuable tool. With its versatility and reliability, it is commonly utilized in woodworking for precise measurements and accurate angle marking. In the case of creating mortise and tenon joints, the steel square guarantees proper alignment and cutting of both the mortise and tenon. To mark out a mortise and tenon joint using a steel square, one should initially measure and mark the desired dimensions on the workpiece. The steel square's ability to create 90-degree angles is crucial for achieving accurate joints. By aligning the square with the workpiece's edge, one can utilize it as a guide to draw straight lines or indicate the mortise and tenon's location. Moreover, the steel square assists in ensuring the correct alignment of the mortise and tenon. By employing the square to examine the joint's corners and angles, a snug and secure fit can be guaranteed. In summary, a steel square proves to be an invaluable tool for marking out mortise and tenon joints. Its precision, straight edges, and ability to maintain joint squareness make it indispensable for woodworkers aiming to create strong and precise joinery.
- Q:Can a steel square be used for measuring the thickness of sheet metal?
- Yes, a steel square can be used for measuring the thickness of sheet metal. A steel square typically has a thin edge or blade that can be placed against the sheet metal to determine its thickness. By comparing the thickness of the sheet metal to the markings on the steel square, one can obtain an approximate measurement of the sheet metal thickness. However, it is important to note that a steel square may not provide highly precise measurements, especially for very thin sheet metal. For more accurate measurements, specialized tools such as calipers or micrometers are recommended.
- Q:How do you use a steel square to determine the rise and run of stairs?
- To use a steel square to determine the rise and run of stairs, follow these steps: 1. Measure the total rise: Start by measuring the total vertical height from the floor where the stairs will start to the floor where they will end. This is known as the total rise. 2. Determine the number of steps: Divide the total rise by the desired height of each step. This will give you the number of steps needed. Round off the number to the nearest whole number and adjust the height of each step accordingly. 3. Calculate the rise: Divide the total rise by the number of steps to determine the rise of each step. This is the vertical distance from one step to the next. 4. Determine the run: To determine the run, which is the horizontal distance covered by each step, use the steel square. Place the square's shorter leg, known as the blade, against the vertical rise line and the longer leg, known as the tongue, against the horizontal floor. Make sure the square is level. 5. Mark the run: Slide the square along the rise line, keeping the blade against the rise and the tongue against the floor. Once the square is aligned with the total run, mark the horizontal line where the tongue intersects with the rise line. Repeat this process for each step. 6. Measure the tread depth: To determine the tread depth, measure the distance from the back of the previous step to the front of the next step. This will give you the horizontal depth covered by each step. By following these steps and using a steel square, you can accurately determine the rise and run of stairs, ensuring a safe and comfortable staircase design.
- Q:What are some common accessories or attachments for a steel square?
- Some common accessories or attachments for a steel square include a scribe, protractor, ruler, and level. A scribe is a pointed tool that can be used to mark lines or measurements on a surface. It is often attached to the square to provide a precise and straight marking tool. A protractor is a device that can be attached to the steel square to measure angles accurately. It is particularly useful when working on projects that require precise angle measurements. A ruler is another common accessory that can be attached to a steel square. It allows for easy measurement of lengths and can be useful when working on projects that require precise measurements. Lastly, a level is an attachment that helps ensure that a surface or object is perfectly level. It can be attached to the steel square to provide accurate leveling measurements, which is particularly important when working on projects that require precise alignment. These accessories and attachments enhance the versatility and functionality of a steel square, making it an essential tool for carpentry, woodworking, and other construction tasks.
- Q:How do you use a steel square to find the length of a hip rafter?
- To use a steel square to find the length of a hip rafter, you would follow these steps: 1. Set up the steel square: Place the steel square on a flat surface or directly on the rafter you want to measure. Make sure it is aligned properly, with the long edge (blade) facing towards the rafter and the shorter edge (tongue) running perpendicular to it. 2. Find the pitch: Determine the pitch or slope of the roof by referring to the markings on the steel square. These markings indicate the rise and run of the roof. The rise is the vertical distance between the rafter and the peak of the roof, while the run is the horizontal distance between the rafter and the edge of the roof. 3. Measure the length: Using the steel square, measure the length of the hip rafter by aligning the tongue with the edge of the rafter and extending the blade towards the peak of the roof. The point where the blade intersects the rafter represents the length. 4. Mark the length: Once you have determined the length of the hip rafter, mark it on the rafter using a pencil or any other suitable marking tool. This will serve as a guide when cutting or installing the rafter. It is important to note that additional calculations or adjustments may be necessary depending on the specific requirements of your project, such as accounting for overhangs or other factors that may affect the length of the hip rafter. Consulting a professional or referring to a comprehensive guidebook for roof framing can provide more detailed instructions specific to your situation.
- Q:How do you use a steel square to check for plumbness?
- In order to check for plumbness using a steel square, the following steps should be followed: 1. Ensure that the steel square is clean and free from any debris or rust. If necessary, wipe it down. 2. Place the steel square firmly against the vertical surface that requires checking for plumbness. 3. Examine the corner of the steel square where the two arms meet. This corner should have a perfect right angle of 90 degrees. 4. Pay attention to the edge of the steel square that aligns with the vertical surface. If the surface is perfectly plumb, the edge of the square should align perfectly from top to bottom. 5. If the edge of the square does not align with the surface, it indicates that the surface is not plumb. Take note of how much it deviates from the square and make necessary adjustments. 6. To rectify the lack of plumbness, shims can be used or the surface can be adjusted until it properly aligns with the edge of the steel square. 7. Repeat the process at different points along the vertical surface to ensure consistency and accuracy. By utilizing a steel square to check for plumbness, it is possible to guarantee that vertical surfaces are straight and correctly aligned. This is particularly important for various construction and woodworking projects.
- Q:Can a steel square be used for checking the squareness of cabinet doors?
- Yes, a steel square can be used for checking the squareness of cabinet doors.
- Q:How do you use a steel square to determine the angle of a compound taper cut?
- To determine the angle of a compound taper cut, one must follow these steps: 1. Place the steel square on the material's surface or edge where the taper cut will be executed, ensuring that the square's long side aligns with the material's length. 2. Adjust the square so that one arm runs parallel to the material's surface or edge. This arm will serve as a reference line for angle measurement. 3. Utilize a protractor or angle finder to measure the angle between the reference line of the square and the material's surface or edge. Position the protractor against the square's perpendicular arm. 4. Take note of the angle measurement, which will determine the required angle for the taper cut. 5. Transfer the angle measurement to the saw or cutting tool being used. Most saws have a bevel or miter gauge that allows for angle adjustment. Set the gauge to the measured angle and secure it in place. 6. Align the material with the saw or cutting tool's blade, ensuring that the steel square's reference line remains parallel to the saw's fence or guide. 7. Execute the compound taper cut carefully, either following the marked line or using the saw's fence or guide as a reference. By utilizing a steel square to measure the angle of a compound taper cut, one can achieve precise and accurate cuts, resulting in a professional-looking finished product.
1. Manufacturer Overview |
|
|---|---|
| Location | |
| Year Established | |
| Annual Output Value | |
| Main Markets | |
| Company Certifications | |
2. Manufacturer Certificates |
|
|---|---|
| a) Certification Name | |
| Range | |
| Reference | |
| Validity Period | |
3. Manufacturer Capability |
|
|---|---|
| a)Trade Capacity | |
| Nearest Port | |
| Export Percentage | |
| No.of Employees in Trade Department | |
| Language Spoken: | |
| b)Factory Information | |
| Factory Size: | |
| No. of Production Lines | |
| Contract Manufacturing | |
| Product Price Range | |
Send your message to us
Steel Long Product of Square Section Bar High Quality
- Ref Price:
-
- Loading Port:
- Tianjin
- Payment Terms:
- TT or LC
- Min Order Qty:
- 25 m.t.
- Supply Capability:
- 10000 m.t./month
OKorder Service Pledge
OKorder Financial Service
Similar products


New products

Hot products

Hot Searches
Related keywords

