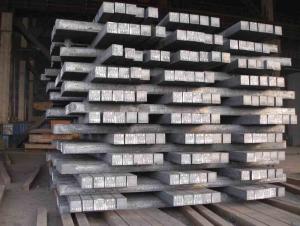

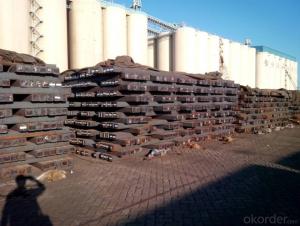
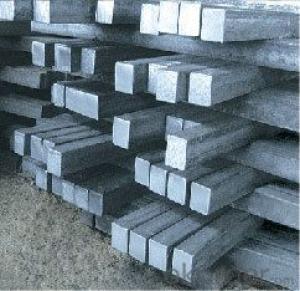
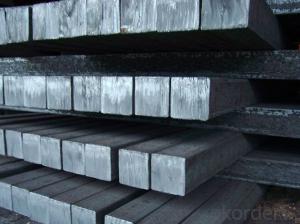
Prime Quality Mild Steel Square Billets and Square Bar
- Ref Price:
-

- Loading Port:
- China Main Port
- Payment Terms:
- TT or LC
- Min Order Qty:
- -
- Supply Capability:
- -
OKorder Service Pledge
OKorder Financial Service
You Might Also Like


Product Description:
OKorder is offering Prime Quality Mild Steel Square Billets and Square Bar at great prices with worldwide shipping. Our supplier is a world-class manufacturer of steel, with our products utilized the world over. OKorder annually supplies products to European, North American and Asian markets. We provide quotations within 24 hours of receiving an inquiry and guarantee competitive prices.
Product Applications:
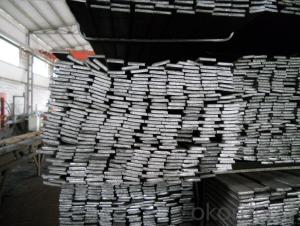
Prime Quality Mild Steel Square Billets and Square Bar are ideal for structural applications and are widely used in the construction of buildings and bridges, and the manufacturing, petrochemical, and transportation industries.
Product Advantages:
OKorder's Prime Quality Mild Steel Square Billets and Square Bar are durable, strong, and resist corrosion.
Main Product Features:
· Premium quality
· Prompt delivery & seaworthy packing (30 days after receiving deposit)
· Corrosion resistance
· Can be recycled and reused
· Mill test certification
· Professional Service
· Competitive pricing
Product Specifications:
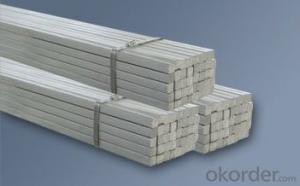
We offer Square Steel Bar with grade Q195 / Q235
Specifications of Square Steel Bar:
-Standard: GB,
-Grade: Q195/Q235 or equivalent.
Chemical Composition:
-Chemical Composition. Q195
Standard | Grade | Element (%) | ||||
GB | Q195 | C | Mn | S | P | Si |
0.06~0.12 | 0.25~0.50 | ≤0.050 | ≤0.045 | ≤0.30 | ||
-Chemical Composition. Q235
Standard | Grade | Element (%) | ||||
GB | Q235B | C | Mn | S | P | Si |
0.12~0.20 | 0.30~0.70 | ≤0.045 | ≤0.045 | ≤0.30 | ||
Measures and Tolerances of Square Steel Bar:

(The section of Square Steel Bar)
-The length of a side and the theoretical weight of Square Steel.
Length of a side(a, mm) | Theoretical weight(kg/m) | Length of a side(a, mm) | Theoretical weight(kg/m) |
6 | 0.283 | 32 | 8.04 |
7 | 0.385 | *33 | 8.55 |
8 | 0.502 | 34 | 9.07 |
9 | 0.636 | *35 | 9.62 |
10 | 0.785 | 36 | 10.17 |
11 | 0.950 | 38 | 11.24 |
12 | 1.13 | 40 | 12.56 |
13 | 1.33 | 42 | 13.85 |
14 | 1.54 | 45 | 15.90 |
15 | 1.77 | 48 | 18.09 |
16 | 2.01 | 50 | 19.63 |
17 | 2.27 | 53 | 22.05 |
18 | 2.54 | *55 | 23.6 |
19 | 2.82 | 56 | 24.61 |
20 | 3.14 | *58 | 26.4 |
21 | 3.46 | 60 | 28.26 |
22 | 3.80 | 63 | 31.16 |
*23 | 4.15 | *65 | 33.17 |
24 | 4.52 | *68 | 36.3 |
25 | 4.91 | 79 | 38.49 |
26 | 5.30 | 75 | 44.16 |
*27 | 5.72 | 80 | 50.24 |
28 | 6.15 | 85 | 56.72 |
*29 | 6.60 | 90 | 63.59 |
30 | 7.06 | 95 | 70.85 |
*31 | 7.54 | 100 | 78.50 |
Notes:
1, The theoretical weights in the list, base on the density of 7.85 g/cm3.
2, The numbers with *mean that they are not regulars or we don’t offer them.
-The allowed tolerance of Square Steel:
Length of a side(mm) | Allowed Tolerance | ||
Group1 | Group2 | Group3 | |
5.5~7 | ±0.20 | ±0.30 | ±0.40 |
7~20 | ±0.25 | ±0.35 | ±0.40 |
20~30 | ±0.30 | ±0.40 | ±0.50 |
30~50 | ±0.40 | ±0.50 | ±0.60 |
60~80 | ±0.60 | ±0.70 | ±0.80 |
80~110 | ±0.90 | ±1.0 | ±1.1 |
110~150 | ±1.2 | ±1.3 | ±1.1 |
150~190 | ―― | ―― | ±2.0 |
190~250 | ―― | ―― | ±2.5 |
Usage/Applications of Prime Quality Mild Steel Square Billets and Square Bar:
-The Square Steel is normally used as structure steel.
-Row material for other structure steel like steel angles, channels, I-beams, H-beams, etc…
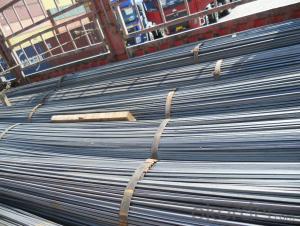
Packaging & Delivery of Prime Quality Mild Steel Square Billets and Square Bar:
-Packing Detail: The products can be packed in bundles by steel wires.
-Marks:
1, Tag marks: the tag marks will be tied up to each bundle of the products. The information is usually including supplier’s logo and name, product name, made in China, products’ specifications, the painted color and other information requested by customers.
2, Color marks: we will paint both ends of the bundles of these products to make sure that they are more evident. It’s will be more convenient for the customers to distinguish them at the destination port.
-Delivery Detail: 30~45 working days after receive buyer’s T.T. or L/C.
Transportation:
-The products can be delivered by bulk vessel or by container. As for container, products with the length of 6m will be loaded in 20’ container, with 9m or 12m, in 40’ container.
-The maximum quantity of loading of container is 25 tons.
-The products usually are transported to the nearest port from the production place.
Payment:
-Invoicing on theoretical weight or actual weight a s customer’s request.
-FOB, CFR or CIF.
-Regular terms of payment:
1, 30% payment in advance, the remaining balance (70% payment) against the copy of B/L.
2, 30% payment in advance, the remaining balance (70% L/C) against the copy of B/L.
3, Negotiable.
FAQ:
Q1: Why buy Materials & Equipment from OKorder.com?
A1: All products offered byOKorder.com are carefully selected from China's most reliable manufacturing enterprises. Through its ISO certifications, OKorder.com adheres to the highest standards and a commitment to supply chain safety and customer satisfaction.
Q2: How do we guarantee the quality of our products?
A2: We have established an advanced quality management system which conducts strict quality tests at every step, from raw materials to the final product. At the same time, we provide extensive follow-up service assurances as required.
Q3: How soon can we receive the product after purchase?
A3: Within three days of placing an order, we will begin production. The specific shipping date is dependent upon international and government factors, but is typically 7 to 10 workdays.


- Q:What are some common techniques for using a steel square in stair building?
- Using a steel square in stair building is essential for ensuring accuracy and precision in the construction process. Some common techniques for using a steel square in stair building include: 1. Determining the Rise and Run: The steel square can be used to measure and mark the rise (vertical height) and run (horizontal length) of each stair. By aligning the square with the stringer or riser board, you can easily mark the correct measurements for each step. 2. Laying Out Stringers: Stringers are the main support structures of a stair. The steel square can be used to lay out the exact dimensions and angles required for cutting the stringers. By using the square to measure and mark the rise and run, you can accurately transfer these measurements onto the stringers for cutting. 3. Checking for Squareness: A steel square is also useful for checking the squareness of the stair parts. By aligning the square with the edges and corners of the steps, you can ensure that everything is perfectly square and level. This is crucial for a safe and stable staircase. 4. Determining the Angle of the Stair Treads: The steel square can be used to determine the angle at which the stair treads need to be cut. By aligning the square with the stringer and the tread, you can measure and mark the correct angle for cutting the treads to fit properly. 5. Creating Templates: In complex stair designs, the steel square can be used to create templates for curved or irregularly shaped stair parts. By tracing the shape onto a piece of plywood or cardboard using the square as a guide, you can transfer the template onto the actual material for cutting and shaping accurately. Overall, the steel square is an indispensable tool in stair building, providing accurate measurements, ensuring squareness, and facilitating precise cuts. By using these common techniques, builders can create safe and well-constructed staircases.
- Q:How do you read measurements on a steel square?
- Before you can read measurements on a steel square, it is essential to grasp the various markings and graduations on the tool. Typically, a steel square comprises two arms, namely the blade (the longer one) and the tongue (the shorter one), which create a 90-degree angle. The blade is adorned with a series of markings and numbers, usually in inches or centimeters, that represent its length. The numbers commence at 0 where the blade and tongue intersect, and they increment as you progress towards the outer edge of the blade. Similarly, the tongue of the steel square also possesses a scale marked in inches or centimeters. This scale is employed for measuring perpendicular to the blade's edge. Just like the blade, the numbers on the tongue initiate at 0 at the intersection and rise as you approach the outer edge. To read measurements accurately, align the desired point on the object you are measuring with the intersection of the blade and tongue. Then, observe the markings on either the blade or the tongue that correspond to the length or width you intend to measure. For instance, if you wish to measure a length of 4 inches, locate the number 4 on either the blade or the tongue and take note of the corresponding point on the object. Moreover, steel squares may feature additional markings or characteristics to aid in various tasks such as identifying angles or determining roof pitches. Familiarizing yourself with these supplementary markings can substantially enhance the versatility of the tool. In summary, reading measurements on a steel square entails comprehending the markings and graduations on the blade and tongue, aligning the tool with the object being measured, and recording the corresponding numbers to ascertain the length or width accurately.
- Q:How do you use a steel square to measure board lengths at different angles?
- To use a steel square to measure board lengths at different angles, you would start by placing the square's long side (blade) against the edge of the board. Next, rotate the square until the desired angle aligns with the edge of the board. Once aligned, mark the board along the shorter side (tongue) of the square. Finally, measure the distance from the marked point to the end of the board to determine the length at the specific angle.
- Q:What are the different markings on a steel square and their purposes?
- A steel square is a versatile tool used in carpentry and other trades for measuring, marking, and laying out angles. It consists of a long, straight blade with a perpendicular handle, forming an "L" shape. The blade of a steel square typically has several markings that serve different purposes. 1. Inch Markings: The most common markings on a steel square are the inch markings along the blade. These markings allow for precise measurements when measuring lengths or distances. They are typically marked in increments of 1/16th of an inch, providing accurate measurements for various construction tasks. 2. Degree Markings: Another important set of markings on a steel square are the degree markings found on the handle. These markings indicate the angles from 0 to 90 degrees, allowing for precise angle measurements. Degree markings are useful for tasks such as cutting or marking angles on wood or other materials. 3. Rafter Tables: Some steel squares feature rafter tables, which are additional markings on the blade. Rafter tables provide measurements and calculations for common roof framing tasks, such as determining the length of a rafter or the angles required for roof pitches. These tables save time and help ensure accurate measurements when working on roofing projects. 4. Brace Measurement: Steel squares often have markings on the inside of the handle that help measure the width of boards or other materials. These markings are useful for quickly determining the width of a piece of wood, ensuring accurate cuts or joints. 5. Scribe Lines: Along the blade of a steel square, there may be small indentations or notches called scribe lines. These lines are used for marking a cut or a line on a workpiece. By placing a pencil or a knife in the scribe line and sliding it along the edge of the square, precise and straight lines can be marked on the material. Overall, the different markings on a steel square serve to provide accurate measurements, assist in angle calculations, aid in rafter-related tasks, and facilitate marking straight lines. These markings make the steel square an essential tool for carpenters, builders, and anyone involved in construction or woodworking.
- Q:How do you choose the right size of steel square?
- There are several factors to take into consideration when selecting the appropriate size of steel square. To begin with, the purpose of your project needs to be determined. Different tasks call for different sizes of squares. For smaller projects or intricate measurements, a smaller steel square may be more suitable. Conversely, larger construction projects or the need to measure long distances would require a larger square. Moreover, the size of the materials you will be working with should be taken into account. Handling smaller pieces of wood or metal will be easier and provide more accurate measurements with a smaller square. Conversely, larger materials may necessitate a larger square to ensure precise measurements and proper alignment. Furthermore, the level of precision required for your project is an important consideration. For highly accurate measurements, a smaller steel square with finer graduations would be more appropriate. However, if your project allows for slightly less precision, a larger square with larger graduations may suffice. Lastly, your own comfort and ease of use should also be factored in. If you have larger hands or prefer a more substantial tool, a larger steel square may be more comfortable to hold and manipulate. In conclusion, selecting the right size of steel square involves evaluating the purpose of your project, the size of the materials, the level of precision needed, and your own comfort and ease of use. By taking these factors into consideration, you can choose the most suitable size of steel square to meet your needs.
- Q:How does a steel square assist in determining the correct angle for a compound angle joint?
- When working on a compound angle joint, it is essential to have precise angle measurements to ensure a strong and precise fit. A steel square, also known as a framing square or carpenter's square, is a reliable and accurate tool that can assist in determining the correct angle for this type of joint. A typical steel square consists of two arms forming a right angle - one longer and one shorter. The longer arm, called the blade, is marked with various scales and angle measurements. To determine the correct angle for a compound angle joint, the steel square can be utilized in the following manners: 1. As a reference tool: The steel square serves as a reference tool for comparing and measuring angles. By aligning the square's blade with one of the angled cuts, the angle can be directly read from the scale on the blade. This aids in determining the exact angle for the joint. 2. Angle transfer: Once the angle of one cut is determined using the steel square, it can be transferred to the other piece of material. By placing the square against the material and aligning it with the measured angle, a line can be marked to indicate the correct angle for the second cut. This ensures accurate fitting of both pieces. 3. Accuracy checking: The steel square can also be utilized to double-check the accuracy of the joint. By aligning the square with both angled cuts and ensuring a perfect match, any discrepancies can be identified and corrected before finalizing the joint. In conclusion, a steel square is an invaluable tool for determining the correct angle for a compound angle joint. It serves as a reliable reference tool for measuring angles, transferring angles to other materials, and checking the accuracy of the joint. With its assistance, precision, accuracy, and a strong, well-fitting joint can be achieved.
- Q:How is a steel square different from a carpenter's square?
- Both construction and woodworking employ measuring tools such as steel squares and carpenter's squares, but they possess distinct characteristics. To begin with, the manner in which these squares are constructed and the materials used diverge. The steel square, as its name suggests, is fashioned entirely from steel, rendering it heavier and more resilient. Conversely, a carpenter's square typically consists of wood, supplemented with a metal edge or lip to guarantee precision. Regarding design, a steel square boasts a lengthier body with a broader base and an L-shaped structure incorporating two arms that intersect at a right angle. One arm serves as a measuring device, while the shorter arm aids in achieving accurate cuts or angles. Conversely, a carpenter's square, also referred to as a try square, possesses a shorter body with a right-angled shape, rendering it suitable for assessing corner precision and marking 90-degree angles. Another distinction lies in functionality. The steel square exhibits greater versatility, facilitating measurement, angle marking, and cut line layout. It often includes supplementary features like a level, protractor, and scribe, making it an exhaustive tool for diverse construction endeavors. Conversely, a carpenter's square principally serves the purpose of verifying right angles and ensuring squareness in woodworking projects. Carpenters and cabinetmakers commonly employ it for layout tasks, aligning joinery, and verifying the accuracy of cuts and joints. In summary, while both steel squares and carpenter's squares fulfill analogous objectives, their disparities reside in their construction, design, and functionality. Steel squares excel in durability and versatility, whereas carpenter's squares represent simpler tools primarily employed for assessing right angles and guaranteeing precision in woodworking projects.
- Q:How do you use a steel square to measure and mark 22.5-degree angles?
- In order to measure and mark a 22.5-degree angle using a steel square, several simple steps must be taken. Begin by positioning the steel square so that the long edge (hypotenuse) faces you, while the shorter edge (leg) is on the left side. It is important to ensure that the right angle formed by these two edges is placed at the starting point of the desired angle. Next, locate the scale on the leg of the square. This scale typically represents degrees, so locate the 45-degree mark on the scale, which is positioned halfway between 0 and 90 degrees. Starting from the 45-degree mark, count two units to the right. Each unit on the scale represents one degree, so by counting two units, we obtain 2 degrees. This is due to the fact that a 45-degree angle lies halfway between 0 and 90 degrees, and half of 45 equals 22.5. Once the 2-degree mark has been identified, use a pencil to draw a line along the edge of the square that intersects this mark. This line will serve as a representation of a 22.5-degree angle. To verify the accuracy of the measurement, it is also possible to measure the angle using a protractor. Place the protractor at the starting point of the angle and align its baseline with the line drawn using the steel square. Confirm that the protractor's zero-degree line aligns with the line from the square, and then check that the protractor indicates an angle of 22.5 degrees. By adhering to these instructions, it is possible to precisely measure and mark a 22.5-degree angle using a steel square.
- Q:Can a steel square be used for checking the flatness of a wall corner?
- Using a steel square to check the flatness of a wall corner is not possible. The main purpose of a steel square is to mark and measure right angles in woodworking and carpentry, rather than determining the flatness or levelness of a surface. For assessing the flatness of a wall corner, it would be more suitable to use a level or a straightedge. A level will indicate if the wall corner is straight and plumb, while a straightedge can be employed to detect any gaps or irregularities in the surface.
- Q:How do you use a steel square to find the length of a rafter?
- To determine the length of a rafter using a steel square, follow these steps: 1. Position the steel square at the end of the rafter board, placing the shorter arm (tongue) against the board's edge. 2. Align the longer arm (body) of the square parallel to the rafter board's length. 3. Once the square is correctly placed, mark the point where the longer arm intersects the rafter board. 4. Proceed to slide the square along the rafter's length, making sure the shorter arm maintains contact with the board's edge. 5. Mark the rafter board at each point where the longer arm crosses it. 6. After marking multiple points along the rafter's length, connect the marks with a straight line. 7. Finally, measure the length of the straight line you drew, which represents the rafter's length. By utilizing a steel square in this manner, you can ensure precise measurements and easily obtain the rafter's length.
1. Manufacturer Overview |
|
|---|---|
| Location | |
| Year Established | |
| Annual Output Value | |
| Main Markets | |
| Company Certifications | |
2. Manufacturer Certificates |
|
|---|---|
| a) Certification Name | |
| Range | |
| Reference | |
| Validity Period | |
3. Manufacturer Capability |
|
|---|---|
| a)Trade Capacity | |
| Nearest Port | |
| Export Percentage | |
| No.of Employees in Trade Department | |
| Language Spoken: | |
| b)Factory Information | |
| Factory Size: | |
| No. of Production Lines | |
| Contract Manufacturing | |
| Product Price Range | |
Send your message to us
Prime Quality Mild Steel Square Billets and Square Bar
- Ref Price:
-
- Loading Port:
- China Main Port
- Payment Terms:
- TT or LC
- Min Order Qty:
- -
- Supply Capability:
- -
OKorder Service Pledge
OKorder Financial Service
Similar products


New products

Hot products


Related keywords

