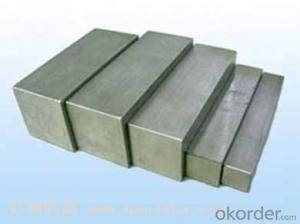


EN10025 Hot rolled steel chequer plate for construction
- Ref Price:
-

- Loading Port:
- Tianjin
- Payment Terms:
- TT or LC
- Min Order Qty:
- 25 m.t.
- Supply Capability:
- 10000 m.t./month
OKorder Service Pledge
OKorder Financial Service
You Might Also Like


Product Description:
OKorder is offering EN10025 Hot rolled steel chequer plate for construction at great prices with worldwide shipping. Our supplier is a world-class manufacturer of steel, with our products utilized the world over. OKorder annually supplies products to European, North American and Asian markets. We provide quotations within 24 hours of receiving an inquiry and guarantee competitive prices.
Product Applications:
EN10025 Hot rolled steel chequer plate for construction are ideal for structural applications and are widely used in the construction of buildings and bridges, and the manufacturing, petrochemical, and transportation industries.
Product Advantages:
OKorder's EN10025 Hot rolled steel chequer plate for construction are durable, strong, and resist corrosion.
Main Product Features:
· Premium quality
· Prompt delivery & seaworthy packing (30 days after receiving deposit)
· Corrosion resistance
· Can be recycled and reused
· Mill test certification
· Professional Service
· Competitive pricing
Product Specifications:
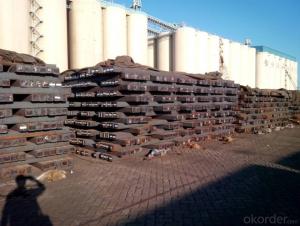
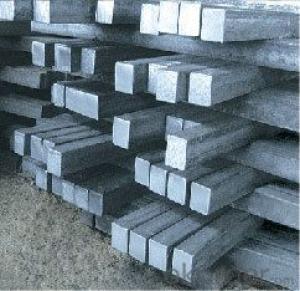
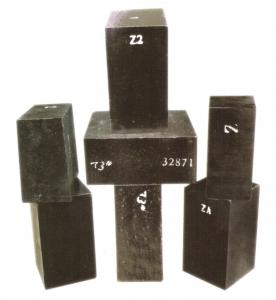
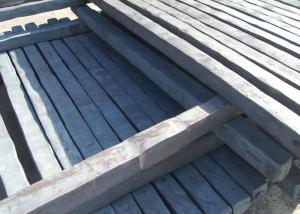
square steel billet
1.3SP, 5SP
2.terms of payment: L/C at sight
3.size: 120*120mm
4.length: 5.8~12m
square steel billet
Specifications
square steel billets
1)We procure world class quality steel billets which meets the specific requirements of the clients
The Billets produced by the company can be broadly divided into three main types i.e.
M.S. Billets
CRS Billets
Special Alloy Billets
M.S. Billets are used for rolling of TMT Re-Bars of Fe415 and Fe500 Grade and various other structural steel products.
CRS Billets are used fro rolling of CRS TMT Re-Bars.
Special Alloy Billets are used for rolling of any special grade TMT Re-Bars like Earthquake resistant TMT Re-Bars and for special grade structural steel products.
The following are the sizes of Billets available with Shyam Steel Industries Ltd.:
100 X 100
120x120
150 X 150
Physical Properties:
Description
As per IS 2830
Shyam Billets
Bend (max.) 5 mm per meter >= 5 mm per meter
Carbon (max.) 3mm per meter >= 3 mm per meter
Length 3 mt - 13 mt 3 mt - 9 mt
Chemical Properties:
Ladle Analysis:
Designation
Carbon
Manganese
C15 0.12-0.18 0.30-0.60
C18 0.15-0.21 0.30-0.60
C20 0.17-0.23 0.30-0.60
C15 MMn 0.12-0.18 0.60-1.00
C18 MMn 0.15-0.21 0.60-1.00
C20 MMn 0.17-0.23 0.60-1.00
C15 HMn 0.12-0.18 1.00-1.50
C18 HMn 0.15-0.21 1.00-1.50
C20 HMn
0.17-0.23 1.00-1.50
Billets of different designations are manufactured in three different grades namely A, B, C having sulphur, phosphorous content (on ladle analysis) and carbon equivalent as follows:
Chemical Analysis:
Grade Sulphur Phosphorous Carbon Equivalent (CE)1
Max Max Max
A 0.05 0.05 0.42
B 0.045 0.045 0.41
C 0.04 0.04 0.39
Q1: What makes stainless steel stainless?
A1: Stainless steel must contain at least 10.5 % chromium. It is this element that reacts with the oxygen in the air to form a complex chrome-oxide surface layer that is invisible but strong enough to prevent further oxygen from "staining" (rusting) the surface. Higher levels of chromium and the addition of other alloying elements such as nickel and molybdenum enhance this surface layer and improve the corrosion resistance of the stainless material.
Q2: Can stainless steel rust?
A2: Stainless does not "rust" as you think of regular steel rusting with a red oxide on the surface that flakes off. If you see red rust it is probably due to some iron particles that have contaminated the surface of the stainless steel and it is these iron particles that are rusting. Look at the source of the rusting and see if you can remove it from the surface.
Q1: How do we guarantee the quality of our products?
A1: We have established an advanced quality management system which conducts strict quality tests at every step, from raw materials to the final product. At the same time, we provide extensive follow-up service assurances as required.
Q2: What makes stainless steel stainless?
A2: Stainless steel must contain at least 10.5 % chromium. It is this element that reacts with the oxygen in the air to form a complex chrome-oxide surface layer that is invisible but strong enough to prevent further oxygen from "staining" (rusting) the surface. Higher levels of chromium and the addition of other alloying elements such as nickel and molybdenum enhance this surface layer and improve the corrosion resistance of the stainless material.


- Q:How do you use a steel square for creating accurate rabbet cuts?
- To use a steel square for creating accurate rabbet cuts, follow these steps: 1. Measure and mark the dimensions of your desired rabbet cut on the wood surface. This will include the width and depth of the rabbet. 2. Place the steel square on the edge of the wood, aligning one side of the square with the surface of the wood. 3. Hold the steel square firmly in place with one hand while using a pencil or marking knife to trace along the other side of the square. This will create a straight and accurate guideline for your rabbet cut. 4. Repeat this process on the adjacent side of the wood, using the same measurement and aligning the square with the previously marked line. This will ensure parallelism and accuracy in your rabbet cut. 5. Use a chisel, router, or table saw to remove the material within the marked lines, following the straight guideline created by the steel square. Take your time and make precise cuts to achieve a clean and accurate rabbet. 6. After completing the rabbet cut, use the steel square again to check for squareness and ensure that the corners of the rabbet are at perfect right angles. By using a steel square as a reference guide, you can maintain accuracy and precision in your rabbet cuts, resulting in clean and professional-looking woodworking projects.
- Q:How do you use a steel square to determine angles for wainscoting?
- To determine angles for wainscoting, one can follow a few steps: 1. Take measurements of the height and width of the installation area to determine the size and dimensions of the wainscoting panels. 2. Position the steel square against the wall, ensuring it is flush and level. Place the long edge of the square against the wall and the shorter edge facing outward. 3. Align one leg of the square with the bottom edge of the wall or baseboard, while keeping the other leg perpendicular to the wall. 4. Use a pencil or marker to trace a line along the longer edge of the square. This line will serve as a reference for cutting or installing the wainscoting panels. 5. Then, use a tape measure to mark the height of the wainscoting panels on the wall. This will help determine the placement of the top edge of the wainscoting. 6. Align the square with the mark indicating the top edge of the wainscoting and trace another line along the longer edge of the square. 7. By connecting the two traced lines, a reference angle for the wainscoting will be established. This angle will guide the cutting and fitting of the top and bottom edges of the wainscoting panels to ensure a proper fit on the wall. 8. Repeat this process for each wall section where wainscoting will be installed, ensuring that the square is aligned and level each time. By utilizing a steel square in this manner, precise and accurate angles can be achieved for wainscoting installation, resulting in a professional and visually appealing outcome.
- Q:Can a steel square be used for shelving installation?
- Shelving installation can indeed utilize a steel square. This multipurpose tool, also referred to as a framing square or carpenter's square, finds widespread application in construction and woodworking projects. Composed primarily of steel, this tool comprises two arms that intersect at a 90-degree angle, forming a right angle. Utilizing this right angle, one can ensure that shelving units are installed in a level and square manner. By employing the steel square, one can effectively mark and measure the positioning of brackets or supports, guaranteeing their proper alignment and even spacing. Moreover, the straight edge of the steel square serves to verify the straightness and alignment of the shelves themselves. Overall, the steel square proves to be a dependable tool that greatly aids in the precise and accurate installation of shelving units.
- Q:Can a steel square be used for setting up a miter saw?
- Certainly! A miter saw can utilize a steel square for its setup. Known as a try square or carpenter's square, a steel square is a versatile tool that serves various woodworking purposes, including the setup of a miter saw. In setting up a miter saw, the steel square guarantees accuracy and alignment of the cutting angle. By positioning the square against the saw's fence and blade, it aids in determining if the blade is perpendicular to the fence. Moreover, the square assists in verifying the proper alignment of the miter gauge for precise angle cuts. In summary, a steel square plays a vital role in configuring a miter saw, ensuring precision and cleanliness in the cuts made.
- Q:Can a steel square be used for roofing projects?
- Yes, a steel square can be used for roofing projects. It is a versatile tool that can help measure and mark angles, make straight cuts, and create precise lines for roofing materials.
- Q:How do you use a steel square for determining the center of a circle?
- To use a steel square for determining the center of a circle, place the square's corner at any point on the circle's circumference. Then, draw two diagonal lines that intersect inside the circle. The point of intersection will represent the center of the circle.
- Q:How do you use a steel square for marking stair skirt board angles?
- Using a steel square for marking stair skirt board angles is a straightforward process. Here's a step-by-step guide on how to do it: 1. Start by measuring the rise and run of the stairs. The rise is the vertical height between two stair treads, while the run is the horizontal distance from one tread to another. Write down these measurements as they will be crucial for the next steps. 2. Place the steel square against the skirt board, ensuring that the long arm of the square is vertical and aligned with the edge of the board. 3. Determine the angle for the skirt board by referencing the rise and run measurements. For example, if the rise is 7 inches and the run is 10 inches, divide the rise by the run (7/10) to get the decimal value of 0.7. Look for this decimal value on the steel square's rise and run tables, usually located on the inside of the square's body. 4. Once you have located the decimal value on the rise and run tables, find the corresponding number on the blade of the steel square. This number represents the angle at which you need to cut the skirt board. 5. Using a pencil or marking tool, mark the determined angle on the skirt board based on the reference number on the steel square's blade. 6. Double-check your measurements and markings to ensure accuracy before proceeding with cutting or any further steps. By following these steps, you can effectively utilize a steel square to mark stair skirt board angles. It is always important to measure carefully and double-check your calculations to achieve precise and accurate results.
- Q:How do you use a steel square for making accurate miter cuts?
- Achieving accurate miter cuts with a steel square involves several steps: 1. Ensure that your steel square is clean and free of dirt or debris. This is important for obtaining precise measurements. 2. Position the steel square flat against the material's edge where the miter cut will be made. Make sure it is aligned correctly and that the desired cutting angle is perpendicular to the square. 3. Securely hold the square against the material to prevent any movement or shifting. If necessary, use clamps or a vise to keep the square in place. 4. Use a pencil or marking knife to mark the line where the miter cut will be made. Align the square with the desired angle and trace along its edge to create an accurate guideline. 5. Verify the square's alignment before proceeding. It is crucial to confirm that the square has not moved while marking the line. 6. Carefully follow the marked line using a miter saw or handsaw to make the miter cut. Take your time and make precise cuts to achieve the desired angle. 7. After making the cut, check the accuracy of the miter by fitting the two cut pieces together. They should fit snugly and form a perfect angle. If adjustments are necessary, use sandpaper or a file to refine the cut until the desired fit is achieved. Remember, practice and patience are essential when using a steel square for accurate miter cuts. Over time, you will improve and achieve precise, clean cuts for your woodworking projects.
- Q:What are the different ways to read angles on a steel square when working with metal?
- When working with metal, there are various options available for reading angles on a steel square. Here are a few commonly used techniques: 1. Degree Scale: Many steel squares have a degree scale engraved on the blade. By aligning the desired angle with the reference line on the blade, you can directly read the angle in degrees. 2. Protractor: For more precise angle measurements, you can use a protractor along with a steel square. Simply place the protractor against the blade of the square and align the reference line with the desired angle. The angle measurement can then be read directly from the protractor. 3. Vernier Scale: Advanced steel squares may feature a vernier scale, which offers even more precise angle readings. Align the desired angle with the reference line and read the corresponding value on the vernier scale. This scale provides additional subdivisions for more accurate measurements. 4. Digital Angle Finder: Digital tools, such as a digital angle finder, can be used in conjunction with a steel square. First, place the square against the workpiece and then utilize the digital angle finder to measure the angle. This tool offers precise measurements and proves particularly useful when dealing with complex angles. 5. Combination Square: A combination square is a versatile tool that incorporates a ruler, a level, and an adjustable blade. By adjusting the blade to the desired angle, you can easily read the angle measurement on the scale provided on the blade. Remember, regardless of the method employed, it is vital to securely position the steel square against the workpiece to ensure accurate angle readings.
- Q:Can a steel square be used for checking the squareness of a jointer table?
- The squareness of a jointer table can be checked with a steel square. In woodworking, a steel square is commonly used to ensure right angles are accurate. By placing the steel square against the jointer table, it is possible to determine if it is perfectly perpendicular to the fence or bed of the jointer. If the table is square, both surfaces should fit snugly against the steel square, confirming proper alignment. However, if there is a gap or the square does not sit flush against the table, adjustments may be necessary as the jointer table is not square. It is important to remember that for precise measurements and alignments, precision squares or dial indicators may be more suitable, as a steel square can only provide a general assessment of squareness.
1. Manufacturer Overview |
|
|---|---|
| Location | |
| Year Established | |
| Annual Output Value | |
| Main Markets | |
| Company Certifications | |
2. Manufacturer Certificates |
|
|---|---|
| a) Certification Name | |
| Range | |
| Reference | |
| Validity Period | |
3. Manufacturer Capability |
|
|---|---|
| a)Trade Capacity | |
| Nearest Port | |
| Export Percentage | |
| No.of Employees in Trade Department | |
| Language Spoken: | |
| b)Factory Information | |
| Factory Size: | |
| No. of Production Lines | |
| Contract Manufacturing | |
| Product Price Range | |
Send your message to us
EN10025 Hot rolled steel chequer plate for construction
- Ref Price:
-
- Loading Port:
- Tianjin
- Payment Terms:
- TT or LC
- Min Order Qty:
- 25 m.t.
- Supply Capability:
- 10000 m.t./month
OKorder Service Pledge
OKorder Financial Service
Similar products


New products

Hot products

Related keywords

