


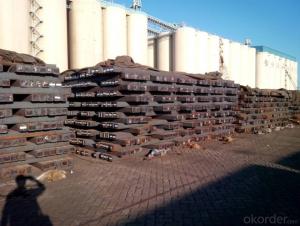
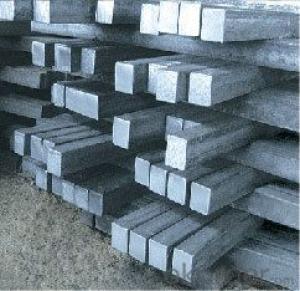
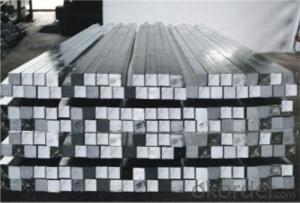
Carbon Steel Square Bar and Billet
- Ref Price:
-

- Loading Port:
- China Main Port
- Payment Terms:
- TT or LC
- Min Order Qty:
- 100 m.t.
- Supply Capability:
- 10000MT m.t./month
OKorder Service Pledge
OKorder Financial Service
You Might Also Like


Product Description:
OKorder is offering Carbon Steel Square Bar and Billet at great prices with worldwide shipping. Our supplier is a world-class manufacturer of steel, with our products utilized the world over. OKorder annually supplies products to African, South American and Asian markets. We provide quotations within 24 hours of receiving an inquiry and guarantee competitive prices.
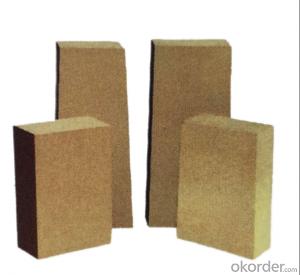
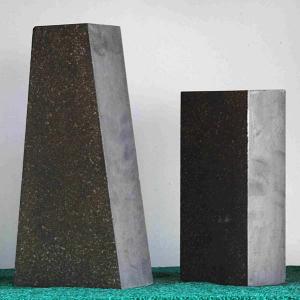
Product Applications:
Carbon Steel Square Bar and Billet are ideal for structural applications and are used in rolling different shape of the section steel for constrution.
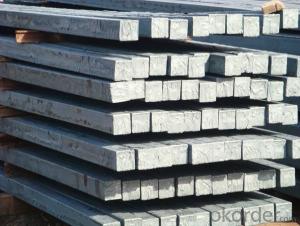
Product Advantages:
OKorder's Carbon Steel Square Bar and Billet are durable, strong, and wide variety of sizes.
Main Product Features:
· Premium quality
· Prompt delivery & seaworthy packing (30 days after receiving deposit)
· Can be recycled and reused
· Mill test certification
· Professional Service
· Competitive pricing
Product Specifications:
Manufacture: Hot rolled
Grade: Q195 – 235
Certificates: ISO, SGS, BV, CIQ
Length: 6m,12m, as per customer request
Packaging: Export packing, nude packing, bundled
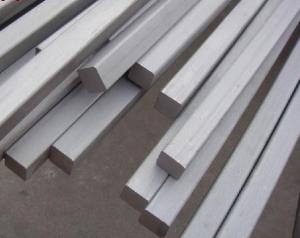
Product Name | Steel Square Bar |
Size | 60×60mm, 100×100mm, 120×120mm, 130×130mm, 150×150mm |
Length | 6M, 9M, 12M |
Grade | Q195, Q235, Q275, 3SP, 5SP, 20MnSi, Etc |
Standard | ASTM, GB, JIS |
Chemical Composition | Q235: C: 0.14-0.22% MN:0.3-0.7% SI: 0.3% max P:0.045%max S:0.045%max |
Q275 C: 0.27-0.38% MN:0.5-0.8% SI: 0.3% max P:0.045%max S:0.045%max | |
According to Customers Needs |
Trademark | Rank | Chemical composition (quality score) % | |||||
C | Si | Mn | S | P | |||
≤ | ≤ | ≤ | |||||
Q235 | A | 0.14-0.22 | 0.30 | 0.30-0.65 | 0.050 | 0.045 | |
Q235 | B | 0.12-0.20 | 0.30 | 0.30-0.70 | 0.045 | 0.045 | |
Trademark | Rank | Pulling Test | |||||
Bend PointΔs/Mpa | Tensile Strength | Elongation Ratioδ5% | |||||
Thickness (Diameter) /MM | Thickness (Diameter) /MM | ||||||
≤16 | 16-40 | ≤16 | 16-40 | ||||
≥ | ≥ | ||||||
Q235 | A | 235 | 225 | 375-500 | 26 | 25 | |
Q235 | B | 235 | 225 | 375-500 | 26 | 25 | |
FAQ:
Q1: Why buy Materials & Equipment from OKorder.com?
A1: All products offered byOKorder.com are carefully selected from China's most reliable manufacturing enterprises. Through its ISO certifications, OKorder.com adheres to the highest standards and a commitment to supply chain safety and customer satisfaction.
Q2: How do we guarantee the quality of our products?
A2: We have established an advanced quality management system which conducts strict quality tests at every step, from raw materials to the final product. At the same time, we provide extensive follow-up service assurances as required.
Q3: How soon can we receive the product after purchase?
A3: Within three days of placing an order, we will arrange production. The normal sizes with the normal grade can be produced within one month. The specific shipping date is dependent upon international and government factors, the delivery to international main port about 45-60days.
Images:


- Q:How do you use a steel square for marking roof valley rafter angles?
- To use a steel square for marking roof valley rafter angles, you will first need to understand the basic functions and markings on the square. A steel square typically consists of two arms, a longer one called the blade and a shorter one called the tongue. The blade is usually 24 inches long, while the tongue is typically 16 inches long. Start by placing the steel square on the roof rafters, ensuring that the blade aligns with the roof's ridge line. The tongue should extend towards the valley of the roof. This setup allows you to mark the angles of the roof valley rafters accurately. To mark the angle, make sure the square is level and align the tongue with the rafter you want to measure. Then, use a pencil or marker to mark the angle on the rafter. Repeat this process for each rafter in the valley. Once you have marked all the angles, you can use the steel square to transfer the marks from one rafter to another. Place the square's tongue on the marked angle of the first rafter and align the blade with the next rafter. Make sure the square is level, and then use your pencil or marker to transfer the mark to the second rafter. Repeat this step for all the marked angles, ensuring accuracy by aligning the square properly each time. Using a steel square for marking roof valley rafter angles is a simple and effective method that helps ensure consistent and precise cuts when installing roof valley rafters. Remember to double-check your measurements and marks before cutting any rafters to guarantee accurate and well-fitting angles for a properly built roof.
- Q:100*100*2.5 square with 20 square meters of housing security light steel structure:
- The span of the main girder in the sunlight room is 20 square meters, but the different shapes lead to the different span of the main beam.
- Q:How do you use a steel square for marking stair baluster spacing?
- To use a steel square for marking stair baluster spacing, you would first measure the desired spacing between each baluster. Then, place the square on the stair tread and align one edge with the edge of the tread. Use the markings on the square to measure and mark the desired spacing on the tread. Repeat this process for each baluster, ensuring consistent spacing throughout.
- Q:How do you use a steel square to lay out a cone shape?
- In order to lay out a cone shape using a steel square, a few steps must be followed. To begin, the desired dimensions of the cone, including the height and base diameter, need to be determined. It is important to have these measurements readily available before commencing the layout process. Afterwards, a horizontal line should be drawn on a flat surface or workbench. This line will serve as the baseline for the cone. The midpoint of the line should be marked as it will act as the apex of the cone. The steel square should now be taken, and one side of it should be placed along the baseline. The apex of the square should be aligned with the midpoint of the line. This will result in the formation of a right angle. From the apex, the desired height of the cone should be measured along the vertical arm of the steel square, and a mark should be made. A line should then be drawn from this mark to the baseline. This line will represent the slant height of the cone. To determine the base diameter of the cone, the desired diameter should be measured along the horizontal arm of the steel square. Marks should be made at this distance on both sides of the baseline. Using a curved line, the marks on the baseline should be connected to the apex. This curved line will depict the outline of the cone. Lastly, it is essential to double-check all the measurements and lines for accuracy before proceeding with any cutting or construction. By adhering to these steps and utilizing a steel square, it is possible to successfully lay out a cone shape with precision and accuracy.
- Q:How do you use a steel square for marking and cutting half-blind dovetail joints?
- To achieve accurate markings and cuts for half-blind dovetail joints, the following steps should be followed when using a steel square: 1. Begin by selecting a steel square with a precise 90-degree angle. This tool will assist in ensuring accurate markings and cuts for the half-blind dovetail joints. 2. Start by marking the thickness of the dovetail joint on the end grain of the tail board and the face of the pin board. This can be accomplished by placing the steel square against the end grain of the tail board and drawing a line along the interior of the square. Repeat this process on the face of the pin board. 3. Next, the depth of the dovetail joint needs to be marked on both the tail and pin boards. Hold the steel square against the end grain of the tail board and align the blade of the square with the marked thickness line. Draw a line along the blade of the square to indicate the depth. Repeat this step on the pin board. 4. Once the thickness and depth lines are marked, position the steel square against the face of the tail board. Align the blade of the square with the marked thickness line on the pin board. This will establish a reference line for the shoulder of the dovetail joint. 5. Utilize a marking knife or pencil to trace along the blade of the steel square, marking the shoulder line on the face of the tail board. Repeat this step on the face of the pin board. 6. The angled sides of the dovetail joint can now be marked. Place the steel square against the face of the tail board, aligning the blade with the shoulder line. Draw a line along the blade to create the angle line for the dovetail. Repeat this process on the pin board. 7. With the lines marked, proceed to cut the half-blind dovetail joints using a dovetail saw or a similar cutting tool. Carefully follow the marked lines to ensure accurate and precise cuts. By utilizing a steel square for marking and cutting half-blind dovetail joints, well-fitted joints can be achieved, contributing to the strength and aesthetics of woodworking projects. Remember to measure accurately and make precise cuts for optimal results.
- Q:How do you use a steel square to lay out a circle?
- To use a steel square to lay out a circle, you would first determine the desired diameter of the circle. Then, locate the center point of the circle and anchor the steel square at this point. Next, extend the blade of the square to the desired radius, ensuring it remains perpendicular to the base. Finally, rotate the square around the center point while marking points along the circumference at regular intervals to complete the layout of the circle.
- Q:How do you use a steel square to determine angles for door casing?
- To use a steel square to determine angles for door casing, you can follow these steps: 1. Measure and mark the width and height of the door casing on the wall. 2. Place the steel square against the edge of the casing, aligning one leg of the square with the width mark and the other leg with the height mark. 3. Ensure the square is level and firmly held against the casing. 4. With a pencil, trace along the edge of the steel square to create a straight line on the casing. 5. Repeat the process on the opposite side of the casing to ensure accuracy. 6. Measure the angle formed by the two lines on the casing using a protractor or the angle guide on the steel square. 7. Use this angle measurement to cut the casing accurately, ensuring it fits perfectly around the door frame. By using a steel square, you can easily determine and transfer the correct angles onto the door casing for precise installation.
- Q:Can a steel square be used for fence-building projects?
- Yes, a steel square can be used for fence-building projects. A steel square, also known as a framing square or a carpenter's square, is a versatile tool that is commonly used in construction and woodworking projects. It can help ensure accurate and square cuts, angles, and measurements, which are essential for building a sturdy and well-aligned fence. Whether you are constructing a wooden fence or a metal fence, a steel square can be used to lay out the fence posts, mark the angles for cuts, and check for squareness during the installation process. It is a valuable tool for any fence builder and can greatly assist in achieving precise and professional results.
- Q:How do you use a steel square to check for plumbness?
- In order to check for plumbness using a steel square, the following steps should be followed: 1. Ensure that the steel square is clean and free from any debris or rust. If necessary, wipe it down. 2. Place the steel square firmly against the vertical surface that requires checking for plumbness. 3. Examine the corner of the steel square where the two arms meet. This corner should have a perfect right angle of 90 degrees. 4. Pay attention to the edge of the steel square that aligns with the vertical surface. If the surface is perfectly plumb, the edge of the square should align perfectly from top to bottom. 5. If the edge of the square does not align with the surface, it indicates that the surface is not plumb. Take note of how much it deviates from the square and make necessary adjustments. 6. To rectify the lack of plumbness, shims can be used or the surface can be adjusted until it properly aligns with the edge of the steel square. 7. Repeat the process at different points along the vertical surface to ensure consistency and accuracy. By utilizing a steel square to check for plumbness, it is possible to guarantee that vertical surfaces are straight and correctly aligned. This is particularly important for various construction and woodworking projects.
- Q:How do you use a steel square to determine the angle of a roundover cut?
- To use a steel square to determine the angle of a roundover cut, you can follow these steps: 1. Start by placing the steel square against the edge of the workpiece where you want to make the roundover cut. Ensure that the square is aligned perpendicular to the edge. 2. Next, locate the corner of the square that aligns with the edge of the workpiece. This will be the reference point for measuring the angle. 3. Take a protractor and place it on top of the steel square, ensuring that its center aligns with the reference corner. 4. Now, observe the angle measurement on the protractor where the edge of the workpiece intersects it. This will give you the angle of the roundover cut. 5. Once you have determined the angle, you can transfer it to your woodworking tool, such as a router or table saw, to set the appropriate cutting angle. Remember, it is crucial to double-check your measurements and alignment before making any cuts to ensure accuracy. Additionally, practice caution and follow proper safety procedures while working with power tools.
1. Manufacturer Overview |
|
|---|---|
| Location | |
| Year Established | |
| Annual Output Value | |
| Main Markets | |
| Company Certifications | |
2. Manufacturer Certificates |
|
|---|---|
| a) Certification Name | |
| Range | |
| Reference | |
| Validity Period | |
3. Manufacturer Capability |
|
|---|---|
| a)Trade Capacity | |
| Nearest Port | |
| Export Percentage | |
| No.of Employees in Trade Department | |
| Language Spoken: | |
| b)Factory Information | |
| Factory Size: | |
| No. of Production Lines | |
| Contract Manufacturing | |
| Product Price Range | |
Send your message to us
Carbon Steel Square Bar and Billet
- Ref Price:
-
- Loading Port:
- China Main Port
- Payment Terms:
- TT or LC
- Min Order Qty:
- 100 m.t.
- Supply Capability:
- 10000MT m.t./month
OKorder Service Pledge
OKorder Financial Service
Similar products


New products


Hot products


Related keywords

